The Bread Monk
  • Home
  • My Bread Blog
  • Breadhead Videos
  • Recipes
  • Fr. Dom's Books
  • Events/Programs
  • Shortcut Stollen
  • New Page

Biscuit Improv: Buttermilk Garden Drop Biscuits

3/20/2017

0 Comments

 
Picture
Many people don't realize that improvisational comedy like you see on "Whose Line Is It Anyway?" is not merely a cadre of witty people making things up as they go along. Improv actually has a number of rules or guidelines to keep the scene from stalling, going in circles. or just being dull. Most people have to study and practice a long time to learn how to apply the rules and, eventually, when to break them. Similarly, an experienced chef or baker often improvises to develop a new dish, based on what's in season at the market or what's in the pantry right now, and shows like Chopped give us ample evidence of how culinary know-how and creativity (and sometimes, pure dumb luck!) can combine to yield extraordinary results.

Whenever I present a bread demo and mention that I made a certain recipe up on the fly, someone always asked, "But how did you know that was going to work?" The answer, of course, is that you might not know for certain, but with enough knowledge and experience, you can increase your chances of success. I recently created a new biscuit recipe using a combination of experience, improv, and serendipity.

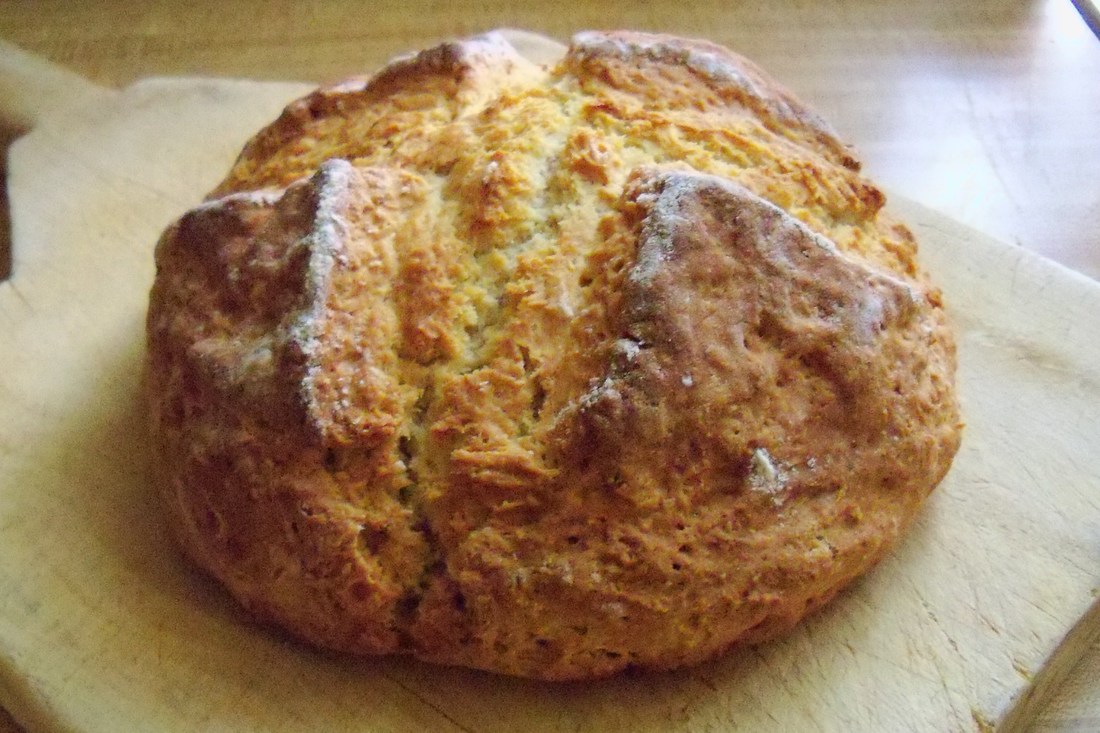
I wanted to bake something for supper for the feast of St. Joseph, and normally that would mean the traditional cream puffs, but we had received a donation of several trays of bite-sized desserts (left over from a shower) so we didn't need any more sweets in the house. I didn't have enough time for yeast rolls so I decided on drop biscuits, because I had buttermilk in the fridge from Irish Soda Bread.  I had noticed that the chives had already sprouted in the herb garden, so Cheddar Chive Biscuits seemed in order. Alas, there was no decent cheddar in the fridge, but I did spy some some limp celery and a handful of baby carrots. From all that, Buttermilk Garden Drop Biscuits were born.

I took a basic drop biscuit recipe from The Joy of Cooking (surprisingly, there was nothing comparable in Bernard Clayton's Book of Breads) but it used 2% milk, so I knew I would need to add some baking soda to get more loft. Baking powder and baking soda are not interchangeable, as the former is activated by heat and the latter by acidic ingredients. But baking soda is much ore powerful, so only a quarter teaspoon was needed.

I also increased the amount of flour by a quarter cup, for two reasons. First, the original recipe called for shortening, and all I had was butter, which has a higher moisture content. Secondly, minced celery and shredded carrots add a lot of water to the mixture as well. I didn't want my drop biscuits to spread out into savory pancakes, so I added that little extra bit of all-purpose flour.

I also knew that the veggie flavor in the biscuits would be more prominent with a little more salt, but why add just salt when you can also add flavor with a salty aged cheese? There was some excellent Romano left over from a recent pizza party which made its way into the mix. Drop biscuits mix up in about four minutes and bake in less than fifteen, so it wasn't long before these beauties were out on the counter. They were the perfect accompaniment to grilled chicken breasts---the-herb-and-veggie flavor is exquisite but fairly subtle and would overpowered by a more heavily seasoned dish. I had one with my Lenten soup today and it was a treat.

Picture
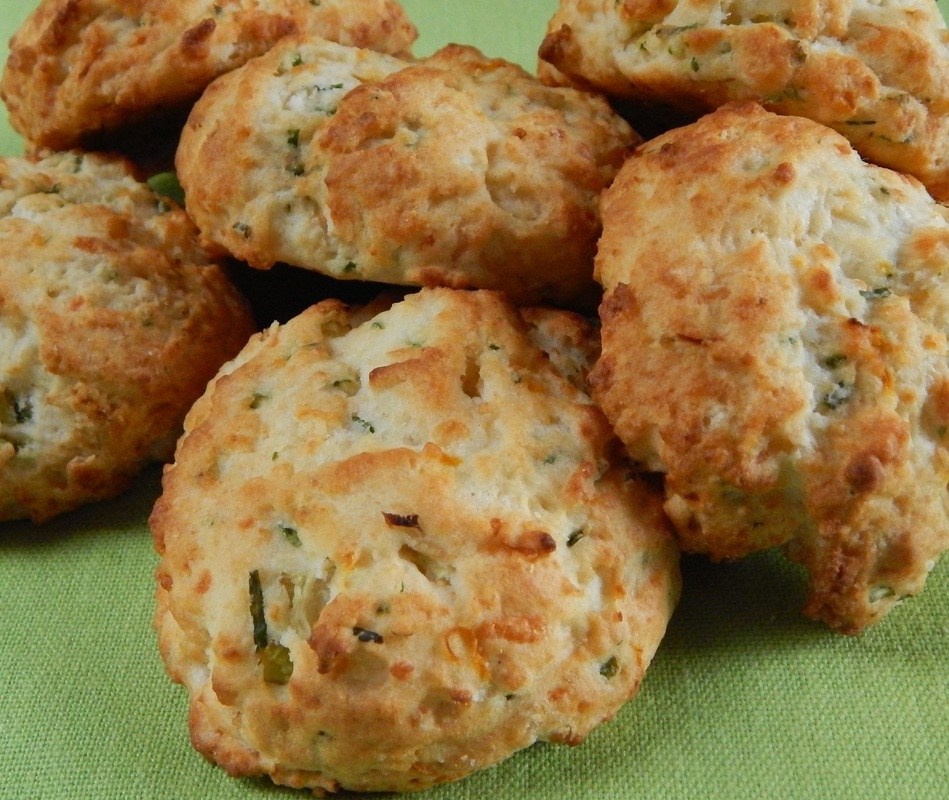
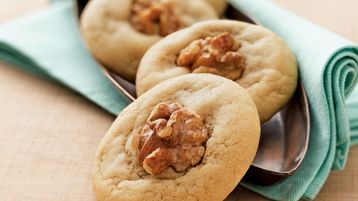
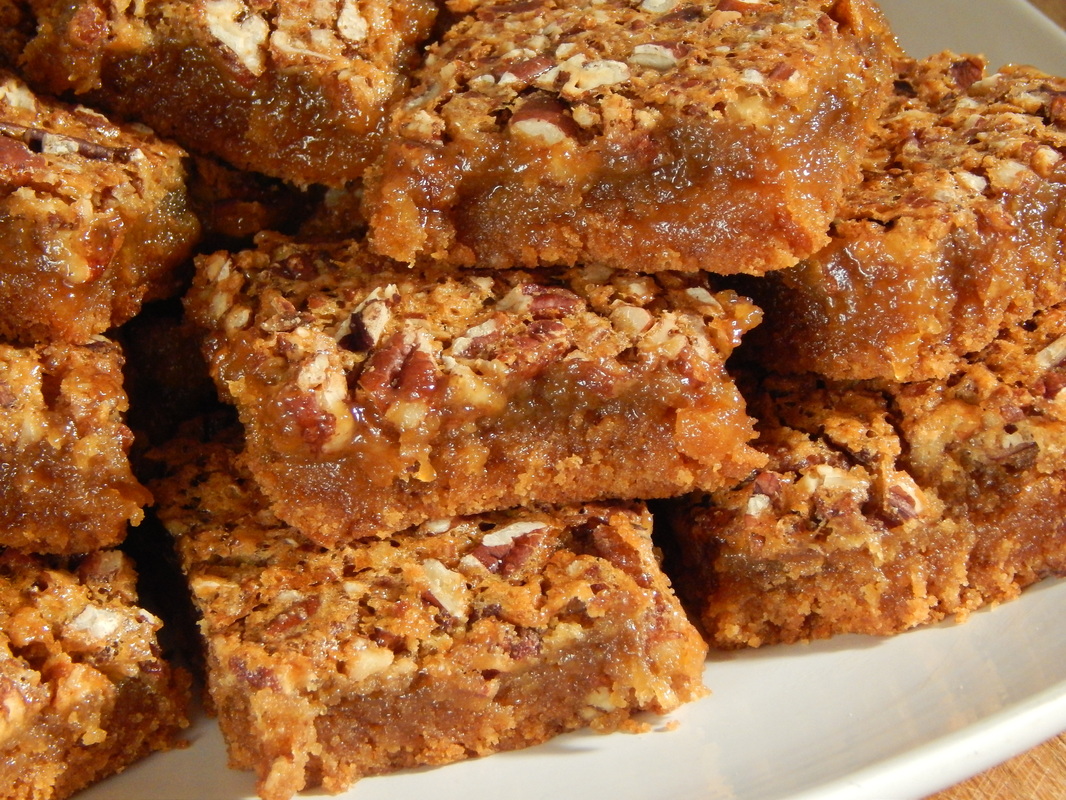
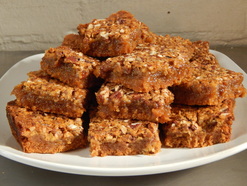
Buttermilk Garden Drop Biscuits---they smell heavenly as they emerge from the oven!
So now that you've got a basic recipe, try your own improvisation, based on what you find in the produce section, the fridge, or the backyard garden. I'd love to hear about your baking adventures.

​God bless and happy baking!

Buttermilk Garden Drop Biscuits

2 1/4  cups all purpose flour
1 tablespoon sugar
1 teaspoon salt
2 teaspoons baking powder
1/4 teaspoon baking soda
5 tablespoon butter 
1/4 cup minced fresh chives
1/4 cup finely shredded carrot
1/4 cup minced celery
1/4 cup shredded romano cheese
1 cup of buttermilk


Preheat oven to 425 degrees. Stir dry ingredients together in a medium size bowl.  Cut in butter using a pastry blender or two knives. Mix in chives, carrots, celery and cheese. Add milk and stir until just blended.  Drop by tablespoons onto a lightly greased baking sheet.  Bake at 425 degrees for 12 to 15 minutes, or until lightly browned.  Cool slightly and serve warm.  Makes 12 large biscuits.
0 Comments

Irish Soda Bread

3/14/2017

0 Comments

 
Picture
Here's my simple recipe for Irish Soda Bread, which is a staple for St. Patrick's Day in many places, including the houses of my mother and grandmother (and many others in the ancestral line before them!). When the Irish arrived by boat in New York, most of them were impoverished, so they has to buy the cheapest meats and vegetables, which at that time were corned beef and cabbage--hence the American-Irish traditional supper for The Saint's Day, which is hardly ever served in Ireland itself. I didn't recall eating it at home either. But Mama's soda bread was always on the table for this day. 

The fecipe could hardly be simpler, and the main concern is not to overmix the dough or it will result in a loaf for tough than tender. The flattened shape keeps this bread from being doughy in the center, and the cross cut in the top keeps it from cracking during baking.  I've heard people say that you cut the cross to let the devil out, but how would the devil get into your buttermilk anyway?

Picture
Irish Soda Bread
4 cups all-purpose flour
1 tsp. baking soda
1/2 tsp. salt
1 1/4 to 1 1/2 cups buttermilk

Position oven rack in the center of the oven and preheat oven to 400 degrees F.   Sift flour, baking soda and salt into a medium mixing bowl and stir to combine completely.  Make a well in the center and pour in most of the buttermilk.  Stir, adding the remaining buttermilk as needed to make a loose dough.  Turn dough out onto a lightly floured surface and knead lightly, just enough to make the dough hold together.  Place dough on a lightly greased baking sheet and form into a flattened round, about 1 to 1 1/2 inches thick.  Cut a cross in the center of the tops using a sharp knife dipped in flour.  Bake 45 to 50 minutes, or until loaf sounds hollow when tapped on both top and bottom.  Remove from pan and transfer to a wire rack.  Cover with a clean, dry towel and let cool slowly.


0 Comments

Estate Sale

3/11/2017

11 Comments

 
Picture
As regular readers of my blog know, I love to shop in thrift stores, second-hand shops and the like. This week at such a store, I found an embroidered hand towel to use on my next bread quilt, a square baking stone for a mere $5, and a copper-bottomed Revereware sauce pan for making caramel. And one other surprise I had not encountered before . . .

One of my cookbooks. For a dollar.

This is, I must confess, a day I have be anticipating with some unease, even though I know that my discomfort is irrational and at least partly based on a lack of monastic humility. After all, do I really have any reason to take this personally? Who knows why this particular book ended up at the thrift store? It might have been part of someone’s downsizing before moving to a retirement community, or perhaps the owner lost mobility because of age or injury and could no longer enjoy baking.

Or maybe, this book was part of an estate sale, not unlike the sale that is going on at my childhood home, even as I type this. Perhaps the previous owner had no children who were interested in baking or (dare I hope?) they already had their own copies. Perhaps they were overwhelmed by the sheer volume of cookbooks in their mother’s (or father’s!) collection.

I can sympathize. I have eight xerox boxes filled with bread cookbooks from my mother’s bookcase---there were as many cookie  recipe books to sort through as well, most of which ended up in the sale. I took all the bread books home so I could sort through them to determine which ones I might want, which might be used as bread demo door prizes, and which could be donated or even discarded.

I found it moving that many of the books I found were already in my collection because my mom gave them to me for Christmas, my birthday, or “just because.” A few of my mom’s copies were claimed by my siblings, sometimes after I convinced them of the worthiness of a particular volume. Little by little I’m working my way through the remainder. If you attend any of my upcoming bread demos, most likely you’ll get a free raffle ticket for a chance to win one of these treasures.

On one shelf on Mom’s bookcase was filled with all of my cookbooks---she usually got the first copy out of the box from the printer. Naturally, I have all the same books on my shelf in the pantry of our abbey kitchen. I’ve decided to replace all of my copies with hers, and give my own away. They are all inscribed to her, of course, with a personal message. I’m happy to have them as mementos of her and how I loved her--still love her.

I’ve been thinking a lot about the estate sale. It’s heart-wrenching in many ways, and in other ways a great relief. An abundance of gratitude is due to my siblings, who have worked far harder than I have in getting the house cleared out and ready for the onslaught of bargain hunters. We are of course hoping for a good monetary result from the sale, so that we can have the funds for some necessary repair and upkeep for the house before it goes on the market, which is a source of some anxiety.

But I’ve also been experiencing some anxiety for a different reason: the feeling that the people who run the sale and the ones who come to shop will not value Mom’s things for what they are truly worth, or as much as we do. What if a rare cookie cutter goes out for a fraction of its value? Will people realize what that batik fabric costs per yard? Will they know if a dresser is pine or cherry? Like my discomfort at finding my first published cookbook priced for a dollar, my fear is that somehow my mother's memory will not be honored by people picking over her things and haggling over their worth.
 
In one way, these are all legitimate concerns. We want to receive appropriate value for the estate whenever possible. But I've come to realize that the sale, ultimately, has nothing to do with my mother's legacy. My siblings and I had taken away everything we genuinely wanted, or at least as much as we had room to store. My sister Angela took Grandma Stellie's rocker; my older brother Marty got the grandfather clock and a rug Mama braided out of rummage sale wool coats; I have her bread books, plus a trunk made by my Irish ancestors who took it over the Great Plains on a covered wagon; Eileen wanted the dining room table and the Cookie Lamp (the subject of a future blog, I promise!): Vinny saved another braided rug, plus a doll Mom made for him from a towel that came in a box of laundry detergent. We all got cookie cutters from her collection and favorite Christmas ornaments and baskets she had made, and all the letters and cards she saved. We have no reasons to regret what we left behind.

So how am I to understand the value of what remained? After much reflection I realized the real value of those Longaberger baskets and Belleek China and Waterford crystal, all the vintage cookie cutters, the boxes and boxes of quilting fabric. It is this: they made my mother happy. She loved having the ideal basket to carry homemade cookies to a potluck, was delighted when someone needed a particular color or print of fabric and she could find it in the sewing room closet, took pride in getting out the good china teapot to entertain her quilting friends. All that "stuff" had already shown its genuine value long before the sale, because it gave her pleasure and afforded her opportunities to make other people happy as well. My mother did not value them as "things" so much in themselves as in their usefulness in showing  how much she loved her family and friends. 


And those memories of how much she loved us, and of the multitude of ways in which she showed it, will endure long after the last box of odds and ends goes home in somebody's trunk.

11 Comments

English Muffin Bread

2/20/2017

9 Comments

 
Picture
There are few things I like better than toasted bread, whether it's honey oatmeal, whole wheat, basic white, or a bagel. I prefer my toast darker than most, always buttered, and usually adorned with cinnamon sugar or preserves. So it seemed a good idea to develop a recipe for English Muffin Bread when I was working on the episodes for season two of Breaking Bread with Father Dominic. Seeing---and purchasing---a set of round stoneware crocks at a friend's kitchen shop sealed the deal.

There are a lot of versions of this recipe out there, as English muffin bread seems to be quite popular in many bed and breakfast inns.  Bread machine and microwave versions abound, but a lot of the recipes I’ve seen in cookbooks or on the Internet seem almost indistinguishable from ordinary white bread, and some have way too much salt.   I think you’ll enjoy this version, which is fast and easy, and develops the lovely large holes which catch melted butter and jam so well.

One version of the recipe to avoid in particular: the one published by Fleischmann's Yeast as a magazine ad back in 2000.  It contained a typo which caused the dough to be too liquid and to overflow the pans! We got a lot of mail about that, believe me, and since I proofed the copy, I was as much at fault as anyone. I recently received Facebook message from someone who used that recipe, which she had cut out long ago and never used until now, so I was embarrassed all over again! So I promised her to publish a corrected version. 

The recipe below is the correct one, and since few people have four round stoneware crocks lying around, I tested the recipe in a 9" x 5" x 3" loaf pan and got excellent results, so I have adapted the recipe accordingly. As you can see, it produces a slice with lovely, large holes to capture butter and jam. Since it uses fast-rising yeast, you can have the recipe done in about 90 minutes, but in my experience it's best to let the loaf cool completely---at least 3 hours---before cutting a slice.  


Picture
English Muffin Bread
1 pkg. fast-rising yeast 
3 cups all-purpose flour  
2 Tbs. brown sugar 
1 tsp. salt 
¼ tsp. baking soda
1 cup milk  
¾  cup water 
cornmeal 

In a medium size bowl, combine yeast, flour, sugar, salt, and soda.
Combine milk and water and heat to 120 to 130 degrees F.   Pour into dry mixture and beat well for about 5 minutes by hand, 2 or 3 by mixer on medium speed---it will make a slightly stiff batter.
Allow batter to rest for 10 minutes.  Coat the inside of a large loaf pan (9" x 5" x 3") with cooking spray and sprinkle with cornmeal. Spoon batter into the prepared pan and sprinkle cornmeal lightly over the top of the batter.  Cover with a light towel and let rise in warm place for 20 to 30 minutes, or until batter nearly reaches the top of the pan.

Bake at 400 degrees for 35 to 40 minutes---if  the top of the loaf begins to brown too quickly, cover them lightly with aluminum foil. Remove from pan and cool on a wire rack completely before serving. 


9 Comments

A mouse, a can, a coffeecake and a quilt

2/8/2017

5 Comments

 
Picture
We have a mouse backstage that keeps chewing on props, and I'm determined to be rid of the little rodent soon. So I'm building a DIY catch and release mousetrap with a coat hanger, a five gallon bucket, and a can. Every canned food in our kitchen comes in the #10 community-feeding size, but I had a can of strawberry rhubarb pie filling, So I made a lovely coffeecake with the filling, using the multigrain baking mix from a previous post. I washed the can and set it on the sink counter to dry.

And someone threw it away.

People can leave half-full coffee mugs, empty but messy pie plates, and open potato chip bags lying around, nobody touches them for HOURS ON END. My carefully washed can disappeared in minutes. No-one has come forward to claim responsibility or demand a ransom, so I've ruled out terrorists and kidnappers. But the coffeecake is lovely:

Picture
The antique plate it's served on is from a set of a dozen bread plates my dear friend Marge gave me. She passed away on Christmas Eve, so I'm pleased to get it out and think of her fondly. I have happy memories of tea and home-baked treats served on vintage china at her dining room table. The cloth in the photo is my latest bread quilt. I was laying out squares in different combinations when I saw that I had a lot of them with pinks and pastels, so I decided to use that as a theme. I'm going to be giving it away as a door prize at my demonstration for the Master Gardeners' Day in Decatur on February 25.
Picture
I have 10 events between now and the end of April. I'll be posting more details very soon, In the meantime, God bless and happy baking!
5 Comments

Memories of Mama: bread quilt

1/17/2017

7 Comments

 
Picture
You may remember a previous post about bread quilts made with vintage dresser scarves and other embroidered linens.  This one I made in honor of my mom. I had started it several months ago with the intention of giving it to her for Christmas. The two blue birds in the center two rows came from a dresser scarf my Grandma Tootsie made. My mother loved violets and roses (wish I could have found an embroidered lily of the valley) and an abiding love for baskets, which she both made and collected.  

The square on the far right with tulips has special meaning for me: in the days of my mother's last illness, I had felt the need to do something hopeful, so I went out to plant some bulbs for the spring. I had just come in from adding a small bed of tulips to accent the kitchen garden when I received word that my mother had died.

We continue to go through the house, finding treasures and mysteries and memories in every drawer, every odd box in the back of a closet. Our mourning continues, each of us coping in our own ways. When I get to missing my mom, I mix up a batch of dough, cover it lovingly with her bread quilt, and look out the window to the kitchen garden, waiting hopefully for the joy of spring.

7 Comments

Which salt to use for baking?

12/31/2016

1 Comment

 
This blog is taken from my forthcoming book Baking Secrets from the Bread Monk.

E
veryone knows that salt is an important or even essential seasoning for many foods, and most bread recipes call for it (the notable exception being Tuscan Saltless Bread). Salt accentuates the flavors of baked goods, and in yeast breads it strengthens the gluten matrix and helps yield a lighter crumb. But what kind of salt to use: table, kosher, or sea salt? They have virtually the same chemical composition, but each has a unique density and texture.   

Table salt comes from mining salt deposits and has fine, evenly shaped crystals. It has greater density than other salts, and often has additives like calcium silicate (an anti-clumping agent) and iodine (a nutrient which helps prevent goiters). As its name suggests, it’s most often used as a last minute seasoning at the table. When a recipe calls simply for “salt”, table salt is what is usually meant. All of my recipes, both on this site and in my cookboks, call for table salt.

Kosher salt became more common in the United States after the wave of Eastern European immigrants in the early 1900’s, who used this coarse salt to remove blood from the meat they served at home, thereby making it kosher. In the late 1960’s it began to be popular with chefs as a cooking ingredient because its coarse grains were slow to dissolve and added a light crunch. It’s an excellent salt for seasoning meats before cooking. It also comes in a finer grain which many bakers prefer over table salt.

Sea salt is produced by evaporating sea water, and since each body of water has a unique blend of trace elements, each sea salt has a unique flavor, although the differences are often subtle. It tends to be more expensive and is best used as a finishing seasoning for a dish.   
 
So which is best for baking? Very few chefs recommend sea salt for baking, and at least one commentator says that kosher salt owes some of its current popularity to food television: kosher salt’s coarse grains show up better on camera. In a sweet muffin or a baguette, you might not be able to discern much of a difference between table salt, kosher salt or sea salt. Just one cautionary note: if a recipe uses kosher salt and table salt is all you have on hand, remember that table salt is denser and a smaller amount should be used. For example, if 1¼ teaspoons of coarse kosher salt are called for, only 1 teaspoon of table salt would be needed.
1 Comment

Memories of Mama: Mint Surprise Cookies

12/20/2016

8 Comments

 
PictureStarlight Mint Surprise cookies, from the Pillsbury Website
At the very first Pillsbury Bake-Off in 1949, Laura Rott of Naperville Illinois won the cookie division with her recipe for "Starlight Mint Surprises," a fairly simple margarine-based cookie with a chocolate mint wafer in the center and a walnut half on top. They proved wildly popular and were a traditional cookie in American homes for decades. The recipe from the Pillsbury website is posted at the bottom of this page, but be sure to read the rest of the blog for some helpful hints.

Picture
In 1963 a version of the recipe appeared in Betty Crocker's classic "Cooky Book", and that is the one that became a perennial Christmas favorite in "The Crumpled House" (our nickname for the house on McClure Avenue in Peoria where we grew up). We made sugar cookies all year long and scores of cowboy cookies, and there was a spritz cookie shape for every holiday, but Starlight Mint Surprises were a special treat reserved for Christmas. My mother always preferred pecans to the walnuts in the original recipe, but in the end it was all about the mint chocolate center anyway.  

Alas, like so many treasures of childhood, it was not to last. They stopped making Starlight Mints, at least the chocolate wafer variety. Enter "Starlight Mints" in any search engine and you'll see pictures of the classic red and white swirl hard candy, which is NOT an acceptable substitute. I assure you. The Pillsbury website recommends the use of "thin rectangular crème de menthe chocolate candies (from three 4.67-oz packages), unwrapped"---in other words, Andes Candies.  I'm sure they are delicious, but I have never had to try this variation, thanks to my clever sister Angela. 
Picture
Anj had the idea that you could make your own "starlight mints" using peppermint oil (NOT extract) and dark chocolate candy melts---Wilton makes both of these products and you can find them in the cake decorating aisle. Place two or three drops of peppermint oil in a re-closable plastic bag and add the candy melts. Seal and shake for a minute or two. Leave overnight, and the next morning you'll have your mint chocolate wafers, just like Mama used to use.   

Once I get my finals graded, I'll be in the kitchen making these memorable treats. I've seen photos of cookie baking all over social media in the past week: people making springerle or peanut blossoms or cout out sugar cookies with lots of frosting and sprinkles. The kitchen is a mess and the table is crowded, but everyone is smiling---an apt description of my childhood. Don't let your family miss out on the sight.  
STARLIGHT MINT SURPRISES
Ingredients

1 cup granulated sugar 
1/2 cup packed brown sugar 
3/4 cup margarine, softened 
2 tablespoons water 
1 teaspoon vanilla
2 eggs
3 cups all-purpose flour
1 teaspoon baking soda
1/2 teaspoon salt
60 thin rectangular crème de menthe chocolate candies (from three 4.67-oz packages), unwrapped (OR use variation described above)
60 walnut halves or pieces
Steps
1
In large bowl, beat sugars, butter, water, vanilla and eggs with electric mixer on medium speed, scraping bowl occasionally, until blended. On low speed, beat in flour, baking soda and salt until well blended. Cover with plastic wrap; refrigerate at least 2 hours for easier handling.
2
Heat oven to 375°F. Using about 1 tablespoon dough, press dough around each chocolate candy to cover completely. Place 2 inches apart on ungreased cookie sheets. Top each with walnut half.
3
Bake 7 to 9 minutes or until light golden brown. Immediately remove from cookie sheets to cooling rack.
8 Comments

Garlic Toast Stars

12/12/2016

1 Comment

 
Picture
Go to the kitchen aisle of any second hand shop and chances are you'll find at least one canape bread mold, perhaps several. Pampered Chef used to sell them, and I'm told that people often bought them because they were a relatively inexpensive item, rather than because they intended to make fancy canapes. They no longer carry them, but Norpro still makes them and they are available on Amazon. But check the Goodwill and Salvation Army stores first, believe me. I own about a dozen of these and have never paid more than $2. In addition to these shapes, Norpro also sells one shaped like a five-pointed star, available separately.

     I hosted a holiday gourmet pizza party last night and wanted to serve a soup course. I made a spicy minestone with homemade sausage, and decided to use the star bread mold to make toasted garlic stars. I used the same dough as for the pizza crusts, and made two loaves with the five-pointed star and two with the six-pointed. It's really simple: spray the inside of the mold and the lids with pan spray, drop in a portion of dough (enough to fill the mold about one-third) put the lid on and stand it upright to rise. I prefer to keep upright in the oven as well, but you can bake them on their sides,too. At 375 degrees F., the loaves are done in 12 to 15 minutes, and slide right out of the tubes. If you stand the loaves upright to cool, they don't get any weird hash marks from the wire rack.
Picture
     For the garlic stars, I sliced the bread and spread the slices with butter mixed with garlic powder and a little Parmesan. Back on the pan and into the oven for 1o more minutes, (set the timer or you'll forget about them as I almost did!). The result is festive toasted garlic stars to adorn your Christmas buffet (you can use the six pointed star mold for celebrating Hannukah). You can easily bake the bread a day or two ahead of time, and the shaped loaves can easily fit in a packed holiday freezer if you make them even further ahead of time.

Picture
     And time is the issue during the holidays, isn't it? Even monks can feel the pinch, especially since we don't do any decorating until December 23 or so. Do don't hit yourself with the guilt hammer if you don't have star-shaped garlic toast for the family buffet. Save the heart-shaped mold for Valentine's Day, or the flower-shaped one for Mother's Day. Store the idea for a rainy day when the kids are bored, and keep your eyes open at garage sales for the bread molds. 

God bless and happy baking!

P.S. Be sure to go to my home page and get the link for a 50% off coupon for my Craftsy online baking class "Bake Your Best: Sweet Yeast Breads, Challah and More." No matter which holiday you celebrate this time of year, you'll learn a recipe and techniques to make a special holiday btteat for your family.

1 Comment

Memories of Mama: Pecan Pie Bars

11/26/2016

1 Comment

 
Picture

A
lthough my mother made just about everything else from scratch, she was not above using cake mixes. Among the cookbooks in her collection, I found one titled: Cake Mix Cookies by Camilla V. Saulsbury. I might not have noticed it among the hundreds of titles had it not been for a small Post-It note bookmarking a particular page, where I found a recipe for Pecan Pie Bars.

A moment of silent reverence, please.

Mom made these for some occasion---birthday, potluck, Christmas---or maybe just because she liked the look of the recipe and she loved pecans. But I must have come home for a visit at just the right time, because I remember eating one at my customary spot at the dining room table with a cup of Irish Afternoon tea and relishing every crumb. If you like pecan pie but don't like messing with a pie crust, this is the recipe for you. The crust is made with cake mix, butter and an egg---simple!---and the filling mixes up in a jiffy. 

I made a batch, along with some Cowboy Cookies, to take with me to Peoria Notre Dame High School's Production of The Man Who Came to Dinner. I was doing a review/talk back with the cast after the show and decided I should bring post-show treats. The show's director was Kathy Svoboda, a dear friend with whom I have a long standing joke about caramel pecan rolls. But I didn't have enough time to make a yeasted dough, so these pecan pie bars were the perfect recipe for the situation. The students were surprised and delighted when I brought out the treats and both the cookies and the pecan pie bars were devoured in short order. I might add that their show was selected for performance at the Illinois Hig School Theatre Festival in January.

Picture
It was satisfying to see my efforts so greatly appreciated, but something else occurred to me on the drive home. I had honored my mother's memory by baking two of her favorite recipes, but even more so by sharing them unexpectedly, by bringing treats when I didn't have to, by doing what she so often did: making other people happy by a random act of kindness in the form of a plastic container full of home-baked goodies. I hope the students were paying attention, and will come to do the same. 

I'm sharing the recipe for these bars (slightly adapted) in the hopes that it will entice you to buy the book---it's a keeper!
Picture


Pecan Pie Bars
adapted from Cake Mix Cookies
by Camilla V. Saulsbury


1  (18.25-ounce) package yellow cake mix
5 Tbs. butter, softened
4 large eggs
½ cup firmly packed brown sugar
1½  cups dark corn syrup
1½  teaspoons vanilla extract
1¼ cups chopped pecans, divided

     Preheat oven to 350° F. (or 325° for dark-coated metal pans). Position oven rack in middle of oven. Spray a 9 x 13-inch metal baking pan with non-stick cooking spray (you can also line the pan with foil or parchment). 
     Set aside ⅔ cup of the dry cake mix. Combine the remaining cake mix, butter and 1 of the eggs with an electric mixture at medium speed until blended and crumbly. Press mixture in the bottom of the prepared pan and bake 15 minutes. 
     Meanwhile, in a large bowl combine reserved ⅔ cup cake mix, brown sugar, corn syrup, vanilla extract, and remaining three eggs and mix until well blended. Stir in ¾ cup of chopped pecans. Pour mixture over hot crust. Sprinkle on remaining pecans. 
     Bake an additional 30-35 minutes or until filling is set. Transfer to a wire rack and cool completely. Cut into bars.


1 Comment
<<Previous
Forward>>

    Author

    Fr. Dominic Garramone AKA 
    the Bread Monk

    Categories

    All
    Breadhead Bookshelf
    Breakfast Breads
    Buns Rolls And Biscuits
    Craftsy
    Donuts
    Equipment
    Ethnic Breads
    Events
    Gluten Free
    Herbal Breads
    Holidays
    Lake Thunderbird
    Memories Of Mama
    Multigrain Breads
    Pastries
    Pizza
    Places To Visit
    Quick Breads
    Reflections While The Bread Is Rising
    Savory Breads
    Sourdough
    Spirituality
    Stuff Besides Bread
    Sweet Breads
    The Classics
    Tools Of The Trade

    RSS Feed

    Archives

    June 2024
    December 2023
    September 2022
    April 2022
    March 2022
    February 2022
    January 2022
    October 2021
    May 2021
    April 2021
    March 2021
    February 2021
    August 2020
    July 2020
    May 2020
    February 2020
    October 2019
    June 2019
    September 2018
    July 2018
    May 2018
    April 2018
    March 2018
    February 2018
    January 2018
    December 2017
    November 2017
    August 2017
    July 2017
    June 2017
    May 2017
    April 2017
    March 2017
    February 2017
    January 2017
    December 2016
    November 2016
    October 2016
    September 2016
    August 2016
    June 2016
    May 2016
    April 2016
    February 2016
    December 2015
    November 2015
    October 2015
    September 2015
    August 2015
    July 2015
    June 2015
    May 2015
    April 2015
    March 2015
    December 2014
    November 2014
    October 2014
    September 2014
    August 2014
    July 2014
    June 2014
    May 2014
    April 2014
    March 2014
    February 2014
    January 2014
    December 2013
    November 2013
    October 2013
    September 2013
    August 2013
    July 2013
    June 2013
    May 2013
    April 2013
    February 2013
    January 2013
    December 2012
    November 2012
    October 2012
    September 2012
    August 2012
    July 2012
    June 2012
    May 2012
    April 2012
    March 2012
    February 2012
    January 2012
    December 2011
    November 2011
    October 2011
    September 2011

Web Hosting by FatCow