With Breadheads and newbie bakers alike finding it hard to locate yeast during the quarantine, I thought I would offer instruction on how to create a "no yeast" multigrain baking mix which can be used for quick breads like muffins, biscuits, waffles and the like. Here is the short video I made with instructions. The recipe follows.
Multigrain Baking Mix and how to use it
If you already use baking mixes, you might be surprised to see that this version requires refrigeration, but you might be equally surprised to discover that the package on the commercial versions also recommends that you refrigerate their product after opening. But most baking mixes use shortening and have a number of preservatives and therefore are more “shelf-stable” as they say in the food biz. My version has no preservatives and uses butter (far fewer trans fats), which with the addition of whole grains makes it a healthier alternative. (If you’re going low-fat, use only one stick of butter.) You can use it one-to-one in any recipe that calls for baking mix.
Multigrain Baking Mix
Ingredients:
3 cups all-purpose flour
1½ cups whole wheat flour
¾ cup quick cooking oatmeal
½ cup yellow cornmeal
¼ cup milled flaxseed
2 tablespoons baking powder
1 tablespoon salt
1 cup (2 sticks) cold unsalted butter, cut into slices
Place dry ingredients into food processor and process until thoroughly mixed. Add butter and pulse until well blended. Store in an airtight container in the refrigerator up to 6 weeks (depending upon how fresh your butter is). If you use salted butter, reduce the salt in the recipe by ½ teaspoon.
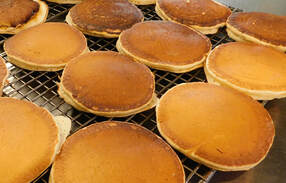
Pancakes
2 cups baking mix
1 cup milk
2 eggs
N.B.: This is the classic recipe, but I think these are better with 1¼ cup of milk and only one egg. I can't imagine you need anything more than the ingredients!
2 cups baking mix
1 cup milk
2 eggs
N.B.: This is the classic recipe, but I think these are better with 1¼ cup of milk and only one egg. I can't imagine you need anything more than the ingredients!
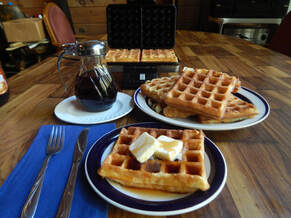
Waffles
2 cups baking mix
1 1/3 cups milk
2 eggs
Separate the eggs, then beat the milk and yolks Add milk mixture to baking mix and stir until just combined. Whisk egg whites until stiff peaks appear and fold gently into batter. Use in waffle iron according to manufacturer's instructions.
NOTE:
If you like a waffle with a crisp exterior, leave the waffle iron closed until the steaming stops.
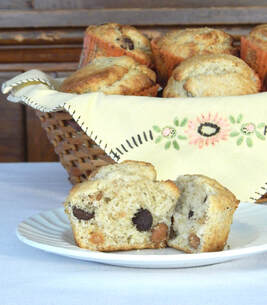
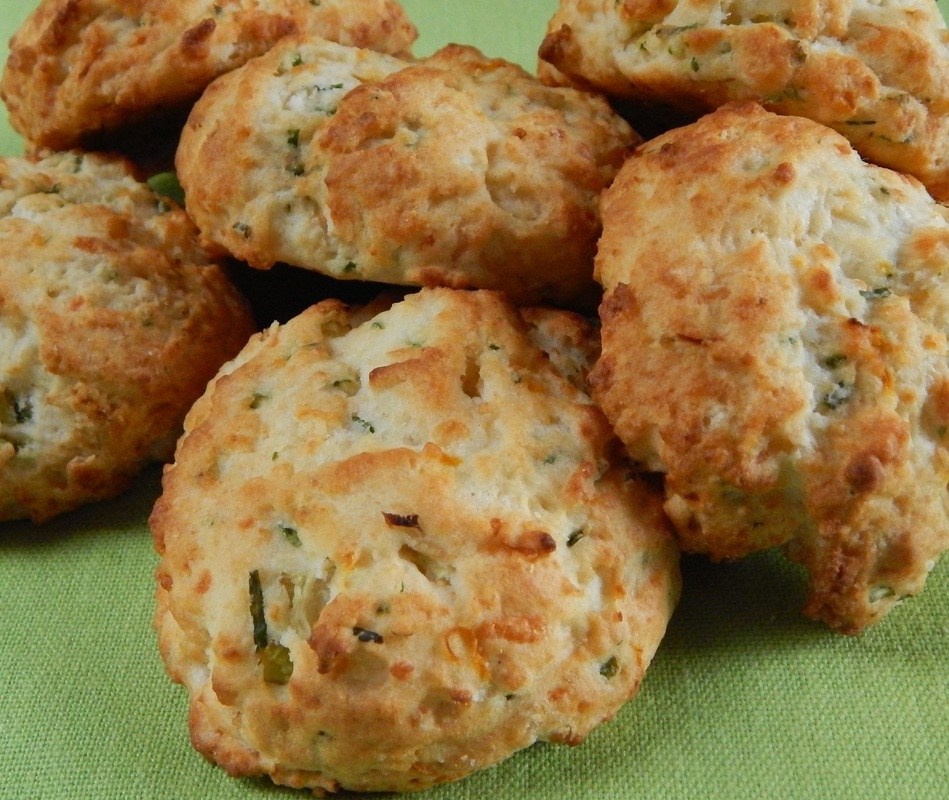
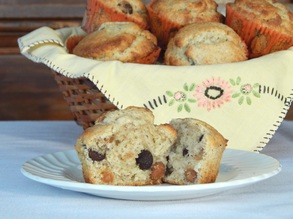
(OK, the picture here isn't blueberry muffins--those are chocolate and butterscotch chips---but you get the idea!)
Blueberry Muffins
2 cups baking mix
1⁄3 cup sugar
2⁄3 cup milk
2 tablespoons vegetable oil
1 egg
3⁄4 cup frozen blueberries
Heat oven to 400 degrees and coat muffin pan with cooking spray. Combine sugar, milk, oil and egg in a small bowl and beat well. Place baking mix in a medium bowl and add liquid, stir until just moistened. Gently fold in the blueberries. Divide batter evenly in 9 muffin cups.
Bake 13 to 18 minutes or until golden brown.
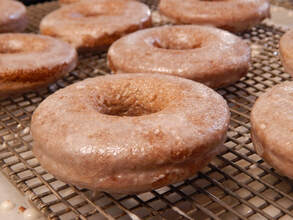
Baked Cinnamon Donuts with Chai Glaze
Donuts
1¾ cup of baking mix
1/3 cup granulated sugar
½ tsp. ground cinnamon
¾ cup 2% milk
1 egg
¼ cup vegetable oil
Preheat oven to 375° F. and lightly grease a donut pan. In a medium-size bowl, combine flour, sugar, salt, and cinnamon and whisk thoroughly to combine. In a separate bowl, whisk together milk, egg and oil. Pour milk mixture into dry ingredients and stir until smooth. Divide batter into pan. Bake in preheated oven for 15 to 20 minutes or until slightly firm to the touch and an inserted toothpick comes out clean. Cool in pans for five minutes before removing from pan to a wire rack; frost while warm.
Chai Frosting
Make one cup of sweetened chai tea. In a small sauce pan, bring to a boil, then reduce heat to a low simmer. Reduce to about ¼ cup of thick syrup. Immediately add 1 cup of powder sugar and a pinch of salt, and whisk until smooth. While mixture is still warm, use to lightly glaze donuts.
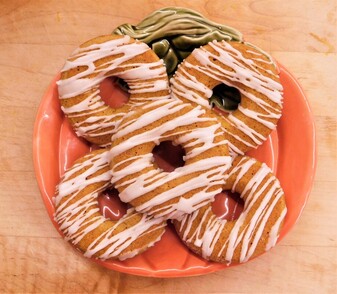
Pumpkin Spice Donuts
2 cups baking mix
2 teaspoons pumpkin pie spice
1 cup pumpkin puree (not pie filling)
2 eggs
3/4 cup liquid pumpkin spice creamer (or 1/2 cup milk)
¾ cup packed brown sugar
¼ cup canola oil
Preheat oven to 350 degrees F. Prepare two donut pans (12 donuts total, or 24 mini donuts) with cooking spray and set aside. In a medium size bowl, whisk together baking mix and pumpkin pie spice. In a separate bowl, combine pumpkin, eggs, creamer/milk, sugar and oil. Add the flour mixture to pumpkin mixture and stir until nearly smooth—do not overbeat. Allow to sit for 5 or ten minutes while the whole grains absorb the liquid, which takes longer than with all-purpose flour.
Transfer the batter to a large ziploc bag and expel excess air before sealing. Snip one corner of the bag and pipe batter into donut pans---each section will be slightly more than half full. Bake for 12-15 minutes or until donuts are lightly browned and spring back when touched. Allow donuts to rest about five minutes in pan before removing to cool on a wire rack.
Glaze or frost as desired, or toss in cinnamon sugar.
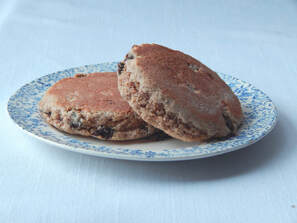
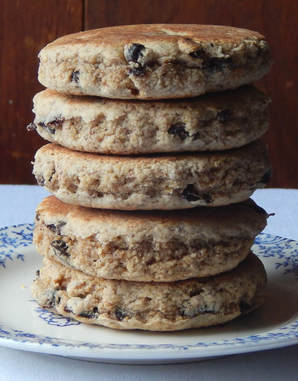
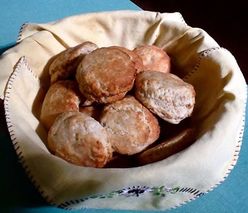
Welsh Cakes
2 cups baking mix
1/3 cup granulated sugar
½ teaspoon cinnamon
¼ teaspoon freshly-ground nutmeg
½ cup currants or raisins
1 large egg
1/4 cup cold milk
Butter for the pan
Combine baking mix, sugar and spices in a medium-size bowl and whisk to blend. Stir in the currants. In a separate small bowl, beat the egg with the milk; stir into mixture to make a soft dough. Turn the dough out onto a lightly floured board and knead briefly, 8 to 10 strokes. Lightly flour the board, then roll the dough to a 1/4-inch thickness. Cut into rounds with a fluted cookie cutter (2½” or 3”size). Heat a cast iron skillet over medium-low heat (or use an electric skillet set to 350° F). Brush the surface of the pan lightly with butter and cook the cakes for about 3 minutes per side, or until they are golden brown. (I usually test one first to make sure I have the temperature correct--they should come out soft in the middle but not at all doughy). Remove to a wire rack and sprinkle with granulated sugar. Serve warm.
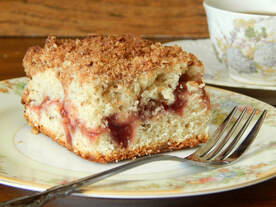
The photo shows the version with a strawberry cake filling, but any way you make this coffeecake it's delish!
Quick Cinnamon Coffee Cake
Streusel
2/3 cup baking mix
2/3 cup packed brown sugar
1 teaspoon ground cinnamon
3 tablespoons cold butter
Coffee Cake
2 cups baking mix
1/8 teaspoon baking soda
2 tablespoons granulated sugar
¾ cup sour cream
1 ½ teaspoons vanilla
1 egg
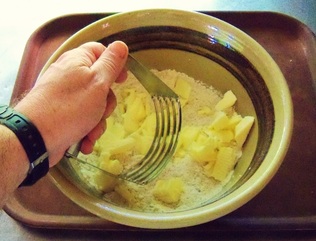
Heat oven to 375°F. Spray bottom and sides of 9-inch round cake pan with cooking spray and dust with flour. Combine 2/3 cup baking mix, brown sugar and cinnamon in a small bowl. Cut in butter using pastry blender, until the mixture resembles coarse crumbs; set aside.
In medium bowl, combined baking mix, baking soda, and sugar and whisk until blended. In a separate bowl, beat sour cream, vanilla and egg until smooth. Stir into dry ingredients until combined. Spread about 1 cup of the batter in pan. Sprinkle with about 3/4 cup of the streusel. Drop remaining batter evenly over top of streusel and sprinkle remaining streusel over top.
Bake 20 to 24 minutes or until golden brown. Let stand 10 minutes before removing from pan and allow to cool slightly before serving.
Variations
Add another tablespoon of butter to the streusel. Peel and core two medium baking apples and slice them thinly. After you put half of the batter in the pan, arrange apple slices on top and sprinkle with half the streusel. Add the second layer of batter and the remaining streusel. Bake as directed—may need up to 25 minutes in the oven. You can do the same with fresh or even canned peaches, but cut them into small pieces.
Make only half of the streusel. After you put half the batter in the pan, add a layer of cake and pastry filling or pie filling. If you use cherry filling, use almond extract instead of vanilla, and add some slivered almonds to the top streusel.
Omit the cinnamon from the streusel recipe, and use 1½ to 2 cups of fresh strawberries as the filling. You can use half brown and half white sugar for the streusel.
Quick Cinnamon Coffee Cake
Streusel
2/3 cup baking mix
2/3 cup packed brown sugar
1 teaspoon ground cinnamon
3 tablespoons cold butter
Coffee Cake
2 cups baking mix
1/8 teaspoon baking soda
2 tablespoons granulated sugar
¾ cup sour cream
1 ½ teaspoons vanilla
1 egg
Heat oven to 375°F. Spray bottom and sides of 9-inch round cake pan with cooking spray and dust with flour. Combine 2/3 cup baking mix, brown sugar and cinnamon in a small bowl. Cut in butter using pastry blender, until the mixture resembles coarse crumbs; set aside.
In medium bowl, combined baking mix, baking soda, and sugar and whisk until blended. In a separate bowl, beat sour cream, vanilla and egg until smooth. Stir into dry ingredients until combined. Spread about 1 cup of the batter in pan. Sprinkle with about 3/4 cup of the streusel. Drop remaining batter evenly over top of streusel and sprinkle remaining streusel over top.
Bake 20 to 24 minutes or until golden brown. Let stand 10 minutes before removing from pan and allow to cool slightly before serving.
Variations
Add another tablespoon of butter to the streusel. Peel and core two medium baking apples and slice them thinly. After you put half of the batter in the pan, arrange apple slices on top and sprinkle with half the streusel. Add the second layer of batter and the remaining streusel. Bake as directed—may need up to 25 minutes in the oven. You can do the same with fresh or even canned peaches, but cut them into small pieces.
Make only half of the streusel. After you put half the batter in the pan, add a layer of cake and pastry filling or pie filling. If you use cherry filling, use almond extract instead of vanilla, and add some slivered almonds to the top streusel.
Omit the cinnamon from the streusel recipe, and use 1½ to 2 cups of fresh strawberries as the filling. You can use half brown and half white sugar for the streusel.
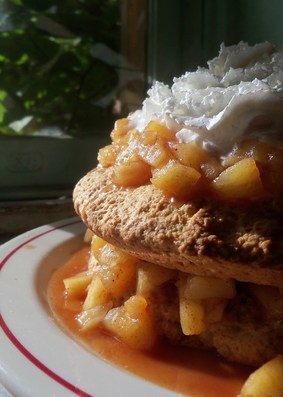
Whole Grain Nutty Shortcake with Tart Apple Topping
3 cups of multigrain baking mix
½ cup light brown sugar, firmly packed
¼ teaspoon ground nutmeg
½ cup coarsely chopped pecans
1 egg
¾ cup of milk
APPLE TOPPING
½ cup brown sugar
2 tablespoons cornstarch
1 tsp. ground cinnamon
¼ tsp. salt
1 ½ cups apple cider or apple juice
5 cups tart apple pieces (peeled, cored, quartered and sliced)
Heat the oven to 425 degrees F. Combine baking mix, brown sugar, nutmeg and nuts in a medium size bowl. In a separate bowl, whisk together egg and milk. Add milk mixture to flour mixture and stir until blended; beat for one minute. Divide dough in half and into two greased 9-inch pie pans. Bake in the preheated oven for 15 to 20 minutes, or until lightly browned and slightly firm to the touch.
While the shortcake is baking, make the topping. Combine the brown sugar, cornstarch, cinnamon and salt in a large saucepan. Stir in the cider and cook over medium high heat until the sauce is clear and thickened. Turn the heat down to medium, then add the apples. Cover and let simmer until the apples are tender. Spoon half of the apple mixture over each shortcake layer (you may serve them individually or stacked.) Serve warm with whipped cream and toasted pecans for a garnish.


 RSS Feed