|
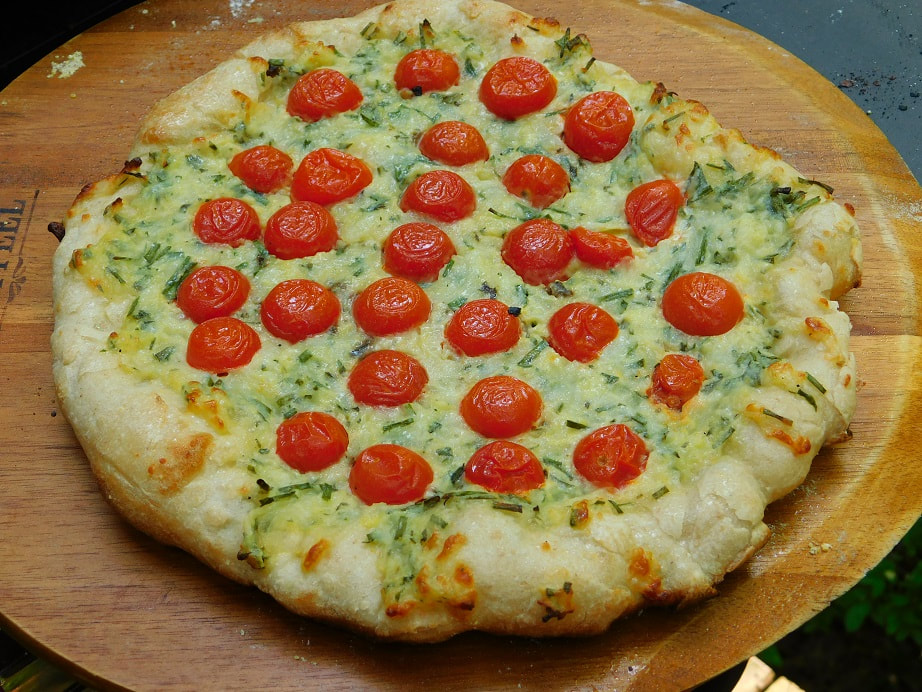
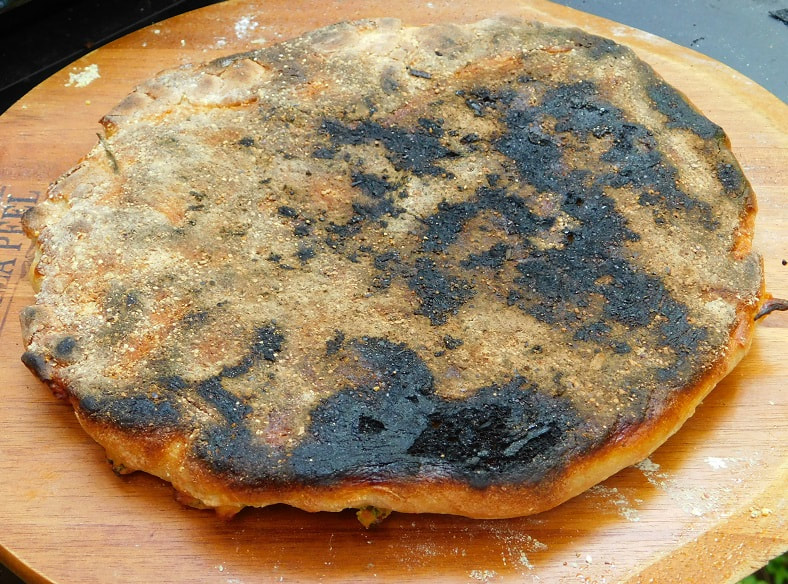
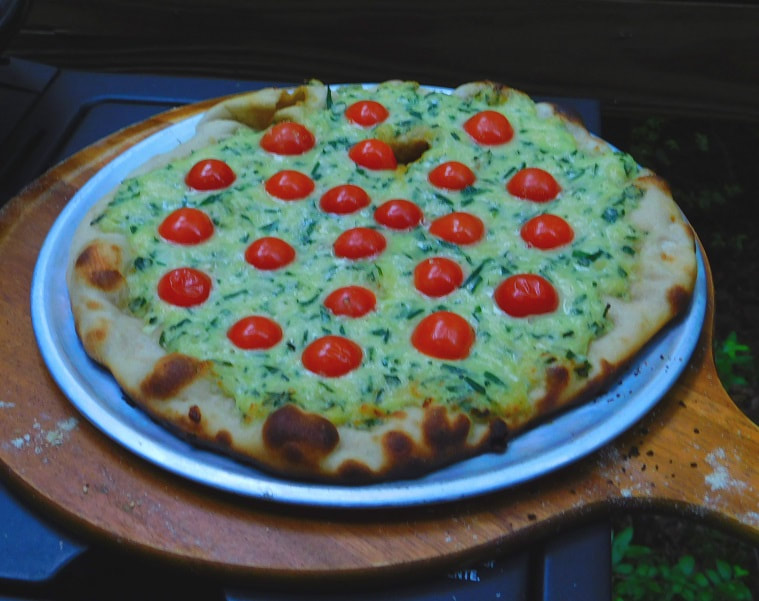
Pizza on the grill trial #2 today, trying to learn from my mistakes and fine tune my technique for this particular grill and stone. Scientific method prescribed that I make the exact some kind of pizzas, although the dough was slightly different in that I used more bread flour and no sourdough starter. I set the grill temp at 475° F. from the very start, to see if that would keep the stone from overheating. I made the sausage pizza first and after five minutes of baking with the lid closed, I got decent results, although I thought that the cheese should have been a little more melted. The bottom, alas, was still overdone on some spots, as you can see. I then turned the grill off completely and left the lid open so everything could cool down a bit, then reset the burners at the lowest possible setting. The thermometer on the lid registered at just under 450° F., so I assembled another Four Cheese Tomato Top pizza, put it on the stone and closed the lid. After exactly five minutes, I discovered similar results: top just slightly underdone, and the bottom too dark in places. So are there further adjustments to be made? The grill temp doesn’t go any lower than 450° F., unless I only turn on two burners, which will be my next experiment. I think I’ll also try adjusting the hydration of the dough---mine tends to be drier than some recipes---and I suspect that a using traditional stone rather than the space age micro-crazed black one will yield different and perhaps better results. But alas, tomorrow is my last day here at the lake and I have to spend most of my time cleaning up and packing. It takes a good hour just to pack all the kitchen gear I brought! But there will no doubt be a sunny day in August or September when I have a few free hours and can come back just for the afternoon and test some more. Maybe I’ll bring some friends along so I don’t have to do all the clean-up!
2 Comments
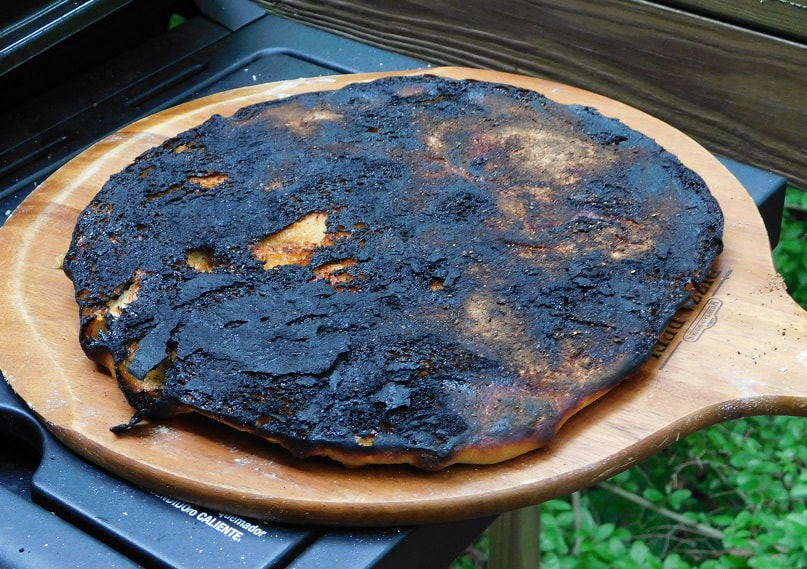
 Today after lunch with a former student in town and a little grocery shopping, I got down to business with pizza on the grill. I actually started the process hours before by making a small batch of pizza dough at 10:00 a.m. and putting it in the refrigerator for a long, slow rise. This method yields better flavor and texture in the dough. I discovered this life-changing insight by accident once when the only time I had to make dough was early in the day, but it’s been confirmed by Christopher Kimball of America's Test Kitchen. Do not believe the snobs who say it has to rest in the fridge for two days---who has time for that? I had read many accounts of how to successfully create pizza on the grill, but I decided to start with using a pizza stone on the grate, because that was closest to the method I used in the oven at home. Here’s a portion of what I found on the Bon Appetit website: On a Gas Grill We like using a gas grill for this (I know, right? We never say that!) The even heat eliminates a huge variable. Place a pizza stone on the grates and set the burners beneath to medium-high. Allow the grill to heat, covered, with the stone inside. When the grill is super hot—a thermometer should register around 500°, about 10 minutes—remove the lid, place an 8-oz. ball of dough stretched to a 12"–14" oval on the stone, add your toppings, and brush the crust with a little olive oil. Replace the cover with vents open and cook until underside of crust is browned and cheese is bubbling, 7–9 minutes. Using a couple of large metal spatulas, transfer the pizza to a platter or board. Let cool for a few minutes, slice, and watch everyone freak out. As I have acknowledged many times, I am not very good at following recipes too precisely. In this case, however, having very little experience of grilling pizzas, I decided that slavish obedience to directions was a necessary virtue. I placed an Emile Henri pizza stone on the grill and heated it on medium high as directed. I made a 12” Four Cheese Tomato Top pizza with 8 oz. of dough, put it on the preheated stone on the grill, and after only five minutes, this is what it looked like. And this is what it looked like on the underside. “Watch everyone freak out” indeed. My reaction aloud was anything but polite and will require sacramental confession, absolution and penance upon my return to the abbey. Another website, The Kitchn, had this to say:
Every grill is different! You know your grill and it cooks differently than mine. Your pizza may take longer or shorter depending on how hot the grill gets and where your areas of direct and indirect heat are. Consider your first pizza a sacrifice to learning just how to control your grill temperature. Well, a sacrifice in the book of Deuteronomy is a burnt offering, so I guess I managed that much. Okay, so a reduction in heat, another crust carefully weighed and topped lightly with sauce, precooked sausage, and a mixture of Italian cheeses. After only four minutes on the pizza stone, again with the lid closed, the bottom was perfect but the top was underdone---I was unable to produce a photo that adequately demonstrated this and was forced to consume the evidence of another failure. And but me no buts about “It’s not a failure, you’re just learning, I’m sure it tasted fine, blah, blah, blah.” A failure it was and thanks be to God. We have a saying on the stage crew at St. Bede Academy: “Fail often to succeed sooner.” Although I have scant patience for it in many other situations, in the context of the test kitchen at least, I like failure---it’s the only way to learn anything worthwhile, because it means you’re attempting something slightly beyond your abilities. Before this week, I could count on one hand the number of times I have cooked anything on a grill. The fact that I don’t have third degree burns and a smoking hole where the cabin used to stand is itself an achievement. So what went wrong? First off, I think this “new ceramic technology” from Emile Henry isn’t as great as the manufacturer thinks it is. Does the black surface with “micro-crazed” glazing retain too much heat? Should I have waited longer to make the second pizza, allowing the stone to cool more? Should I have used a traditional unglazed stoneware round (I have two at the cabin, although one is actually too large to fit on the grill). I’m not willing to give up on Emile just yet, but more experimentation is required—it’s a bad workman who blames the tool in his hand. The directions in the booklet say: “Let stone heat up to 500 - 700° F. depending on your recipe.” At 700° I suspect the pizza would have spontaneously combusted when I closed the lid to the grill. Secondly, are the burners on this particular grill too close to the stone? As a heat source they are closer than in some ovens, but in a wood fired oven the heat is even closer, so not sure what to think here. I do know that the lid of this particular grill has vents in the back over one has no control, so it’s possible I’m losing too much heat out the back to cook the tops adequately. Again, I have to experiment more with this grill to get some answers. Lastly, should I use someone else’s pizza dough recipe? The one I made was pretty close to the one provided by the pizza stone manufacturer, although I tossed in a little sourdough starter to give it some extra flavor. I can’t imagine that particular variable made a huge difference, and I’ve probably made ten different doughs to use in as many different kitchens---and in wood fired ovens---and never had a problem. I’m determined to solve this problem, perhaps to make another attempt tomorrow, but for now I’m out of dough and toppings, so I think I’ll watch a movie and enjoy some popcorn---if I can get the microwave to work.  Today is the Fourth of July, an important day in our nation’s history of course, and in my family’s history as well. My parents were married on this date in 1957, and it remained one of my mother’s favorite holidays, even after my parents divorced in 1969. Nearly every year we attended the Peoria Municipal Band Concert at the amphitheater in Glen Oak Park, just a few blocks from our house. My mother would be fully decked out in red, white and blue---in later years she even collected a patriotic vest, hat and shoes covered in sequins. When they played “The Stars and Stripes Forever” she handed out small flags to us and other nearby children and led a small parade around our picnic blanket. Even today when I hear that song, I smile---and cry a little, too, now that she’s gone.  I did very little to celebrate Independence Day, other than to indulge in the luxurious freedom of reading a book---a novel, not something I had to study or prepare a lecture from---for virtually the entire day. I took a little time off to use up some bananas that had been riper than I realized when I brought them to the cabin, so I was glad to have Fannie Farmer along for a banana bread recipe, and ran to Walmart to pick up a cover for the grill. Although there were several fireworks displays scheduled in nearby towns, some instinct kept me reading at the dining table after my beans-and-weenies supper. By the time darkness fell, it was pouring rain like the end of the world, and it’s still raining lightly as I write this at 10 p.m. So that’s the freedom I celebrate and am grateful for tonight—the freedom to relax and do very little. I am grateful for the financial and social stability that allows me to spend a careless day alone in a small cabin without anxiety that I can’t afford a day without gainful employment, without fear of who might come knocking on the door. Is it any wonder that immigrants and refugees stream to our shores and borders? Centuries of men and women fought battles---military and political and intellectual---to secure such freedoms. To them, we owe our deepest gratitude.  Recipe for these whole grain pancakes at https://www.kingarthurflour.com/recipes/homemade-whole-grain-pancake-mix-recipe Recipe for these whole grain pancakes at https://www.kingarthurflour.com/recipes/homemade-whole-grain-pancake-mix-recipe My sourdough pancakes were somewhat less than successful this morning, because I was careless about measuring the baking soda. Anyone who has watched me in the kitchen at home knows that I am a “grandma baker”: like a grandma who has been making the same recipes for many years, I don’t do a lot of measuring of ingredients. But in the case of baking soda, I have learned to my sorrow, one must proceed with more caution. Sourdough yeast and its accompanying lactobacilli produce acids, which is where the tangy flavor comes from. By added something alkaline (baking soda) you get carbon dioxide bubbles, which creates a lighter, fluffier product. But the rule of thumb is “1/4 teaspoon of baking soda per cup of flour”. Evidently, my eye was less than accurate this morning, because the pancakes were fluffy but had a decided chemical taste, indicating that there was more baking soda than could be neutralized by the acids in the batter. As usual, I mixed my starter with multigrain flour and a little filtered water the previous evening so it could develop overnight, but chemistry trumps even the best of intentions! So I kept that maxim carefully in mind as I worked on my “Fruit and Nut Bread To Serve with Cheese” (gotta come up with a better name) this afternoon. The recipe I used for inspiration had less than two cups of flour but 2 teaspoons of baking powder and ½ teaspoon of baking soda, both which seem a little high to me, given the small amount of flour. Also the original recipe had no source of acidity to it—no lemon juice, brown sugar, buttermilk, or cream of tartar, to name the usual suspects. So I don’t know why baking soda was part of the recipe in the first place.  But my adapted recipe uses yogurt as one of its liquids, so a quarter teaspoon of baking soda makes sense, along with 1 ½ teaspoons of baking powder. I knew that using the bare minimum would result in a denser bread, but that’s what I was hoping to achieve: something moist and dense that could stand up to aged cheeses. As you can see, the results were beautiful, but not entirely satisfactory. I think I used too much dried fruit---even paired with sharp cheese, the bread was cloyingly sweet. I also should have gone with my initial thought of omitting the vanilla called for in the original recipe, as that flavor didn’t pair well with the cheese either. By itself, served warm with butter, the bread still seemed too sweet to me but I suspected it might still be enjoyed by the officers at the local police station. That’s where I usually take my test recipes when I’m at the lake cabin, so I don’t blow my blood sugar sky high! They 9and all first responders) stay plenty busy during the 4th of July celebrations, so if you have an extra plate a cookies, drop them by the local station.  After I said morning prayer and cleaned up after my sourdough pancake breakfast, I made a batch of multigrain dough. I can’t give you the exact recipe, but it had white bread flour, a multigrain mix I brought (whole wheat, cornmeal and oatmeal), the leftover sourdough pancake batter, a cup of warm milk and a cup of cold coffee, along with yeast, a little sugar, salt, two eggs, and vegetable oil. I kneaded it a solid 15 minutes to make sure I developed the gluten matrix, which takes more time in a multigrain dough. After it proofed for just over an hour, I shaped six hamburger buns, four hot dog buns, and a sandwich loaf. Before long the cabin smelled glorious, and there was a week’s worth of bread cooling on the counter. 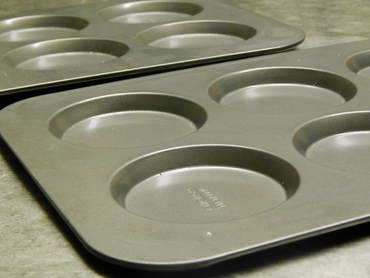 Although it’s not absolutely necessary to have them, I used special pans for the hamburger buns. I’m not sure if they are for buns or for muffin tops (I’ve seen them labeled both ways) but they make for a nice uniform shape. A hamburger bun requires about 2 ounces of dough, perhaps more if you’re serving a half pound burger. My burger for supper was more modest and the bun was a perfect size. The burger itself did not remain on the plate long enough to get a picture, but as you can see above, at least I managed to get a shot of the buns cooling on the picnic table on the front patio! Now that I have the grill up and running, I’ll have to start experimenting with pizza. I’ve heard a lot of people swear by pizza cooked directly on the grate, but that doesn’t appeal to me as much as heating a pizza stone in a closed grill, which seems to me to imitate an authentic pizza oven more closely. They even make inserts for kettle grills that transform them into pizza ovens—I may have to make an investment in one before long. My long term goal is a wood-fired pizza oven for the west patio of the monastery---but more on that another day.
 It has been far too long since I have posted a bread blog, not because I haven’t been baking, but because I have stuck to familiar breads--family favorites, if you will--rather than exploring anything new. So the brethren have enjoyed cornbread, dinner rolls like ones on the left, almond spiral and Coffeecake Exceptionale on several occasions in the last few months, with the occasional strawberry-rhubarb dump cake when strawberries were cheap and the rhubarb was ripe. There have been no complaints!  But this week I have made my annual pilgrimage to our little retreat cabin at nearby Lake Thunderbird, and that means experimentation! There are always too many recipes to choose from (thanks to Pinterest and my extensive cookbook collection!) but I have some direction from my publisher. He wants a new edition of Thursday Night Pizza, possibly with more color photos, but certainly with a chapter on pizzas on the grill and using a wood fired pizza oven, since both of these methods are becoming increasingly popular in backyards, on decks and patios, across the United States. More on this subject in a later blog. 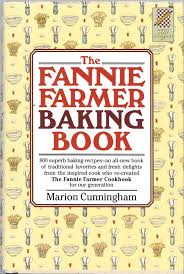 I also want to try one or two recipes from The Fannie Farmer Baking Book, which I didn’t even know existed until I found a copy at a second hand shop, although it was published in 1984. With 800 recipes, it starts with 145 pages on pies and pastry and works its way through cookies, cakes, yeast breads and batter breads. I’m sure several blogs will be devoted to its recipes over the next few months. BTW, there are a lot of used copies available on line for far less than what I paid for it. Between this and my Breadhead Bible you'd be set for recipes for decades to come!  This one is from Taste of Home, but I want mine to have even more fruit and a lot of nuts as well. This one is from Taste of Home, but I want mine to have even more fruit and a lot of nuts as well. My other project is to develop a bread studded with dried fruit and nuts that doesn’t taste like Christmas fruitcake and pairs well with both fresh and aged cheeses. I found a recipe in a small book I found in my mother’s collection that will serve as a starting point, but I think it needs some tweaking. I’m sure the staff at the Lake’s clubhouse will be happy to serve as taste testers. The one at the right from Taste of Home is kind of what I want except I want to use Greek yogurt rather than eggnog. I'll keep you posted. As usual, I brought along my sourdough starter, the one which I collected several years ago on the back deck of this very cabin. I use it to make multigrain sourdough pancakes, one of my favorite breakfasts, accompanied with a reduced-fat breakfast sausage I make with lean ground pork and ground turkey. I haven’t published it before, but I used it in my new Craftsy class “Baking with Herbs and Spices” for Sausage Roll Ups, so here it is. Reduced Fat Breakfast Sausage 1 lb. ground turkey 1 lb. lean ground pork 2 tsp. dried sage 1 to 2 tsp. salt 1 tsp. ground black pepper 1 tsp. garlic powder ½ tsp. dried marjoram (optional) ¼ to ½ tsp. crushed red pepper Mix thoroughly and refrigerate until use. I cook up the whole batch in patties and toss them into a ziplock bag in the freezer. One minute in the microwave and they are ready to serve. |
AuthorFr. Dominic Garramone AKA Categories
All
Archives
June 2024
|



 RSS Feed