The Bread Monk
  • Home
  • My Bread Blog
  • Breadhead Videos
  • Recipes
  • Fr. Dom's Books
  • Events/Programs
  • Shortcut Stollen
  • New Page

Savory Biscotti

3/27/2018

0 Comments

 
Picture
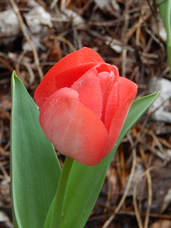
My tulips are just a few weeks away from blooming!
Spring has almost sprung here in north central Illinois---we had three inches on snow on Saturday, but it almost completely disappeared by Tuesday afternoon. The tulips and daffodils I planted last fall are sprouting all over the yard and the chives are up. But the days remain a bit chilly, so we're still serving hot soup in the student dining room. In the monastery we get soup at lunch every day, all year long, which has probably been the case since we first showed up on the property in 1890. No better way use leftovers!

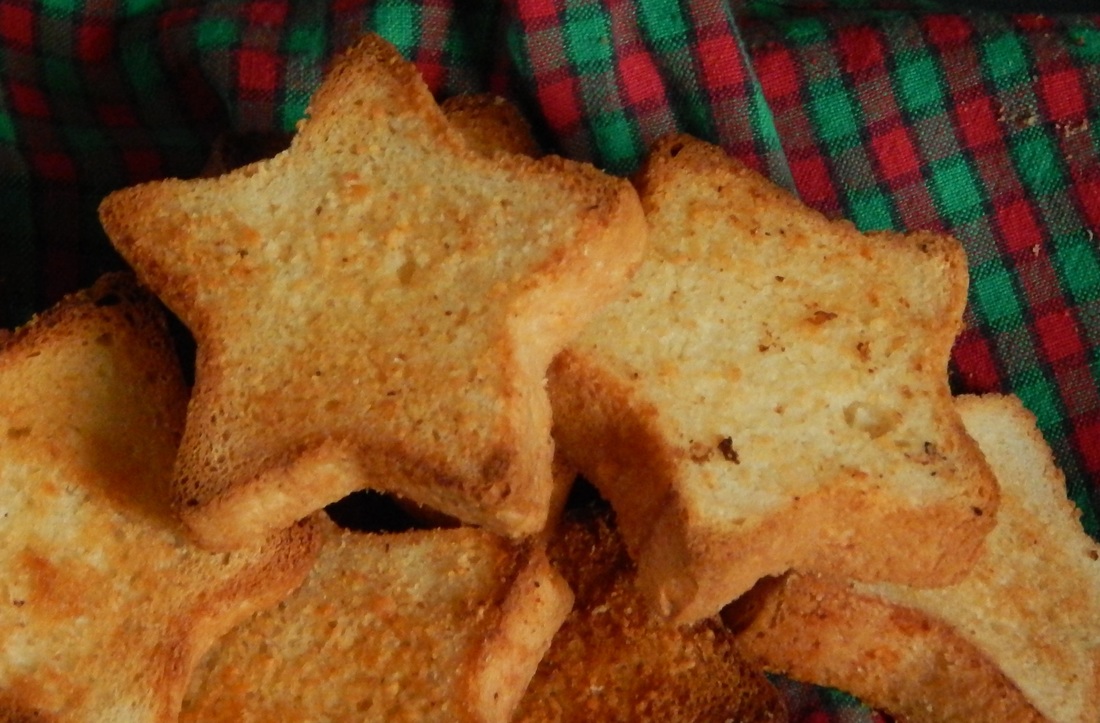
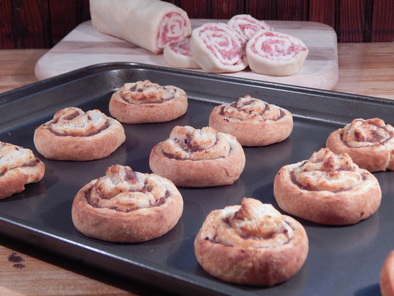
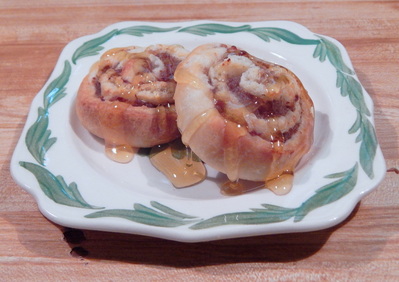
My herb guild has a Soup Night every year and a couple of years ago at that meeting I gave a talk on herbal breads to accompany soups, among them a savory biscotti recipe I found on the Land O'Lakes Butter website. It proved quite popular, in part because the idea of a savory biscotti rather than a sweet one is so different. In recent months I've been developing recipes for my next Craftsy class, which has an herbal theme, so I decided to create a savory biscotti recipe for the class. My favorite cheese is smoked Gouda, so I made that the central flavor, along with a little thyme and rosemary. We served them at lunch on a day when we had out of town guests visiting the abbey and got enthusiastic reviews, so I'm posting the recipe here. 
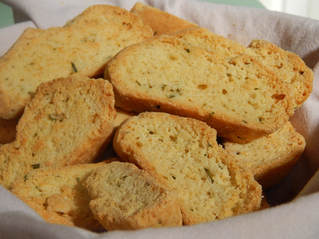
Picture
Savory Biscotti
1¼ cups all-purpose flour
2 tablespoon fresh rosemary
1 Tbs. fresh thyme
1 1/2 teaspoons baking powder
½ teaspoon salt
½ cup unsalted butter, softened
2 eggs at room temperature
6 oz. smoked gouda, shredded
Directions
Preheat the oven to 350 degrees and line a 9” x 13” baking sheet with parchment paper. In a medium mixing bowl, whisk together the flour, rosemary, thyme baking powder and salt. In separate bowl, beat the butter and eggs together until smooth, then stir in the cheese. Slowly add the flour mixture and beat until combined. Divide dough in half. Form each half into an 8” x 3” slightly flattened log. Bake 30 minutes or until golden brown. Remove pan from oven and cool for 20 minutes. Transfer the logs to a cutting board. Using a sharp serrated knife, cut into 3/4-inch thick pieces on a slight diagonal. Return them to the pan and bake an additional 20 minutes, turning them over after 10 minutes. Remove from pan to a wire rack and cool completely before serving.  Makes about 20 biscotti, plus some smaller pieces for nibbling.


Notes
--I first made savory biscotti for a presentation to our local herb guild. I made several kinds of crackers and side breads, but these savory biscotti were the biggest hit. Excellent with any soup.
-- You can use other cheeses (a sharp white cheddar, pepper jack, and provolone all come to mind)or herbs. Remember, use one half to one third as much dried herb as fresh.

0 Comments

Biscuit Improv: Buttermilk Garden Drop Biscuits

3/20/2017

0 Comments

 
Picture
Many people don't realize that improvisational comedy like you see on "Whose Line Is It Anyway?" is not merely a cadre of witty people making things up as they go along. Improv actually has a number of rules or guidelines to keep the scene from stalling, going in circles. or just being dull. Most people have to study and practice a long time to learn how to apply the rules and, eventually, when to break them. Similarly, an experienced chef or baker often improvises to develop a new dish, based on what's in season at the market or what's in the pantry right now, and shows like Chopped give us ample evidence of how culinary know-how and creativity (and sometimes, pure dumb luck!) can combine to yield extraordinary results.

Whenever I present a bread demo and mention that I made a certain recipe up on the fly, someone always asked, "But how did you know that was going to work?" The answer, of course, is that you might not know for certain, but with enough knowledge and experience, you can increase your chances of success. I recently created a new biscuit recipe using a combination of experience, improv, and serendipity.

I wanted to bake something for supper for the feast of St. Joseph, and normally that would mean the traditional cream puffs, but we had received a donation of several trays of bite-sized desserts (left over from a shower) so we didn't need any more sweets in the house. I didn't have enough time for yeast rolls so I decided on drop biscuits, because I had buttermilk in the fridge from Irish Soda Bread.  I had noticed that the chives had already sprouted in the herb garden, so Cheddar Chive Biscuits seemed in order. Alas, there was no decent cheddar in the fridge, but I did spy some some limp celery and a handful of baby carrots. From all that, Buttermilk Garden Drop Biscuits were born.

I took a basic drop biscuit recipe from The Joy of Cooking (surprisingly, there was nothing comparable in Bernard Clayton's Book of Breads) but it used 2% milk, so I knew I would need to add some baking soda to get more loft. Baking powder and baking soda are not interchangeable, as the former is activated by heat and the latter by acidic ingredients. But baking soda is much ore powerful, so only a quarter teaspoon was needed.

I also increased the amount of flour by a quarter cup, for two reasons. First, the original recipe called for shortening, and all I had was butter, which has a higher moisture content. Secondly, minced celery and shredded carrots add a lot of water to the mixture as well. I didn't want my drop biscuits to spread out into savory pancakes, so I added that little extra bit of all-purpose flour.

I also knew that the veggie flavor in the biscuits would be more prominent with a little more salt, but why add just salt when you can also add flavor with a salty aged cheese? There was some excellent Romano left over from a recent pizza party which made its way into the mix. Drop biscuits mix up in about four minutes and bake in less than fifteen, so it wasn't long before these beauties were out on the counter. They were the perfect accompaniment to grilled chicken breasts---the-herb-and-veggie flavor is exquisite but fairly subtle and would overpowered by a more heavily seasoned dish. I had one with my Lenten soup today and it was a treat.

Picture
Buttermilk Garden Drop Biscuits---they smell heavenly as they emerge from the oven!
So now that you've got a basic recipe, try your own improvisation, based on what you find in the produce section, the fridge, or the backyard garden. I'd love to hear about your baking adventures.

​God bless and happy baking!

Buttermilk Garden Drop Biscuits

2 1/4  cups all purpose flour
1 tablespoon sugar
1 teaspoon salt
2 teaspoons baking powder
1/4 teaspoon baking soda
5 tablespoon butter 
1/4 cup minced fresh chives
1/4 cup finely shredded carrot
1/4 cup minced celery
1/4 cup shredded romano cheese
1 cup of buttermilk


Preheat oven to 425 degrees. Stir dry ingredients together in a medium size bowl.  Cut in butter using a pastry blender or two knives. Mix in chives, carrots, celery and cheese. Add milk and stir until just blended.  Drop by tablespoons onto a lightly greased baking sheet.  Bake at 425 degrees for 12 to 15 minutes, or until lightly browned.  Cool slightly and serve warm.  Makes 12 large biscuits.
0 Comments

Garlic Toast Stars

12/12/2016

1 Comment

 
Picture
Go to the kitchen aisle of any second hand shop and chances are you'll find at least one canape bread mold, perhaps several. Pampered Chef used to sell them, and I'm told that people often bought them because they were a relatively inexpensive item, rather than because they intended to make fancy canapes. They no longer carry them, but Norpro still makes them and they are available on Amazon. But check the Goodwill and Salvation Army stores first, believe me. I own about a dozen of these and have never paid more than $2. In addition to these shapes, Norpro also sells one shaped like a five-pointed star, available separately.

     I hosted a holiday gourmet pizza party last night and wanted to serve a soup course. I made a spicy minestone with homemade sausage, and decided to use the star bread mold to make toasted garlic stars. I used the same dough as for the pizza crusts, and made two loaves with the five-pointed star and two with the six-pointed. It's really simple: spray the inside of the mold and the lids with pan spray, drop in a portion of dough (enough to fill the mold about one-third) put the lid on and stand it upright to rise. I prefer to keep upright in the oven as well, but you can bake them on their sides,too. At 375 degrees F., the loaves are done in 12 to 15 minutes, and slide right out of the tubes. If you stand the loaves upright to cool, they don't get any weird hash marks from the wire rack.
Picture
     For the garlic stars, I sliced the bread and spread the slices with butter mixed with garlic powder and a little Parmesan. Back on the pan and into the oven for 1o more minutes, (set the timer or you'll forget about them as I almost did!). The result is festive toasted garlic stars to adorn your Christmas buffet (you can use the six pointed star mold for celebrating Hannukah). You can easily bake the bread a day or two ahead of time, and the shaped loaves can easily fit in a packed holiday freezer if you make them even further ahead of time.

Picture
     And time is the issue during the holidays, isn't it? Even monks can feel the pinch, especially since we don't do any decorating until December 23 or so. Do don't hit yourself with the guilt hammer if you don't have star-shaped garlic toast for the family buffet. Save the heart-shaped mold for Valentine's Day, or the flower-shaped one for Mother's Day. Store the idea for a rainy day when the kids are bored, and keep your eyes open at garage sales for the bread molds. 

God bless and happy baking!

P.S. Be sure to go to my home page and get the link for a 50% off coupon for my Craftsy online baking class "Bake Your Best: Sweet Yeast Breads, Challah and More." No matter which holiday you celebrate this time of year, you'll learn a recipe and techniques to make a special holiday btteat for your family.

1 Comment

Tomato Galette II

9/14/2016

0 Comments

 
Picturephoto: Wild Boar Farms
One of our faculty members grows heirloom and hybrid vegetables, and he brought in some Dragon’s Eye tomatoes. These hybrids were developed by Wild Boar Farms, and you can order the seeds from there. They have a pink-rose color with green stripes that turn gold as they ripen. The flesh is dark and almost meaty, with great flavor.
 
Last year I came across a recipe for a Tomato Galette which I thought looked yummy, so I gave it a try. The results were nowhere near as pretty as the online photo, but it was tasty---you can find my earlier blog with photos HERE. I decided to make a second attempt with the Dragon’e Eye tomatoes, and to make some other adjustments to the recipe based on what ingredients I had on hand: zucchini, onions, some leftover bacon, and gorgonzola instead of chevre.

Picture

Wow. Just . . . wow.


I shared it with some of the faculty members, including our super-intendent Dr. Struck. Here’s a quote of his reaction:
 
“That was insane. I’m not a foodie---I’m a trash eater, I’ll eat anything. But that made me want to become a foodie. IN-SANE.”
 
I’ll take that as a thumbs up.
 

​If you still have a few heirloom tomatoes in the fridge and some giant zucchini in need of fulfillment, try this galette. The crust is easy to make---be sure to refrigerate it for several hours or even overnight before rolling it out---and constructing the pie is not at all fussy. Use your favorite pie dough recipe if you like (this one has Parmesan and cracked pepper in it) but don’t use frozen pie dough, or the angels will weep for you.

Tomato Bacon Galette with Gorgonzola

Crust

1 1/2 cups all-purpose flour
1/2 cup cold unsalted butter, cubed
1/3 cup shredded Parmesan cheese
1 teaspoon cracked black pepper
4 -6 tablespoons ice cold water

Filling
3 large heirloom tomatoes (about 1½ pounds)
3 tablespoons dry bread crumbs
1 cup of quartered zucchini slices
3 or 4 strips of cooked bacon, chopped
1/2 cup thinly sliced white onion
4 ounces gorgonzola, crumbled

1 egg, lightly beaten

1 tablespoon water

Place flour in a food processor with butter and pulse until pieces are pea-sized (You can also do this by hand with a pastry blender). Stir in Parmesan and cracked pepper. Place mixture in a medium size bowl and stir in the ice water with a fork, about a tablespoon at a time, until the dough is moistened and can be formed into a ball. Flatten dough into a disk, wrap with plastic wrap and chill for 2 hours---I let mine chill overnight. 

Core the tomatoes and slice about 1/4 inch. Arrange slices on a wire rack over a baking pan or paper towels. Place a layer of paper towels over the top to absorb moisture—when the towels become soaked through, replace them. Repeat as needed for 30 to 45 minutes. The idea is to remove some of the excess moisture so you don’t get a soggy pie.
 
Preheat oven to 375 degrees . On a lightly floured surface, roll dough to a 13” circle. Transfer it to a large pizza pan or baking sheet lightly coated with pan spray. Spread the bread crumbs on pastry evenly, leaving about a 1-inch border. Layer zucchini, tomatoes, and onions on the crust, then sprinkle with bacon and gorgonzola. Fold the edge of the crust over the filling, pleating as necessary. Combine egg and 1 tablespoon water and brush with a soft pastry brush over the outer crust. 

Bake for 35 to 40 minutes or until crust is evenly browned and crisp. Can be served warm or at room temperature.
Picture
0 Comments

Sausage Roll-Ups

10/5/2015

0 Comments

 
PictureSausage Roll-Ups are an easy appetizer or brunch item.
For family potlucks, my mother often makes sausage roll-ups. These savory appetizers are a snap to make, and much of the prep can even take place the night before, so having them for breakfast or brunch isn't much of a chore. They can be made with any kind of bulk sausage: garlic, sweet hot Italian, maple, sage and onion, etc.

We're fairly certain my mom got the recipe from Pillsbury, since it uses their crescent rolls in a tube. My friend Julie refers to their biscuits as "whomp biscuits", since you peel the label off the tube and "whomp!" it on the edge of the table. You can certainly try that if you want, but allow me to say this: you can make exquisite homemade biscuit dough with far less fuss and get a much better result. Besides, as adorable as he is, Poppin' Fresh creeps me out a little. I just don't like to see my food animated. And we're almost the same age but he's virtually unchanged in appearance, which makes me wonder about all those preservatives.
So we're going to start with a basic biscuit dough. I say "basic" but what I'm really referring to is BISCUITS OF VICTORY! For many years I was unable to make a decent biscuit, but I finally found and adapted a recipe that worked for me every time. Hence, the epic name, which must be pronounced in a heroic voice like the voice over on Super Friends. The recipe for the dough is HERE, directions for the roll-ups are below. 
Sausage Roll-Ups
One batch of Biscuit Dough
1 pound of bulk sausage, uncooked

Prepare biscuit dough. On a well-floured surface, roll dough out to 15” x 24”. Crumble sausage and spread evenly over dough (an offset spatula helps). Starting from the long side, roll up jellyroll style. Cut roll in half crosswise with a sharp knife. Wrap each half in waxed paper or parchment and again in plastic wrap. Refrigerate for one hour or overnight.

Preheat oven to 425° F. Lightly grease two 9 x 13-inch baking sheets. Remove wrapping from dough and cut into 1” slices. Place rolls cut side down on baking sheets and space them evenly. Bake for 12 to 15 minutes until sausage is cooked and rolls are golden brown on the edges. Serve warm.

PictureSausage Roll-Ups drizzled with honey--the perfect combination of sweet and savory.
I like to eat mine drizzled with honey or maple syrup, but for something a bit more savory, sprinkle the tops with finely shredded asiago cheese or a mixture of mozzarella and Parmesan as they emerge hot from the oven. You can make the jellyroll and slice immediately, but they are harder to slice that way and tend to spread out more when baking. But either way they are delicious and will disappear quickly from your buffet table.  I've also had success baking them the night before and reheating the next day. Just let them cool completely on the pans, cover the pans with aluminum foil and refrigerate. Reheat the next morning, covered, at 375° F. for five minutes, then uncovered for another five to seven minutes until heated through.

One last comment: these are not a heart healthy bread! The dough is loaded with butter and sausage of course can be laden with fat, salt and calories. That's why my family only served these once or twice a year. But my oh my are they good!
  
God bless and happy baking!

0 Comments

Italian Onion Herb Bread

9/18/2015

1 Comment

 
PictureItalian Onion Herb Bread can be made in round loaves or in a loaf pan.
A friend invited me to supper at his house last weekend and "suggested" I might bring along some bread. This is the time of year when I try to use up whatever fresh herbs are left in the garden, and when I saw that we had some green onions in the fridge that needed to be used pretty quickly, I knew Italian Onion Herb Bread was the best possible choice. It goes well with just about any meat (we were having pork loin on the grill) plus my host's last name is DiVincenzo. I used fresh garlic chives, basil, rosemary, oregano, and a pinch of red pepper in my mix, but any dried Italian seasoning will work. I would have to rate this among the breads with the best aroma, not only while baking, but on the counter, in the bread basket, and even when wrapped in plastic. Try it and let me know what you think. 

Picture
Italian Onion Herb Bread

2 pkg. active dry yeast
1 Tbs. brown sugar
2 tsp. salt
1 cup warm water (100 to 110 degrees)
1 cup milk
2 Tbs. vegetable oil (divided)
1/3 cup finely chopped onion
1 or 2 Tbs. dried Italian herb blend, or 1/4 cup fresh
5½ to 6 cups of all-purpose flour

Sauté onions in 1 tablespoon of the oil until translucent but not browned.  Remove pan from heat and add remaining oil, herbs and milk---set aside to cool to lukewarm.  Dissolve yeast in warm water with a pinch of the sugar. Let stand 10 minutes until foamy.  In a large mixing bowl, combine milk, salt, and onion/herb mixture.  Stir in yeast and remainder of sugar.  Add 2 cups of flour and mix thoroughly. Add three more cups of flour, one cup at a time.  About ¼ cup at a time, add enough of the remaining flour to make a moderately stiff dough.  Turn out onto a lightly floured board and knead for 6 to 8 minutes, until dough is smooth, shiny and slightly sticky.  Lightly oil the surface of the dough, and place in the rinsed bowl covered with a dish towel, in a warm place free from drafts.  Let rise until doubled, about one hour.  Punch dough down and knead again for about one minute.  Form into loaves and place in greased pans.  Let rise again for 30 to 45 minutes, until nearly.  Bake at 375 degrees for 45 minutes or until golden brown and loaves sound hollow when tapped.  Cool on racks.

Notes
---The first time you make Italian Onion Herb bread, use only 1 tablespoon of dried herb mix, and see if that’s enough for your palate.  If not, increase it to two. Go easy on the rosemary. 
---You can try other of herbs in this recipe as well.  I made it once with a combination of lovage, savory and parsley, and the community devoured six loaves at a single meal! 
---If you are short on time, omit the onions and just warm the milk to 110 degrees before adding it to other ingredients along with the oil.

1 Comment

Chili for Breakfast?!

9/15/2015

0 Comments

 
PictureNothing I like better than cornbread with butter and honey.
Earlier this week I made a batch of cornbread using a new recipe I found on Pinterest. The pinner claimed it was "The Best Cornbread"--moist and sweet, with a tender crumb. I'm usually a bit wary of such claims, because often what the baker has developed is a recipe for a cornmeal-flavored cake, with way too much butter and sugar. But this recipe made use of unsweetened applesauce, so I decided to give it a try. I'm glad I did. Although it had a texture that reminded me of yogurt cake and was a bit too sweet for my taste, it was definitely moist and flavorful. The recipe is HERE.

PictureSan Pasquale, patron saint of cooking, looks on from the background.
I don't know what inspired me to put my fried eggs on cornbread the next morning, because normally I'm a butter-and- honey kind of monk. But it was so good that I decided to take it even further and create the masterpiece picture here. I cut a large square of cornbread in half lengthwise and topped it with a slice of sharp cheddar. That went into the microwave for about 20 seconds, just enough to melt the cheese. Once it was on the plate, I added chili, jalapenos, and a fried egg. No salt, no pepper, no hot sauce--it had all the flavor it needed. I'm glad I didn't use the whole piece of cornbread, because that would have been far too bread-y. This was perfectly balanced, IMHO.  The idea of chili first thing in the morning might seem odd at first, until you think about breakfast staples like biscuits and gravy, or eggs over grits and corned beef hash. You could do something similar with salsa, guacamole, or white chili, or make a variation on Eggs Benedict if you're awake enough to attempt hollandaise sauce at that hour. 

Picture
Cornbread with chili, jalapenos, cheddar, and an egg sunny side up.
I should note that in taking this picture I had the assistance of Courtney and Destiny, two of my students who usually get to school early and graciously volunteered to advise me on food styling. They were rewarded with the plate pictured above and a pair of forks.

God bless and happy baking!
0 Comments

Italian Onion Herb Bread

6/17/2015

0 Comments

 
PictureItalian Onion Herb Bread in the abbey kitchen, fresh from the oven.
Last night was the annual picnic for the Illinois Valley Herb Guild to which I belong. I heard that beer brats were going to be served, as well as tortellini, so I thought---as usual!---we needed some homemade bread to go along with such alfresco delights.  I chose to make skinny loaves of Italian Onion Herb Bread, a perennial favorite here at the abbey, which could be used to house the brats or to mop up bolognese sauce.

After these beauties were out of the oven, I realized two things: 1) I needed to make sweet hot mustard as well; and 2) I had never posted the recipe for Italian Onion Herb Bread on my recipes page. The first task required some experimentation with regular yellow mustard, St. Bede honey, crushed red pepper, horseradish and garlic, and after all the multiple tastings and tweakings, I couldn't tell you the recipe if I tried. A task for another day.


Picture
But the recipe for Italian Onion Herb Bread has been duly posted on my recipes page; for a shortcut, click HERE. If you make a dozen of these beauties for a bake sale, I guarantee you'll sell every loaf. I like to make them in "W" pans (usually called "French bread pans") but you can roll out long skinny loaves and bake them on a standard sheet tray as well. Mine look like this and are made by Fox Run, but there are lots of other shapes and sizes out there: HERE's a sampling. The ones pierced with holes are more expensive but create a more crisp crust.

God bless and happy baking!


0 Comments

Austrian Povitca

1/19/2014

1 Comment

 
Picture
The bacon craze is on the downside of its run, it seems to me, or it is moving from trendy to mainstream and will soon be considered passé---or more likely, that has already happened and I'm just not on top of things.  I figured it had jumped the shark when I saw bacon-themed jewelry in the Rhode Island Novelty catalog.  So maybe those of us who have been bacon fans for decades can go back to enjoying its salty, smoky goodness without feeling like we're on a crowded hipster bandwagon.  One of my all time favorite bacon recipes is for Austrian povitica ("poh-VEE-teetz-ah" or "poh-vuh--TEETZ-ah" depending upon which Slovenian you ask). 

My recipe for povitica has been in my family for four generations.  My great-grandmother, Frances Zunic Sardick, brought it to this country from Austria.  You most often see the Croatian or Slovenian versions of this bread (usually called potica) which use ground walnuts, cream, honey, and a much sweeter dough rolled into very thin layers.  They are very popular at Christmas in our area, but I find them a bit dull compared to this savory beauty, which bakes up as a large, dramatic loaf.

Povitica is a traditional holiday bread, and in my family a special treat for Easter, at the end of Lenten fasts and meatless meals.  When my mother was a little girl, my grandmother used to make it on Good Friday to serve Saturday night.  How she could stand to fry bacon and bake bread on the most important day of fast and abstinence in the church calendar, I can’t imagine!  She certainly made of sterner stuff than Mom and Grandpa Frankie, who would leave the house and visit every church in a 25 mile radius to escape the tempting aromas.


Picture
You can use any bread dough, white or wheat, for povitica.  Most people prefer a richer dough with eggs and butter and at least a little sugar.  Most recently I used a potato bread dough with a cup of whole wheat flour thrown in and no added sugar.  It took longer to rise (90 minutes for the first rise, 50 for the seond),  but with better flavor and texture.  It may also take a while to roll the dough out to 24" x 20", but if you let the dough relax for a few minutes between rollings, it will cooperate better. 

Picture
The povitica filling is made of chopped cooked bacon, chopped walnuts, a little sugar and six beaten eggs.  The beaten aggs are poured gently and evenly over the other filling ingredients, and then the whole business rolled up like a jelly roll.  Use the dining room table like my mom did if you lack counter space in the kitchen. 

Picture
Here it is all coiled up and ready for a second rising.  Any 9" x 13" pan will do, but I prefer one with higher sides.  A lasagna pan works great, but so does an ordinary cake pan like the one pictured here.   

Picture
I like to brush on an egg wash for the second half of the baking process to achieve this deep, rich color, but that's not really necessary.  The rippling on the crust is normal after the povitica cools, so don't be distressed  by it.  It takes about three hours to cool completely, so don't wrap it in plastic untl then.

Picture
It's a challenge to cut across such a large loaf, but I have an extra long bread knife.  You will probably want to cut the loaf down the middle first and then make smaller slices.  Povitica is delicious warm or cold, plain or buttered.  I often enjoy it warm with a light buttering and a thin drizzle of honey---salt, sweet, crunchy, creamy, chewy, all at once!

AUSTRIAN POVITICA

1 batch of bread dough, white or wheat
1 ½ to 2 lbs. bacon                             
1 lb. chopped walnuts
2 Tbs. sugar
6 eggs

Follow instructions for any simple bread recipe up to the first rising. While it is rising, chop uncooked bacon into small pieces, and fry until cooked, but not crisp.  Drain and set aside.  After dough has doubled, punch down dough and knead for 3 minutes to work out the air bubbles.  Roll out onto a large lightly floured counter or cloth to 24" by 20", about ¼“ thick. Spread bacon bits evenly over dough, then sprinkle the sugar on top, followed by the walnuts.  Beat the eggs thoroughly and pour over filling and dough.

Roll up the dough lengthwise jellyroll style.  Pull slightly on the dough to get a tight roll, but be careful not to tear holes in the dough.  Seal the edges, then coil into an oval loaf with the two edges tucked into the center (see photo).  Place in a lightly greased 9" x 13" x 2½” loaf pan.  Cover with a clean cloth and let rise in a warm place until doubled in bulk, about 50 minutes.

Preheat oven to 450°.  If any of the egg mixture has leaked out during rising, brush this over the top of the loaf for a glaze.  (In any case, get as much of the egg out of the bottom of the pan as possible, or it will cause the bottom crust to burn.)  Bake for 10 minutes at 450°, then reduce heat to 350° and bake for about 40 minutes, or until nicely browned.   If the bread begins to brown too much on top, cover the loaf lightly with aluminum foil until the last 10 minutes of baking.  If your oven doesn’t bake evenly, turn the pan around at least once during the baking process to ensure the bread is being baked thoroughly on all sides.

A printer-friendly version can be found HERE.
Picture
MMmmmmm........bacon! Make povitica this week!
1 Comment

Soup and Farinata

4/13/2013

1 Comment

 
I have a pizza party on Sunday, and I want to make something different for the appetizer course.  In previous years I've done marinated olives, antipasti trays, Italian wedding soup and minstrone.  This time I wanted a lighter soup more suitable for spring:  chicken broth  with a little vegeatble stock, ribbons of egg with Parmesan cheese, orechiette pasta and chopped green onion  for garnish---egg drop soup, southern Italian style!

But what to serve on the side?  Grissini?  Too bland.  Bruschetta?  Old hat!  Plain or garlic crostini?  Ho-hum!  Then as I was browsing on the Splendid Table website, I came across a reference to a flatbread made in Genoa called "farinata," made with chickpea flour.  I liked the idea of something similar in shape to pizza, but with a different flavor and texture, so I started researching.  As with many ethnic breads, there are hundreds of variations on farinata.  It can be plain or flavored with onions, herbs, olives, and the like.  It can be thin as a crepe or thick as a slice of bread, soft as a pancake or crisp as a cracker, cut into strips, squares or wedges, baked on a pizza pan or in a cast iron skillet.    

There was no chickpea flour at my local supermarkets, so I bought a one pound bag of dried chickpeas and sent them through a tabletop mill and then sifted out the larger pieces to get a fine flour, about 2 1/2 cups.  I mixed a cup of flour with 1 - 3/4 cups of water and left it overnight to thicken.  Thius morning  I put the pizza stone in the oven and turned the heat up to 500 degrees.  After about 30 minutes, I put a 10-inch cast iron frying pan on the stone.  In the meantime, I added a teaspoon each of salt and rubbed sage to my batter.  Once the pan was thoroughly heated, and pulled it out of the oven and poured in about 2 tablespoons of olive oil and swirled it around then pan, then tossed in about a quarter cup of minced red onion.  After it sizzled for about a minute, I gently added a cup of batter to the pan and put it back in the oven for 10  minutes.  The directions in most recipes for farinata tell you to put it under the broiler for 2 minutes, but I don't have a broiler.  So I browned the top by flipping the flatbread over in the pan and putting it back in the oven for another 2 minutes. 
Picture
The result, as you can see, was a golden brown flatbread, tender in the middle and crisp on the edges, fragrant with sage and onion and begging to be dunked in chicken broth.  I also made another one with the oven's convection blower on.  It got burnt on the edges, but the crispy texture of the middle more than made up for that.  You can bet I'll be experimenting with this new bread a LOT in the weeks to come, especially as the garlic chives, sage and oregano start sprouting. 

1 Comment
<<Previous

    Author

    Fr. Dominic Garramone AKA 
    the Bread Monk

    Categories

    All
    Breadhead Bookshelf
    Breakfast Breads
    Buns Rolls And Biscuits
    Craftsy
    Donuts
    Equipment
    Ethnic Breads
    Events
    Gluten Free
    Herbal Breads
    Holidays
    Lake Thunderbird
    Memories Of Mama
    Multigrain Breads
    Pastries
    Pizza
    Places To Visit
    Quick Breads
    Reflections While The Bread Is Rising
    Savory Breads
    Sourdough
    Spirituality
    Stuff Besides Bread
    Sweet Breads
    The Classics
    Tools Of The Trade

    RSS Feed

    Archives

    June 2024
    December 2023
    September 2022
    April 2022
    March 2022
    February 2022
    January 2022
    October 2021
    May 2021
    April 2021
    March 2021
    February 2021
    August 2020
    July 2020
    May 2020
    February 2020
    October 2019
    June 2019
    September 2018
    July 2018
    May 2018
    April 2018
    March 2018
    February 2018
    January 2018
    December 2017
    November 2017
    August 2017
    July 2017
    June 2017
    May 2017
    April 2017
    March 2017
    February 2017
    January 2017
    December 2016
    November 2016
    October 2016
    September 2016
    August 2016
    June 2016
    May 2016
    April 2016
    February 2016
    December 2015
    November 2015
    October 2015
    September 2015
    August 2015
    July 2015
    June 2015
    May 2015
    April 2015
    March 2015
    December 2014
    November 2014
    October 2014
    September 2014
    August 2014
    July 2014
    June 2014
    May 2014
    April 2014
    March 2014
    February 2014
    January 2014
    December 2013
    November 2013
    October 2013
    September 2013
    August 2013
    July 2013
    June 2013
    May 2013
    April 2013
    February 2013
    January 2013
    December 2012
    November 2012
    October 2012
    September 2012
    August 2012
    July 2012
    June 2012
    May 2012
    April 2012
    March 2012
    February 2012
    January 2012
    December 2011
    November 2011
    October 2011
    September 2011

Web Hosting by FatCow