The Bread Monk
  • Home
  • My Bread Blog
  • Breadhead Videos
  • Recipes
  • Fr. Dom's Books
  • Events/Programs
  • Shortcut Stollen
  • New Page

Stitcher in the Kitchen

5/11/2016

2 Comments

 
Picture
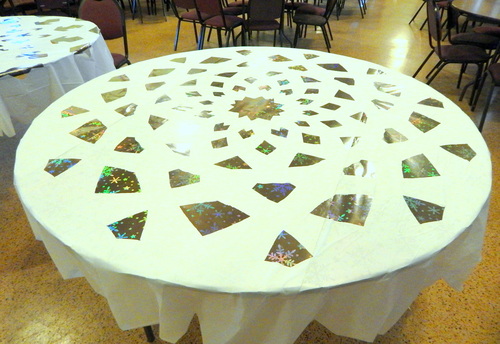
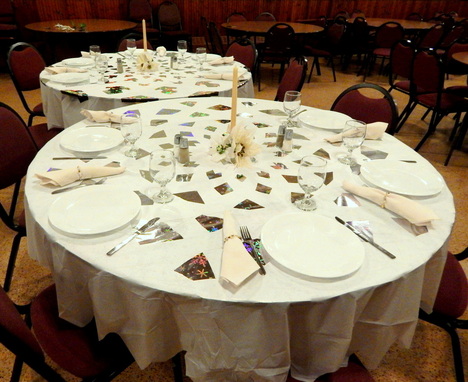
Pinterest is one of my favorite social media sites, not only for bread recipes (although that is reason enough to register!) but also for craft and DIY projects as well as woodworking, as I wrote in a previous Bread Blog. Some time ago I came across a pin of this lovely quilt made with squares cut from vintage dresser scarves and embroidered pillow cases. If you're interested in the quilter's story and want to see more pictures of her exquisite work, you can find her blog HERE. Regular readers of this Bread Blog know that I spend a lot of time in antique malls and thrift shops, and I regularly have come across antique and vintage embroidered linens, often with a rip or a stain which might keep them from display---but what good are they kept languishing in a drawer? I thought this quilt was a glorious way to upcycle them.

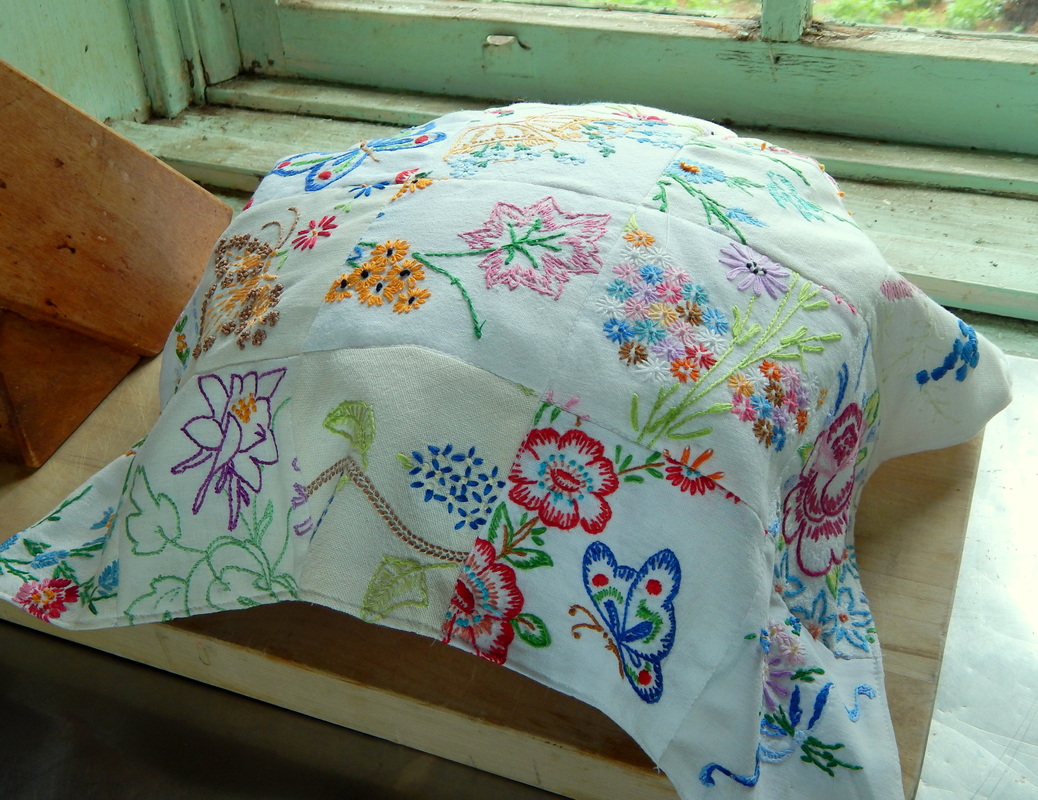
I've studiously avoided quilting for decades, if for no other reason than I know that once you've been stung by the quilting bee there is no turning back. There is ample evidence of this in my mother's home: venturing into her quilting fabric stash in the sewing room closet requires a life line and signal flares to find your way out. Just about the last thing I need is another hobby which requires ample storage space. But this quilt proved too much of an inspiration---or was it temptation? In any case, I knew I didn't have the skills or the time to create an entire queen size quilt. But a little bread quilt to cover the dough while it's rising? That I could manage.

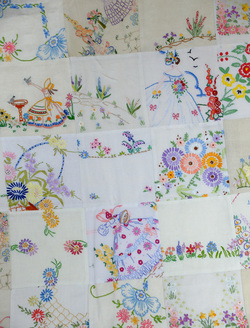
I collected pieces over the course of several months, never paying more than $4. There were some glorious embroidered pillowcases that went for upwards of $15, but my thrifty monastic heart couldn't bear to spend that much. I looked for signs which read "50% off everything in booth" and scoured the piles of linens at Goodwill and the Salvation Army. Soon I had a tote bag full, which I then washed in hot water with OxiClean and ironed carefully.

I cut a 4.5" square out of plexiglas to use as a template so I could actually see what I was cutting and used a small rotary cutter to get good clean edges. I won't bore you with the details of my stitching adventures, but let me say that I made a few mistakes along the way and had what my Grandma Tootsie used to call "a rippin' good time"! I used one of her damask napkins as a backing but without any batting---I didn't want the piece to be too heavy. And may I add that whoever invented the technique known as "stitch in the ditch" obviously did not wear bifocals. 

Picture
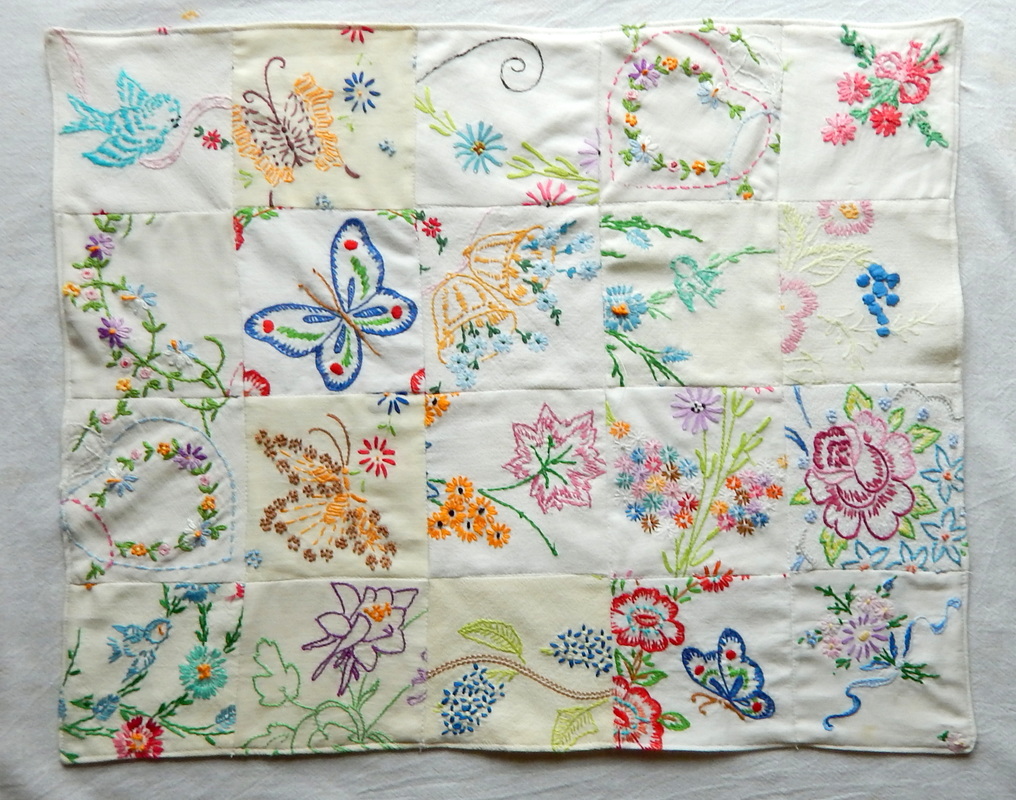
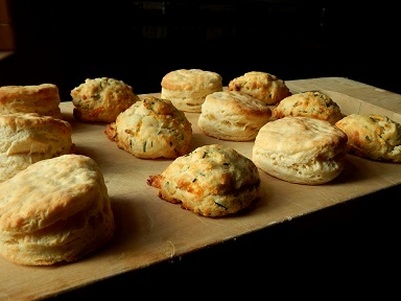
So here is the finished product, puckers and all. It has any number of technical and design flaws and wouldn't take any prizes at the county fair---but I couldn't be happier with it! I'm sure I'll be making more--my mother gave me some of Grandma Tootsie's embroidered linens, which means I know what my sisters are getting for Christmas this year. I figured I'd work out the kinks on this one before I used the family heirlooms. I finished the this morning and went straight to the kitchen to make a batch of white bread so I could put it to use.
Picture
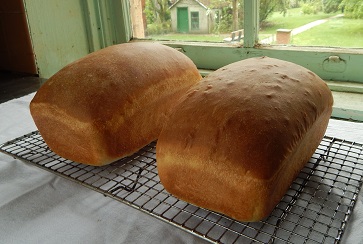
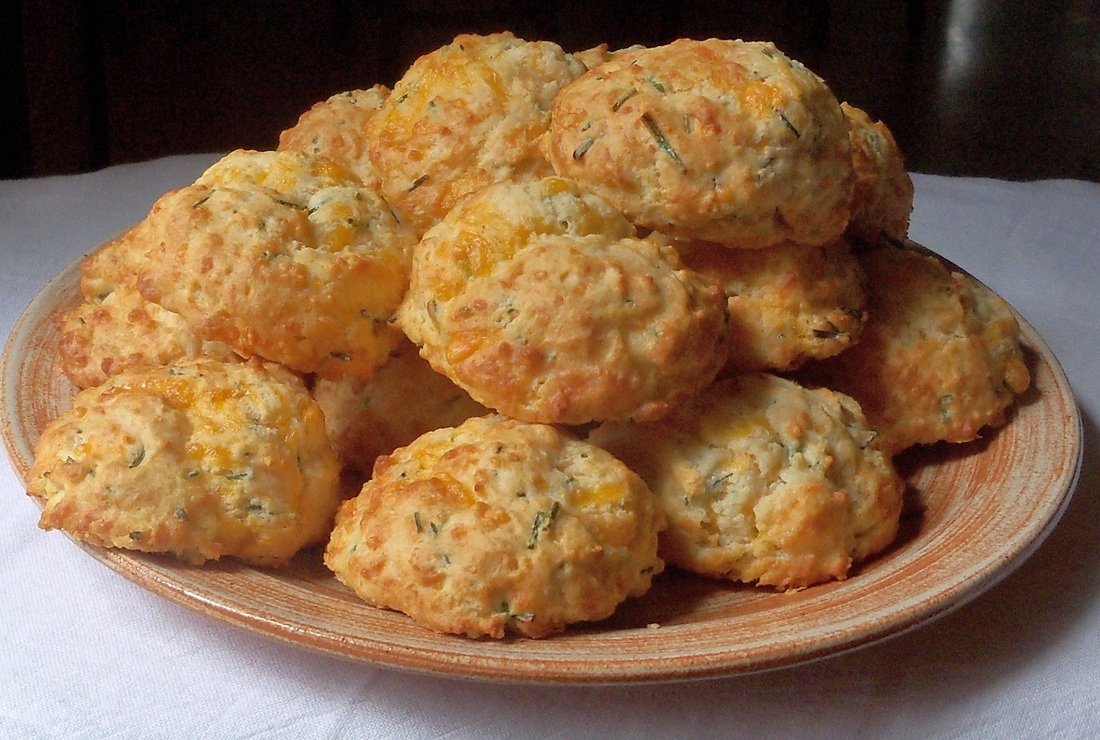
I've always been a firm believer that having beautiful and meaningful tools in the kitchen makes the act of baking more meaningful as well. The dough whisk my mom bought for 50¢ at a rummage sale, the rolling pin made by my father, the antique mixing bowl a friend gave me--having these treasures in the kitchen drawers and cabinets inspire me to take time to bake more often, which is good for my busy soul at the harried end of a school year. Did my bread turn out better as a result? I'll let you be the judge.
Picture
2 Comments

Batter Up!

4/29/2016

0 Comments

 
Picture
I'm embarrassed that it's been so long since I posted---mea culpa!
Tomorrow is our Academy's annual dinner auction, for which I usually have a few bread related items: pizzas delivered to your child's lunch table (which went for $120 last year!), gourmet pizza party for 12 (usually goes for about $1800) and new this year, a catered baseball-themed party.  Here's the description: 
“Batter Up!” Baseball Bash
 
Whether you bleed Cardinal Red or Cubby Blue, this baseball-themed party is bound to be a grand slam for you and up to 20 guests. You provide the “home field” and Fr. Dom and his concession crew will do the rest. Enjoy a tailgate-style menu including "Let's Play Pepper" Pasta Salad, Buffalo Chicken Sliders on homemade pretzel buns, a ballpark hotdog station, and a variety of creative and delicious  snacks and sides. Wash it down with Line Drive Lemonade, and plenty of “Ice cold beer, here!”  At the seventh inning stretch you’ll enjoy “Cardinal Sin” and “Holy Cow” frozen custard sundaes. Choose one night during the Cubs/Cards series of August 12-14, make room for extra chairs in your living room, and we’ll do the rest! 
We'll see how much it goes for. I'll be sure to post all the recipes once I get them all tested. In the meantime, here's a recipe page from an demo I gave in Denver in June of 2014; Ball Park Breads recipe page.
0 Comments

Sour Cream Fastnachts for Mardi Gras

2/7/2016

0 Comments

 
Picture
Wow, it's been quite some time since I posted---my last blog post was before Christmas and here we are about to start Lent! But before the Lenten austerities get underway, treat your family to some deliciously rich Fastnacht fritters.  I may have posted this recipe before, but it's worth it share it again.

The full name for these donuts is fastnacht kuchen, “Fastnacht” being the German word for the day before Ash Wednesday.  There are as many different recipes for these Shrove Tuesday donuts as there are German grandmothers (the Polish grandmas call them paczki).  The majority of them are made with a yeasted dough containing mashed potatoes. I offer here a simpler recipe, easily made and best served fresh.

Depending on the date of Easter, Fat Tuesday is often on or around Valentine’s Day. Using heart shaped cookie cutters for your fastnachts is a good way to combine the two holidays. Plain granulated sugar or powdered sugar may also be used to coat them. Without a sweet topping of some kind, fastnachts can seem a little bland to the American palate, as the recipe has far less sugar than the usual sour cream donut.


Fastnachts
1/3 cup vegetable oil
1/3 sugar
¾ tsp. ground mace or nutmeg
1 cup sour cream (room temperature)
2 eggs (room temperature)
3 cups all-purpose flour
1 tsp. baking soda
2 tsp. baking powder
Vegetable oil for frying
Cinnamon sugar for topping
 
In a medium size bowl, combine oil, sugar, sour cream, and eggs and beat with a whisk for two minutes.  In a separate bowl, sift flour and baking powder and stir until thoroughly combined.  Add egg mixture and stir until just combined. With dough still in bowl, knead gently for 8 or 10 strokes.  Allow dough to rest for 5 minutes.  Preheat oil for frying to 350 degrees.  Pat or roll dough out on a lightly floured surface to about ¼ inch thick.  Cut dough into rectangles about 2” x 3” and cut a short slit down the center of each one.  Fry in hot oil a few at a time, 2 minutes per side, until golden brown.  Drain on paper towels, then toss in cinnamon sugar to coat.  Best if served fresh and warm.

0 Comments

Snowflake Tablecloth

12/14/2015

3 Comments

 
Picture
Here's an idea for your holiday entertaining: make a snowflake tablecloth. I made these for a winter-themed pizza party, but they would be a great addition to a "Frozen" themed birthday party, Christmas, hannukah, etc.  The tables I used were 5' across.
It's actually two layers. First, cover the top of the table with metallic or holographic wrapping paper. It can be in any color, but silver, gold and metallic blue look especially lovely. Tape the wrapping paper to the table with small lengths of double-stick tape on the underside.  Next, take a white round plastic tablecloth and fold it in half, to get a semi circle. Then fold it into thirds (you get a fat "piece of pie" shape), then in half again (a thinner pie shape)---be sure to keep the edges even as you go. Fold it in half one more time to get a shape like the thin sliver of pie you cut when you are on a diet. Use very sharp pair of scissors to cut shapes out of both sides of the wedge, leaving the last 12" of the wide end uncut, so you have a clean overhang. Unfold the round and arrange it over the wrapping paper. 

Picture
These are not the best photos (should have used a flash, I suspect) but you get the idea. Keep your eyes open for inexpensive metallic wrapping paper--I got mine at Big Lots--and buy more than you think you'll need, unless you are unusually good at math and geometry and can calculate exact amounts! The round plastic table-cloths are available at most Family Dollar Stores, or at a wedding rental place. You might buy a couple extra in the case the first one doesn't turn out.

3 Comments

Hoska revisited

12/14/2015

2 Comments

 
Picture
Last year I posted a blog entry about hoska, and noted that I wasn't entirely satisfied with the results of my labors. Well, it's the Christmas season again, so I made another attempt, and I'm much more satisfied with the results. I used the exact same hoska recipe, but was a bit more generous with the candied pineapple and brushed the egg wash on a bit later in the baking process. The brethren love this bread and have suggested that I ought to make it year-round! That candied pineapple is expensive, so in July they may be getting it with golden raisins instead!

2 Comments

Simply Divine Bakery

11/25/2015

0 Comments

 
Picturefrom http://www.indianalandmarks.org/
This past summer I attended a Monastic Worship Forum at Immaculate Conception Monastery, a community of Benedictine sisters in Ferdinand, Indiana. I enjoyed hobnobbing with my fellow music ministers, and took a little time to explore a few antique malls along the way. But from a culinary standpoint,  the best part of the week was a tour of their baking operation, Simply Divine Bakery. The sisters support themselves in part by baking and selling traditional cookies: springerle, shortbread, gingersnaps, buttermints, lemon cookies, and a recipe from St. Hildegarde of Bingen, a Benedictine abbess of the 12th century. You can see their product line HERE, and order them HERE. When you're thinking about holiday gift giving, keep Simply Divine Bakery in mind!  I took some photos of the ones I liked best when I got home with my goodies.

0 Comments

Spring Valley Historical Society Recipes

11/23/2015

1 Comment

 
Here's three of the recipes I presented at my demo for the Spring Valley Historical Society. You can find Bolo Rei on the "Recipes" page. Don't burn the scones!
Picture


Pumpkin Spice Donuts 
with Chai Latte Frosting 
 

1 cup pumpkin (not pumpkin pie filling)
2 eggs,
½ cup pumpkin spice creamer (liquid)
¾ cup packed brown sugar
¼ cup canola oil
2 cups all-purpose flour
2 teaspoons baking powder
2 teaspoons pumpkin pie spice
½ teaspoon salt

Chai Latte Frosting
½ cup sweetened chai tea
2 tablespoons pumpkin spice creamer (liquid)
¼ cup butter
2 cups powdered sugar

Preheat oven to 350 degrees. Prepare two donut pans (12 donuts total) with cooking spray and set aside. In a medium size bowl, combine pumpkin, eggs, creamer, sugar and oil. In a separate bowl, whisk together flour, baking powder, pumpkin pie spice, and salt. Add the flour mixture to pumpkin mixture and stir until nearly smooth—do not overbeat. 

Transfer the batter to a large ziploc bag and expel excess air before sealing. Snip one corner of the bag and pipe batter into donut pans---each section will be slightly more than half full. Bake for 12-15 minutes or until donuts are lightly browned and spring back when touched. Allow donuts to rest about five minutes in pan before removing to cool on a wire.

For frosting
In a small saucepan over low heat, bring sweetened chai tea to a simmer and reduce to about three tablespoons. Cool completely and stir in creamer. Whisk in butter and powdered sugar until smooth. Use to frost donuts. If you want a light glaze instead of frosting, omit butter and use only one cup of powdered sugar.


Picture


Chocolate Raspberry Scones 

2 cups all-purpose flour
¼ cup unsweetened cocoa powder
½ cup granulated sugar
1 Tbs. baking powder
1/8 tsp. baking soda
¼ teaspoon salt
½ cup (1 stick) of chilled butter
½ cup buttermilk
1 large egg, beaten
1/3 cup semi-sweet chocolate chips, chopped fine 
½ cup raspberry preserves or cake filling
OR 1 cup of fresh raspberries

Preheat oven to 400 degrees, and lightly grease a baking sheet or cookie pan. Sift flour, cocoa, sugar, baking powder, baking soda and salt into a medium size bowl and stir thoroughly. Cut butter into small pieces. Using a pastry blender or two sharp knives, blend butter into the dry ingredients until the mixture resembles coarse crumbs. Stir in chopped chocolate chips. In another small bowl, whisk buttermilk and egg together until well blended. Pour into dry ingredients and stir with a wooden spoon until just moistened, but do not overmix. Turn dough out onto a lightly floured surface and knead gently for 8 or 10 strokes. Divide in half, and on a lightly floured surface, pat each piece into a flattened  8” round. Lay one round on the pan and spread the top with the raspberry preserves or fresh raspberries. Lay the second round on top. Using a large knife or metal spatula, cut dough into 8 wedges, wiping knife after each cut. Bake at 400 degrees for 15 to 20 minutes, or until round is firm on the edges but still slightly soft in the middle. Cool on a wire rack, then cut apart before serving. 


Picture


Apricot Skillet Bread

1 cup yogurt (plain or flavored)
2 eggs (or egg substitute)

½ cup yellow cornmeal 
1 cup spelt flour (or all-purpose)
2 Tbs. brown sugar or honey
1 Tbs. wheat germ
2 tsp. baking powder
1 tsp, ground coriander seed
½ tsp. ground ginger
½ tsp. salt

Preheat oven to 400° F.  In a medium size sauce pan, warm yogurt over low heat until liquid.  Remove from heat, and add apricots and eggs; stir until blended.  In another bowl, mix all dry ingredients thoroughly.  Lightly grease a 10" cast iron skillet, and place in the oven for five minutes.  Pour yogurt mixture onto dry ingredients and stir until just moistened.  Remove skillet from oven and pour in batter, smoothing the top with a spatula or spoon.  Immediately place in oven and bake for at least 20 minutes.  To test for doneness, insert a toothpick in the center of the bread and remove--if it comes out clean, the bread is done.  If not, return to oven for five more minutes.  Leave in the pan for five minutes after it comes out of the oven.  Then, remove the flatbread by placing one hand (protected by an oven mitt or towel) on top of the bread and turning the pan upside down with the other hand, catching the bread in your hand as it comes out.  If bread does not come out easily, allow to cool in pan for a few minutes, then try again. Allow to cool on a wire rack for 10 more minutes, then cut into wedges and serve. 


    Questions? Contact Fr. Dom!

Submit
1 Comment

Compound Butters

11/23/2015

1 Comment

 
PictureRaspberry Walnut, Five Spice, Cranberry Orange, Honey Coriander & Sweet Siracha.
It's been awhile since I posted, for which I apologize--been busy with the cookbook and, up until November 14th, our fall theatre production of one act plays. My part of the cookbook is nearly finished, Deo gratias, except for a few more photos, some introductory material, and a handful of recipes. Several weeks ago I was in "The Scone Zone" but this weekend I spent a morning mixing compound butters. I think I have a new food obsession!

Compound butters are simply mixtures of butter with other ingredients or flavorings. They can be sweet or savory, and are used to enhance the flavor of everything from morning toast to midnight snack and everything in between. Many savory compound butters are used as a topping for steak, including such French classics as such as beurre à la bourguignonne (garlic and parsley butter) or beurre Maitre d’Hotel (butter with parsley and lemon juice). I've been making savory herb butters for years using the fruits of our labors in the abbey garden and apiary, but I decided to expand my repertoire into sweet butters for the new cookbook. The pictures are above, the recipes below.

Note: For savory butters involving herbs, garlic and cheeses, I use salted butter. For sweet butters, I recommend using unsalted butter and adding just a pinch of salt to enhance the flavors. 

Clockwise, from top

Raspberry Walnut Butter:
1 stick unsalted butter, softened
¼ cup raspberries, lightly mashed
1 tablespoon honey
¼ cup toasted walnuts, chopped (optional)
Mix this by hand, not with a food processor, or the raspberries will become liquified. The crunch of the walnuts is a welcome addition, especially when this butter is served on a warm bagel. 

 
Brown Sugar Spice Butter
1 stick unsalted butter, softened
2 tablespoon brown sugar
½  teaspoon pure vanilla extract
½ teaspoon Chinese five spice 
Be sure you make this well in advance, so the brown sugar can dissolve completely in the butter, best achieved with an electric mixer or small food-processor. The Chinese five spice usually includes fennel and star anise, along with cinnamon, pepper and cloves, so it has a spicy flavor with licorice overtones. It’s delicious on a toasted English muffin.
   
Cranberry Citrus Butter
1 cup fresh cranberries
2 sticks unsalted butter, softened
zest and juice of half a medium orange or lime
¼ cup chopped toasted pecans
honey to taste
This butter has a flavor profile similar to the classic fresh cranberry salad, although using lime instead of orange gives it a deliciously tart twist. Try this on a plain dinner roll or croissant. 
 
Honey Coriander Butter
1
stick unsalted butter
¼ cup honey 
1 teaspoon ground coriander
A good introduction to coriander, the seed of the cilantro plant but with a very different flavor: spicy with a citrusy undertone. I love this on top of cornbread or Irish soda bread.

Honey Siracha butter
1 stick unsalted butter, softened
1 tablespoon honey
1 teaspoons Siracha
pinch of salt
Sweet and hot in an increasingly popular flavor combination, and this butter is an easy way to add it to your culinary experimentation. Spread this over toast and top it with a poached egg. You can add more siracha to taste, and consider adding a little orange or lemon zest for another layer of flavor.


1 Comment

Chocolate Raspberry Scones

10/15/2015

1 Comment

 
Picture
Chocolate Raspberry Scones are a delicious addition to a buffet.
Norfolk Scones are scones made in two layers with a fruit filling, usually currents. Since so many people love the flavors of chocolate and raspberry,I decided to give that a try. Fresh raspberries are best of course, but we rarely have those around, so I use Solo Raspberry Cake and Pastry Filling or thick raspberry preserves. I posted a picture on Facebook recently and got an enthusiastic response, so I'm posting the recipe here. It appeared originally in More Breaking Bread with Father Dominic.  

I once worked on a PBS pledge drive in Milwaukee and made these live on camera in an unfamiliar kitchen set, then served them to the volunteers as they were answering phones.  So you should have no trouble making them at home. My buddy Greg made the (slightly exaggerated) comment: “These are so light and so good that you could eat them until you were violently ill, and you wouldn’t really mind.”  The lightness comes from using buttermilk instead of heavy cream, a suggestion I received from a Breadhead to whom I owe my thanks.  I have even made these with powdered buttermilk (look in the same aisle as non-fat dry milk) and they turned out just as light and delicious as the ones made with the fresh product.

Chop the chocolate chips in a blender or food processor if you have such—I just use a heavy chef’s knife.  They should still be granular rather than powdered.  And if it’s a hot day, put them in the freezer to firm up, or you’ll end up with a gooey mess! You can substitute strawberry preserves for the raspberry, but fresh strawberries don’t work very well in this recipe. 

Chocolate Raspberry Scones
2 cups all-purpose flour
¼ cup unsweetened cocoa powder
½ cup granulated sugar
1 Tbs. baking powder
1/8 tsp. baking soda
¼ teaspoon salt
½ cup (1 stick) of chilled butter
½ cup buttermilk
1 large egg, beaten
1/3 cup semi-sweet chocolate chips, chopped fine 
½ cup raspberry preserves or cake filling
OR 1 cup of fresh raspberries

Preheat oven to 400 degrees, and lightly grease a baking sheet or cookie pan. Sift flour, cocoa, sugar, baking powder, baking soda and salt into a medium size bowl and stir thoroughly. Cut butter into small pieces. Using a pastry blender or two sharp knives, blend butter into the dry ingredients until the mixture resembles coarse crumbs. Stir in chopped chocolate chips. In another small bowl, whisk buttermilk and egg together until well blended. Pour into dry ingredients and stir with a wooden spoon until just moistened, but do not overmix. Turn dough out onto a lightly floured surface and knead gently for 8 or 10 strokes. Divide in half, and on a lightly floured surface, pat each piece into a flattened  8” round. Lay one round on the pan and spread the top with the raspberry preserves or fresh raspberries. Lay the second round on top. Using a large knife or metal spatula, cut dough into 8 wedges, wiping knife after each cut. Bake at 400 degrees for 15 to 20 minutes, or until round is firm on the edges but still slightly soft in the middle. Cool on a wire rack, then cut apart before serving. 

God bless and happy baking!
1 Comment

Cheddar Chive Drop Biscuits

10/13/2015

1 Comment

 
Picture
Today when I walked into the kitchen after school, as usual I took a peek at the menu for supper: creamed chicken over cheddar biscuits. Unfortunately I knew, with some dread, what that meant: tiny, dry hockey pucks from the freezer, loaded with partially hydrogenated blandness.

Not on my watch.

So I rolled up my sleeves and banged out Biscuits of Victory and a batch of Cheddar Chive Drop Biscuits. These latter are very similar to the ones everyone loves at Red Lobster. Except way better and way cheaper and they're done in about 30 minutes. Drop biscuits are a breeze and you don't need a rolling pin or biscuit cutter. A Pastry blender is useful, however, and I recommend the one with metal blades rather than wire. The recipe calls for shortening, but I used butter because that's what I had in the house. 

God bless and happy baking!

Picture
Cheddar Chive Drop Biscuits 
2 cups all-purpose flour or gluten-free baking mix
½ tsp. salt
1 Tbs. sugar
2 tsp. baking powder
2 to 4 Tbs. chopped fresh chives
½ cup vegetable shortening
1 cup milk
¼ cup shredded sharp white or yellow cheddar

Preheat oven to 425 degrees. Stir dry ingredients together in a medium size bowl.  Cut in vegetable shortening using a pastry blender or two knives.  Add milk and stir until just blended.  Drop by tablespoons onto a lightly greased baking sheet.  Bake at 425 degrees for 12 to 15 minutes, or until lightly browned.  Cool slightly and serve warm.  Makes 12 biscuits.
1 Comment
<<Previous
Forward>>

    Author

    Fr. Dominic Garramone AKA 
    the Bread Monk

    Categories

    All
    Breadhead Bookshelf
    Breakfast Breads
    Buns Rolls And Biscuits
    Craftsy
    Donuts
    Equipment
    Ethnic Breads
    Events
    Gluten Free
    Herbal Breads
    Holidays
    Lake Thunderbird
    Memories Of Mama
    Multigrain Breads
    Pastries
    Pizza
    Places To Visit
    Quick Breads
    Reflections While The Bread Is Rising
    Savory Breads
    Sourdough
    Spirituality
    Stuff Besides Bread
    Sweet Breads
    The Classics
    Tools Of The Trade

    RSS Feed

    Archives

    June 2024
    December 2023
    September 2022
    April 2022
    March 2022
    February 2022
    January 2022
    October 2021
    May 2021
    April 2021
    March 2021
    February 2021
    August 2020
    July 2020
    May 2020
    February 2020
    October 2019
    June 2019
    September 2018
    July 2018
    May 2018
    April 2018
    March 2018
    February 2018
    January 2018
    December 2017
    November 2017
    August 2017
    July 2017
    June 2017
    May 2017
    April 2017
    March 2017
    February 2017
    January 2017
    December 2016
    November 2016
    October 2016
    September 2016
    August 2016
    June 2016
    May 2016
    April 2016
    February 2016
    December 2015
    November 2015
    October 2015
    September 2015
    August 2015
    July 2015
    June 2015
    May 2015
    April 2015
    March 2015
    December 2014
    November 2014
    October 2014
    September 2014
    August 2014
    July 2014
    June 2014
    May 2014
    April 2014
    March 2014
    February 2014
    January 2014
    December 2013
    November 2013
    October 2013
    September 2013
    August 2013
    July 2013
    June 2013
    May 2013
    April 2013
    February 2013
    January 2013
    December 2012
    November 2012
    October 2012
    September 2012
    August 2012
    July 2012
    June 2012
    May 2012
    April 2012
    March 2012
    February 2012
    January 2012
    December 2011
    November 2011
    October 2011
    September 2011

Web Hosting by FatCow