The Bread Monk
  • Home
  • My Bread Blog
  • Breadhead Videos
  • Recipes
  • Fr. Dom's Books
  • Events/Programs
  • Shortcut Stollen
  • New Page

Peanut Butter Bread

11/14/2013

0 Comments

 
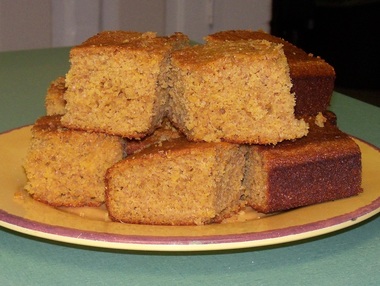
A Breadhead on my Facebook Page asked if I had a recipe for Peanut Butter Bread.  As a matter of fact I do, although the directions are for a loaf shaped like a caterpillar and decoarted with candy for the child's party!  I regret that I don't have a picture, (if some Breadhead out there makes this, please send us photos to post) but here's the recipe:


Magic Caterpillar Peanut Butter Bread 
1 pkg. active dry yeast
¼ cup warm water (100° to 110° F.)
1cup milk
¾ cup chunky peanut butter
¼ cup sugar
1 tsp. salt
3¼ to 3½ cups all-purpose flour
Tubes of colored frosting, candies, gumdrops, licorice, etc.

In a medium size bowl, dissolve yeast in warm water and allow to stand until foamy, about 10 minutes.  In a small saucepan, combine milk, peanut butter, sugar and salt, and cook over medium heat, stirring constantly until blended smooth.  Cool mixture to lukewarm, then pour into yeast.  Stir in flour, one cup at a time, mixing each time until flour is thoroughly incorporated.  Turn dough out onto a lightly floured board and knead for 5 minutes, adding small amounts of remaining flour as needed to keep dough manageable.  Lightly oil the surface of the dough, and place it in a clean bowl.  Cover with a dry cloth and allow to rise in a warm place free from drafts for one hour.  


Punch dough down and knead briefly to expel larger air bubbles.  Lightly grease a 12” x 18” pan.  Roll dough into a rope about 24” long, and form into a large “S” shape on the pan.  Using a butter knife or dough scraper, chop rope into sections about 3” wide, but do not separate completely.  Cover with a towel and let rise 30 minutes (the caterpillar will “magically” grow back together during rising and baking).  Bake in a preheated oven at 375° F. for 25 minutes, or until top is golden brown.  Allow to cool on the pan for 15 minutes before removing to wire rack to cool completely.  Decorate with frosting, gumdrops or other candy.  Poke holes in the side with a toothpick and insert sections of licorice for legs.

Notes --- If you don't think your child is ready for a full bread baking lesson, you can always enlist him or her in the decorating phase of bread.  This recipe for Magic Caterpillar Peanut Butter Bread is a fun project for a rainy day when there's nothing to do, or for a birthday party activity that will keep kids entertained and produce some of the treats.  I recommend working with a smaller group of kids (five would work but be a bit crowded), or have one or two in the kitchen while others are doing something else.

---Decorating gel does not work as well as frosting as a “glue” for the candy decorations, so make sure you pick up the right tube at the store.  Any candies will work to make spots for the caterpillar’s sections, but thin red licorice makes the perfect legs and antennae, unless you know your youngsters prefer the flavor of black licorice.


0 Comments

Spinach Pesto Pizza

10/31/2013

0 Comments

 
Picture
Photo by Elizabeth Steffen
Last day of National Pizza Month!  This is Spinach Pesto Pizza,  which I developed because we had scads of spinach coming in from the garden. Since fresh spinach is pretty much available year round, it's a great veggie pizza to serve anytime.  I make it with red onion, baby belle mushrooms and baby Swiss cheese, but feel free to experiment.

Spinach Pesto
Makes 1½ cups
4 cups washed, torn spinach leaves, stems removed, well packed, about 6 ounces

3 garlic cloves
½ cup walnuts or pistachio nuts, toasted
1/3 cup extra virgin olive oil
3 oz. grated Romano Pecorino cheese
Juice of ½ lemon
Salt and pepper to taste

Place 2 cups of spinach leaves, garlic, nuts, and lemon juice in a food processor container. Cover and puree until well blended.  Add remaining spinach and olive oil, and blend until smooth.  Fold in Romano cheese, and adjust seasoning. 

Notes
---A great alternative to traditional pesto, especially when it’s too early for basil and the spinach is the star of the garden.  By the way, mixing in a little arugula, endive or other salad greens can give you subtle variations on flavor.  A quarter cup of fresh parsley is a nice addition as well. 
---This pesto is a gorgeous bright green with a fresh flavor to match.  You can also use it for pasta like traditional pesto (it’s excellent with seafood ravioli or cheese tortellini) and makes an unusual dip for crudités--- just be sure to let everyone know it’s NOT guacamole! 
0 Comments

Mornay sauce for Pizza

10/29/2013

0 Comments

 
Picture
It's still National Pizza Month, so I thought I'd share my recipe for mornay sauce for pizza.  It's a little thicker than the sauce you might use for vegetables, and is a great alternative to tomato-based sauces.  I use it for this asparagus and ham pizza, but it also goes great with broccoli and chicken, any veggie pizza, or even sun-dried tomatoes and slivered almonds on a thin crust as an appetizer pizza.  

Mornay Sauce
1 cup milk
1 quarter of a small red onion
1 bay leaf
2 Tbs. butter
2 Tbs. all-purpose flour
¼ cup grated Parmesan cheese
¼ cup shredded white cheddar
salt and pepper to taste

Place milk, onion and bay leaf in a small pan over medium heat; simmer for 10 minutes but do not boil.  Remove from heat and discard onion and bay leaf.  In a separate small sauce pan, melt butter over medium heat.  Add flour and whisk until smooth.  Cook until a light tan color, whisking constantly—about 2 minutes.  Gradually add the milk and continue to whisk over medium high heat until mixture is thickened and coats the back of a spoon, about 4 minutes.  Remove from heat and whisk in cheese until smooth.  Add salt and pepper to taste.

Notes:
---Mornay sauce is traditionally made with Parmesan and Gruyère cheeses, but I find that Gruyère is expensive and often hard to come by, so I use a white cheddar.  Swiss cheese can also be substituted.  White pepper is generally preferred for a white sauce such as this one, but use whatever you have at home.  A pinch of paprika is a nice addition, too.
---You’ll only need about half of this sauce to make a 12” to 14” pizza, but the remainder can be refrigerated and used to dress up your boring microwaved vegetables for lunch at work.  When used the next day it may need a little milk or half and half to thin it. Or use the whole batch to make a rather elegant mac-and-cheese.  When asked about it, you can shrug and say, “Oh, it’s just a little Mornay sauce I whipped up last night.”  Try not to sound too smug. 

0 Comments

Apple Spice Cake

10/28/2013

0 Comments

 
Picture
Dedicated Breadhead Mary Anne Walsh sent me pictures of her recent success in making the apple spice cake from my cookbook from season three of Breaking Bread.  Since it's the perfect season for that kind of baking, I thought I'd post her photo to inspire you to try it for yourself.  To get the recipe, click HERE. 

Picture
Quite some time ago (nearly a year!) Anne Miller of Minnesota sent me some photos of her baking success for the state fair.  She entered a loaf of Italian Onion Herb Bread (from season 1 of BBWFD) and it took first prize!   She sent some other pictures, including one of Honey Oatmeal  Bread---gorgeous!  The recipe for Italian Onion Herb Bread is HERE, and you can check out more of her photos HERE.

0 Comments

Fall Quick Breads at St. Louis CCW

10/23/2013

1 Comment

 
Picture
We had a lovely evening last night at St. Louis parish in Princeton IL.  The local chapter of the Council of Catholic Women had invited me last February to give a presentation but it was cancelled because of freezing rain.  After a few other attempts, we re-scheduled for last night---and in the late morning it started to SNOW!  Fortunately, it didn't stick around long and didn't seem to deter anyone.  We had over 50 ladies attend.
    The committee served three different kinds of soup plus crackers, and then we passed around all of my samples as well.  I made the cheddar chive drop biscuits pictured above (recipe HERE) plus I had a batch made ahead using Italian herbs and cheeses.  They mix up in no time and bake for only 12 - 15 minutes, so you can be serving them hot in less than half an hour.  I followed my sister Lisa's suggestion and brushed them with garlic butter before serving.

Picture
  
 
       Next up, Nutty Whole Grain Shortcake, which veteran Breadheads have seen on this blog before (click HERE for the recipe).   The flavors of this fall dessert are exquisite, and you get the taste of sweet, tart, salt and bitter all at once.  You can make this with just about any fruit, but I like it best with apples, pears, or peaches.  If you're in a pinch, you can even top it with apple pie filling, but I usually cut the apple slices a little smaller and add a dash of apple cider vinegar to increase the tartness---some extra cinnamon doesn't hurt either.  We made smaller sample-sized portions and let everyone have a taste.

Picture
Lastly, I made another monastery fall favorite: gluten-free Pumpkin Scones with cream cheese filling (click HERE for the recipe).  Everyone loved these, especially our one celiac sufferer.  I used Hodgson Mill's Gluten Free Baking Mix (click HERE to see their whole gluten-free product line*), but have also been successful with this recipe using gluten--free mixes from King Arthur Flour and Bob's Red Mill.  All-purpose flour works fine for those who don't have dietary restrictions.  Spreading the sweetened cream cheese over the bottom layer of soft scone dough is tricky--it's actually easiest to place it as a series of small blobs with a teaspoon!--but the filling makes the scone wonderfully moist. 

     We were having too much fun last night to think to take any pictures, but I hope the photos above will inspire to try one or more of these recipes.  Remember, if you have photos of breads you've baked that you'd like to share, e-mail them to me at [email protected], and I'll try to post them on the Breadhead Gallery page.

*Hodgson Mill sent me a selection of their gluten-free products to try.  Opinions here are my own, and I have received no other compensation for this post.


1 Comment

Wheat breads

10/10/2013

2 Comments

 
Picture
My friend and fellow blogger Kimberly and her husband are trying to eat as little processed food as possible for the month of October.  She's posting some amazing recipes on her website (click HERE to check it out), and she's inspired me to bake more whole grain breads these days.  I have a five gallon bucket worth of wheat kernels that I can grind fresh for bread, so I should be using it, right?


First off, Molasses Wheat Cornbread (above).  I developed this recipe with some students years ago and never published it.  It has no white flour at all, and the molasses gives it an earthy taste that most people have loved.  It you're not a fan of molasses, you can use barley malt syrup or raw honey instead.  Click HERE to get the recipe.


I also made a big batch of multi-grain bread today (14 loaves).  I just made the recipe up as I went along, so I can't give you any proportions, but Anna's Honey Wheat Bread would come pretty close.  I recently read, however, that you shouldn't knead dough made with stone ground flours for as long, because the edges of the bran cut the strands of gluten.  I had always heard that you had to knead them longer.  Tried the shorter kneading time and I think I got loftier, lighter loaves.  Stay tuned for more experimentation.

Picture
I also read online recently that a tomato knife does a fine job of slashing loaves before baking.  Tried it on the big bake tonight and I have to say I'm very pleased with the results.  The photo below shows the results of the bake, although two loaves had already disappeared!  I think a wavy-blade sandwich knife would work well, too, so I'll have to experiment with that soon, too.

Picture
2 Comments

8 Minute Pizza Sauce for National Pizza Month

10/7/2013

1 Comment

 
Picture
October is National Pizza Month and I've been posting daily #pizzatweets on Twitter (check the birdie icon in the upper right corner of this page to follow me) but I figured at least once of week I should post a recipe.  So here's my "8 Minute Pizza Sauce" recipe from my book Thursday Night Pizza (click HERE to order a signed copy from the Saint Bede Abbey Press).  

I start with crushed tomatoes, so that you get better tomato flavor, a trick I learned from Alton Brown.  The red wine gives it some depth, and simmering for only three minutes ensures that you don't cook all the essential oils out of the herbs.   If there 's any leftover sauce, use it to make bagel pizzas under the broiler for breakfast.  You could also add a little more basil and garlic and some sauteed onion, and you'll have a single serving of pasta sauce to take to work.

Keep checking back for more pizza recipes this month.  

God bless and happy baking!

8 Minute Pizza Sauce
1 15-oz. can of crushed tomatoes, undrained
¼ cup tomato paste (about half a six ounce can)
¼ cup red wine
2 small cloves of garlic, minced
3 Tbs. grated Parmesan
1 tsp. dried oregano
¼ tsp. dried basil
¼ tsp. black pepper
Salt to taste

In a medium sauce pan, heat tomatoes, paste and wine over medium high heat for 5 minutes, stirring constantly.  Stir in the seasonings, turn heat down and simmer for 3 minutes.  Remove from heat and cool to lukewarm before use.  May be refrigerated for up to three days.

1 Comment

Minestrone recipe

10/5/2013

1 Comment

 
Picture
A friend requested my minestrone recipe.  I don't have a photo other than this one of my mom and I making minestrone in the abbey kitchen for our family Christmas a few years ago.  You'll enjoy this soup a lot more if you make the sausage yourself using lean ground pork rather than using whatever's in the case at the supermarket.  Better still, double the recipe and use half pork and half turkey---far less grease to skim off the top of your soup.  The recipe for the sausage is included below.  You can use whatever pasta you like.  I've made it with rotini, ditalini, pennette, orichette, shells, macaroni---whatever's in the pantry will work. 


Minestrone
1 to 1½  lbs. bulk Italian sausage, browned and drained
Olive oil (if needed)
1  medium onions, chopped
3 cloves of garlic, minced
1 15 oz. can pizza sauce
4 cups beef stock or bouillon
2 cups chicken stock or bouillon
1 cup dry red wine
2 tbs. grated Romano cheese
1 Tbs. Italian seasoning mix
1 medium green pepper, seeded and chopped
1 medium zucchini, diced
2 cups bowtie pasta
salt and pepper

Brown the sausage; remove from pan and cool.  If there is not enough fat left in the pan, add a small amount of olive oil.  Sautee onions and garlic until limp, about 5 minutes.  Add pizza sauce, beef and chicken stock, wine and sausage.  Simmer, covered, for 25 minutes.  Add cheese, herbs, green pepper, and zucchini; simmer, uncovered, for 20 to 25 minutes.  In a separate pan, boil pasta until not quite cooked.  Drain and rinse with cold water to stop the cooking process.  About 10 minutes before serving, add the pasta to the soup and simmer until pasta is al dente.  Salt and pepper to taste.  Serves 6 to 8.

Hot Italian Sausage
1 lb. lean ground pork             2 tsp. Italian herb blend
1½ tsp. garlic powder             1½ tsp. fennel seed
½ tsp celery salt                      1 tsp crushed red pepper
2 tsp. black pepper                 ¾ tsp. salt

Mix thoroughly in a bowl, cover and refrigerate until use.  I like to let the flavors marry for about 2 hours before I cook this up.


1 Comment

Harvest Lattice Braid

10/1/2013

0 Comments

 
Picture
These photos are not the greatest, but I did want to share this recipe for a “Harvest Braid” which uses the “lattice” technique for shaping a loaf.  It appears braided but is actually a series of strips folded over the top of the filling.  It's filled with ham, sharp cheddar, chopped apples, and walnuts--perfect flavors for fall baking.  Easy and beautiful!

Harvest Braid
Any dough, enough for one loaf of bread
1 ½ cups coarsely chopped ham
1 ½ cups sharp Cheddar cheese
½ cup chopped walnuts
1 ¼ cups peeled and chopped apples
1 egg beaten with 1 tablespoon of water for egg wash (optional)

Prepare dough though the first rising.  Punch dough down and knead briefly to expel larger air bubbles.  On a lightly floured board, roll out to a rectangle about 18 x 10 inches.  Prepare filling by combining ham and cheese in a medium size bowl and tossing to mix.  Spread filling lengthwise in the center third of the dough, pressing it together lightly. 

Picture
Picture
Using a sharp knife or a small pizza cutter, cut each outer third of the dough (the part not covered by the filling) into 5 to 10 diagonal strips, cutting from the edge of the dough to about 1 inch from the edge of the filling.  Lightly brush strips with water.  Fold strips over filling, alternating left and right, being careful not to stretch the dough.  Tuck in the ends of the last strips and pinch to seal.  Carefully transfer to a lightly greased 13 x 9 x 2-inch baking pan.  Cover and let rise in a warm, draft-free place for 30 minutes or until doubled.

If desired, brush surface of loaf with egg wash.  Bake in a preheated 375 degree oven for 30 minutes or until golden brown and the temperature of the filling is at least 160 degrees.  Allow to cool on pan for 10 minutes before removing to a wire rack to cool slightly before serving.

0 Comments

Italian Herbal Swirl Bread

9/28/2013

0 Comments

 
Picture
Anyone familiar with this website will recognize the bread pictured at the right as the header photo from my home page.  It's Italian Herbal Swirl Bread, featured in my book Bake and Be Blessed.  It occurred today that I've never posted a recipe for it.  Since we're coming to the end of summer and it's time to use up all those fragrant herbs growing rampant in the abbey kitchen garden, I figured I'd share the recipe this week.

Picture
Use whatever fresh herbs you have on hand, even if they aren't Italian.  Just go easy on the rosemary and the sage---a little goes a long way---and remember that the leaves should be loosely packed when measured.  If you try a different combination of herbs you really like, be sure to add a comment to this post, or better yet, send me a picture for the Breadhead Gallery!

Italian Herbal Swirl

Dough
2 cups warm water                  ¼ cup olive oil
2 pkg. dry yeast                      ½ cup stone ground cornmeal
1 tsp. salt                                 5 to 5 ½ cups bread flour

Filling
1 cup ricotta cheese                 ¼ cup fresh oregano leaves
½ cup fresh parsley leaves      ½ cup fresh basil leaves
1 cup snipped chives               salt and pepper

NOTE: All herbs should be loosely packed when measured.

            Put water into a large bowl.  Add yeast, stir to dissolve.  Add salt, oil and cornmeal and beat well.  Add 4 cups of flour, one cup at a time, mixing thoroughly each time until flour is thoroughly incorporated and beat well.  Work in enough of remaining flour to form a soft dough.  Knead for 6 to 8 minutes.  Place in large bowl and cover with a dish towel.  Let rise in a warm place free from drafts for about one hour, or until doubled in volume. 

Coarsely chop parsley, oregano and basil leaves and toss together with the chives until mixed.  Punch dough down and knead briefly.  Divide in half, and roll each half into a rectangle 12’ wide and 14” high.  Spread ½ cup of ricotta evenly over each half of dough and sprinkle on chopped herbs.  Sprinkle lightly with salt and pepper.  Roll up jellyroll style and place seam side down on parchment on an 11” x 15” baking sheet.  Cover with a dry towel and let rise until nearly doubled, about 30 minutes.  Make 5 diagonal slashes with a sharp knife or razor blade on the top of each loaf.  Bake at 400 degrees F. for 15 to 20 minutes.  Bread is done when lightly browned and sounds hollow when tapped.  Cool on racks.

0 Comments
<<Previous
Forward>>

    Author

    Fr. Dominic Garramone AKA 
    the Bread Monk

    Categories

    All
    Breadhead Bookshelf
    Breakfast Breads
    Buns Rolls And Biscuits
    Craftsy
    Donuts
    Equipment
    Ethnic Breads
    Events
    Gluten Free
    Herbal Breads
    Holidays
    Lake Thunderbird
    Memories Of Mama
    Multigrain Breads
    Pastries
    Pizza
    Places To Visit
    Quick Breads
    Reflections While The Bread Is Rising
    Savory Breads
    Sourdough
    Spirituality
    Stuff Besides Bread
    Sweet Breads
    The Classics
    Tools Of The Trade

    RSS Feed

    Archives

    June 2024
    December 2023
    September 2022
    April 2022
    March 2022
    February 2022
    January 2022
    October 2021
    May 2021
    April 2021
    March 2021
    February 2021
    August 2020
    July 2020
    May 2020
    February 2020
    October 2019
    June 2019
    September 2018
    July 2018
    May 2018
    April 2018
    March 2018
    February 2018
    January 2018
    December 2017
    November 2017
    August 2017
    July 2017
    June 2017
    May 2017
    April 2017
    March 2017
    February 2017
    January 2017
    December 2016
    November 2016
    October 2016
    September 2016
    August 2016
    June 2016
    May 2016
    April 2016
    February 2016
    December 2015
    November 2015
    October 2015
    September 2015
    August 2015
    July 2015
    June 2015
    May 2015
    April 2015
    March 2015
    December 2014
    November 2014
    October 2014
    September 2014
    August 2014
    July 2014
    June 2014
    May 2014
    April 2014
    March 2014
    February 2014
    January 2014
    December 2013
    November 2013
    October 2013
    September 2013
    August 2013
    July 2013
    June 2013
    May 2013
    April 2013
    February 2013
    January 2013
    December 2012
    November 2012
    October 2012
    September 2012
    August 2012
    July 2012
    June 2012
    May 2012
    April 2012
    March 2012
    February 2012
    January 2012
    December 2011
    November 2011
    October 2011
    September 2011

Web Hosting by FatCow