The Bread Monk
  • Home
  • My Bread Blog
  • Breadhead Videos
  • Recipes
  • Fr. Dom's Books
  • Events/Programs
  • Shortcut Stollen
  • New Page

Marcus Aurelius and Coffee Cake

6/11/2015

0 Comments

 
Picture
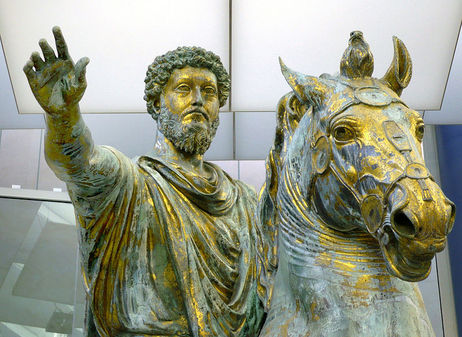
Marcus Aurelius’s original statue in Rome, by Zanner. Public domain via Wikimedia Commons.
Recently I started reading the Meditations of Marcus Aurelius, Roman emperor and Stoic philosopher. You might wonder what value there might be in such a project; you'll find a thoughtful blog HERE written by an Oxford professor about the Meditations' relevance today. For myself I offer no explanation other than it seemed to me that a well educated person should have read them at some point, especially someone like me who minored in Philosophy. 

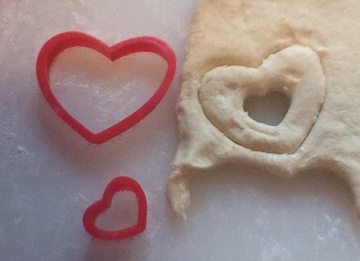
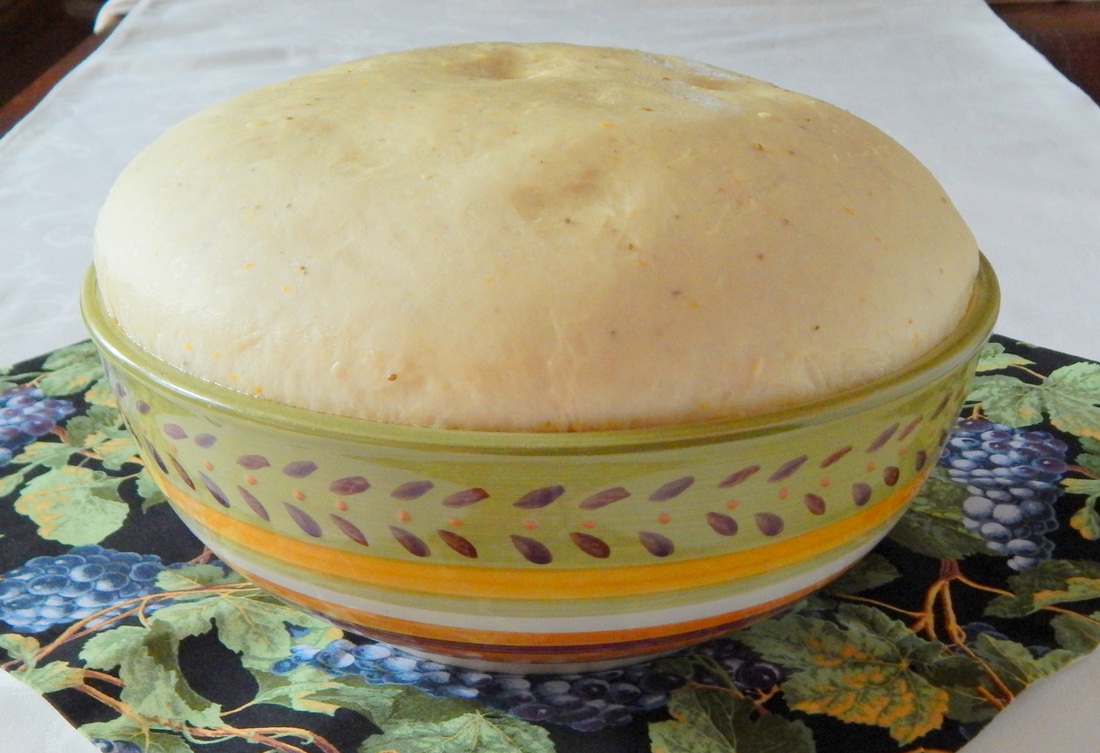
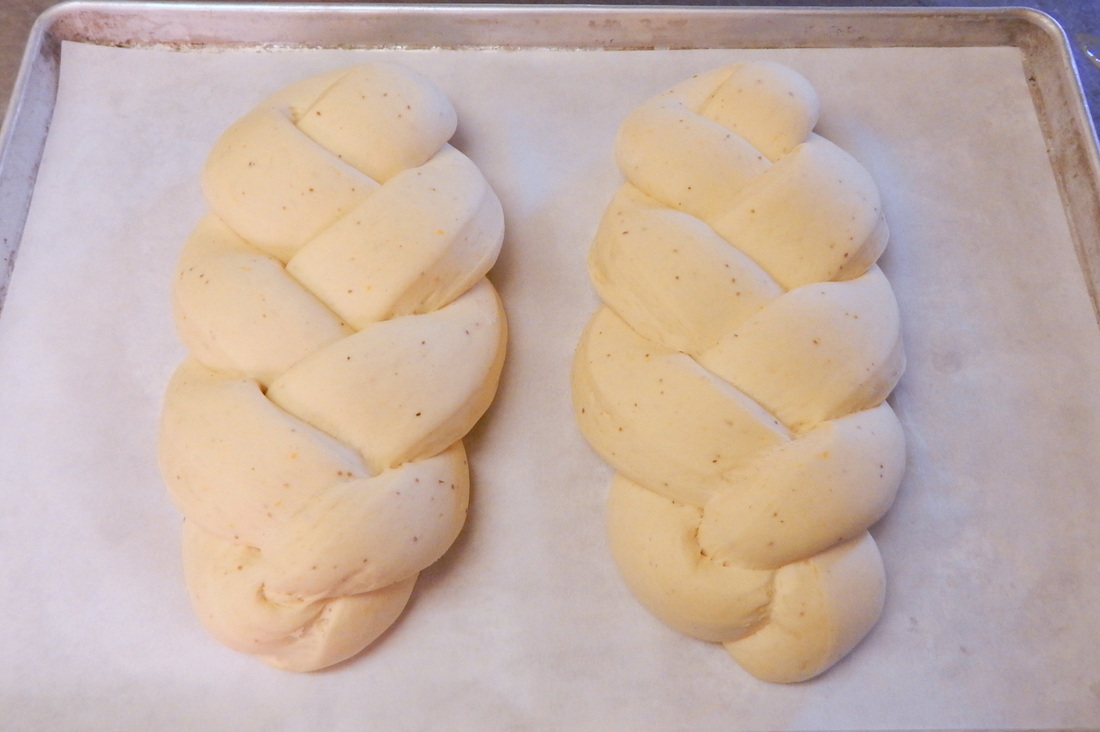
Surprisingly, my scholarly reading intersected with my passion for baking yesterday. I have been experimenting with various forms of yeasted coffee cakes, and decided to use my Best Ever Crescent Roll Dough, which I consider the gold standard for soft rolls and anything sweet. The dough, however, proved to be a little too soft and sticky; I had trouble rolling it out evenly and it developed several tears in the course of my making a chocolate-filled babka (click HERE for the recipe that was my inspiration). But I trudged on undaunted by the mess on the counter, my sticky hands, and the lopsided twist in the Bundt pan before me. 

Picture
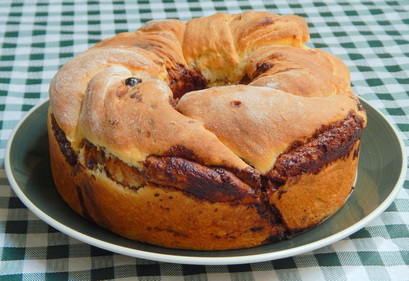
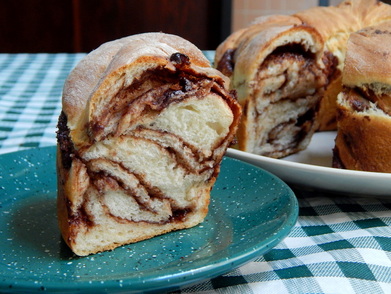
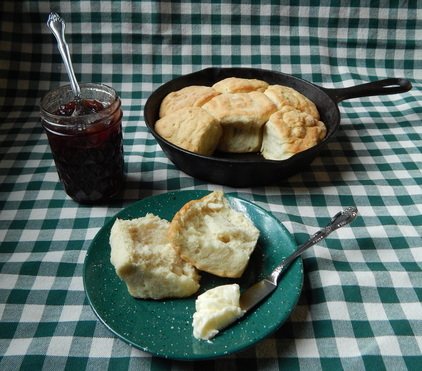
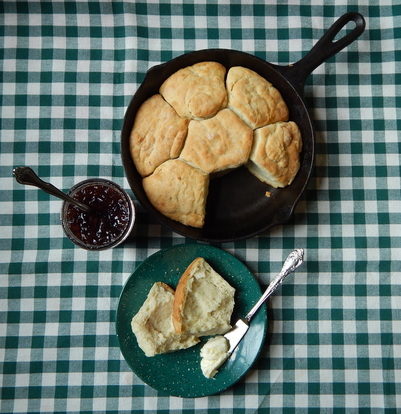
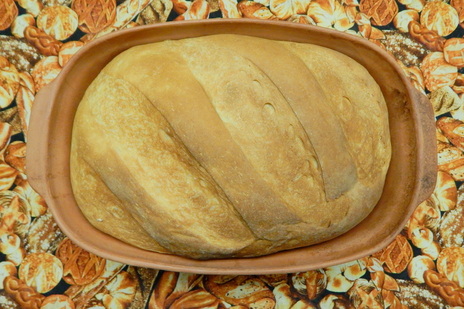
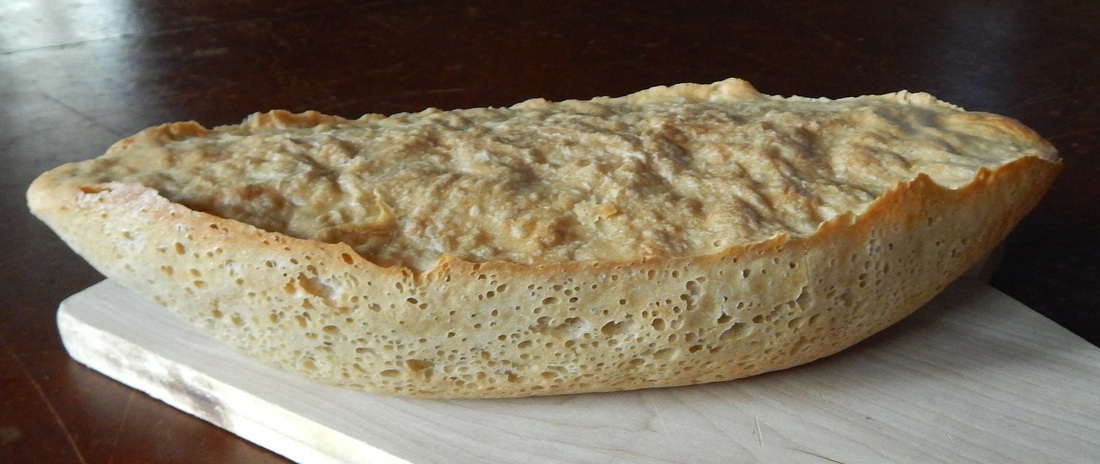
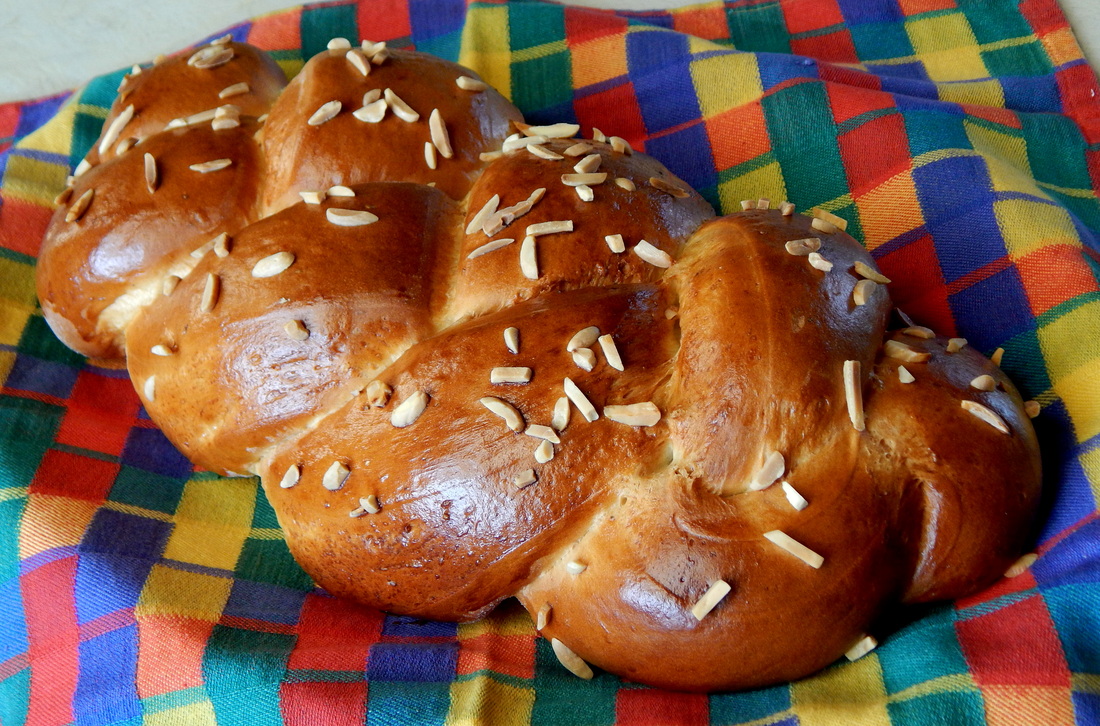
The result, however, was surprisingly appealing. In fact, I would argue that its attraction is based on its imperfections: the unevenly-sized twists, the long split that reveals the chocolate filling inside, even the lopsided profile all contribute to what I would not hesitate to call a truly beautiful loaf. Anyone who passed by as it sat cooling on the counter remarked on how attractive the babka was, how the open side revealing the filling made it more so.    

Marcus Aurelius, as it turns out, would agree.  That very morning I had read the following passage:

[W]hen bread is baked some parts are split at the surface, and these parts which thus open, and have a certain fashion contrary to the purpose of the baker's art, are beautiful in a manner, and in a peculiar way excite a desire for eating. And again, figs, when they are quite ripe, gape open; and in the ripe olives the very circumstance of their being near to rottenness adds a peculiar beauty to the fruit. And the ears of corn bending down, and the lion's eyebrows, and the foam which flows from the mouth of wild boars, and many other things- though they are far from being beautiful, if a man should examine them severally- still, because they are consequent upon the things which are formed by nature, help to adorn them, and they please the mind . . .
                                                                                       Meditations Book III, section 2
There is much to be admired in Marcus Aurelius' character and his writings, but I'm especially drawn by the fact that the most powerful man in the Roman empire of the 2nd century noticed the details of the baker's art, the graceful arch of the bending corn, and the regal structure of the lion's brow. Many of his reflections stress the need to live an intentional life, that no action should be without an aim,  no choice be made thoughtlessly. A little something to ponder the next time you select a muffin from the case at Starbuck's, or sit down to enjoy a slice of homemade coffee cake.
Picture

0 Comments

Yeasted donuts

6/4/2015

0 Comments

 
Picture
Make no mistake--donuts are NOT a "heart-healthy" food. But me no buts about baked donuts or multigrain batters or paleo flours. Donuts made with reduced fat and alternative grains can be delicious, but they simply can't compare with a fresh, warm, glistening Krispy Kreme, cooked in hot oil and drenched in powdered sugar glaze. 

As I diabetic, I have to be careful around donuts---I'd probably pass up chocolate cake for a day-old long john---so I don't make them often. But Friday, June 5 2015 is National Donut Day, so I stayed up late Thursday night to make some Spudnuts. 

(According to the Nibble, National Donut Day is celebrated the first Friday of June. 
The holiday was created in 1938 by the Salvation Army, to honor the women who served donuts to servicemen in World War I.  June 8 is Jelly-filled Donut Day, Cinnamon Roll Day is October 4. OK, back to Spudnuts).

Spudnuts was a national chain of franchised donut shops started by the Pelton brothers in Salt Lake City in 1940. Their proprietary donut mix used potato flour for added softness and flavor (this ingredient had just become commercially available---before that fresh mashed potatoes were needed). In 1964 when the brothers sold the company,. there were 314 franchises nationwide. Wikipedia can tell you more HERE. There still individual shops around, sometimes with a recipe adapted from the original. Naturally there is a website for Spudnuts fans which includes a list of existing shops by state. 

I've had a Spudnuts recipe in a three ring research binder since about 1999, but there are about a half dozen recipes online, all of them slightly different, one of them really different: the one offered by Saveur magazine uses ground mace, cracked black pepper, and lemon zest. Looking all these recipes over, most of them bear a striking resemblance to my Best Ever Crescent Roll Dough.  So that's what I use for my yeasted donuts, except that I use only 1/2 cup of mashed potato.

Some other tips about donuts:

1) Don't over knead or over work the dough, or the donuts will be tough and not  tender. After the first rise, don't punch the dough down too hard and never knead it a second time. Deflate it gently and roll it out to about 3/4", using a minimum of flour on the board.
2) Don't twist the cutter, which can seal the edges of the donut and keep it from rising properly. Just press down firmly.
3) Let your donuts rise the second time on individual sheets of waxed paper or parchment.  It makes it simpler to ease them gently into the hot oil.
4). The oil should be 375 degrees F. Use a candy thermometer clipped on the side of a deep skillet, or an electric fryer with a thermostat.
5) Don't crowd the pan---3 or 4 donuts at a time, and let the oil reheat between batches.
6) Wait until donuts are almost completely cool before glazing or frosting. And no, I don't really have a glaze recipe, because I never measure anything for it. If you're reading this, you can obviously Google it! Alton Brown has a good one HERE.

Sound like a lot of fussy work? Perhaps these photos will help convince you:

0 Comments

Pinterest accessorized my monk's cell

6/1/2015

3 Comments

 
Picture
Some people might be surprised to discover that I'm on Pinterest, but there's a lot of great recipes to be found there--for bread and just about everything else--but lately I've been looking at up-cycling . When I saw the towel rack pictured to the left, I knew I had to make something similar for my monastery room.

One reason I've been thinking about such un-monastic things as interior decorating is that I'm in the process of moving from the third floor to the second floor of the abbey. There are a variety of reasons for this transfer, but one of the best is that it has made me clear out a LOT of old clothes, books I don't read and chachkies that I never dust anyway. Monks aren't supposed to be attached to material things, so this move was as much a spiritual exercise as a practical one.

Picture
Simplicity, however, doesn't mean squalor nor sterility, so I set out to add a few personal touches.  The first was to have a vintage rolling pin  rack for my aprons, bath towel, belt, etc.  

Picture
I have never been able to watch a piece of vintage hardwood go into the trash, no matter beat up the piece of furniture might be.  As a result I have in my scene shop a large selection of oak and cherry boards rescued from desks and tables destined for the dumpster. You can see that the board I used still has part of the desk drawer's locking mechanism. The rolling pins I collected at flea markets when I travel for bread demos.  The hooks I made from some antique silverplated forks that came in a box of flatware somebody gave me from an estate sale.

Picture
I cut off the bottom part of the forks using a Dremel tool with a ceramic cutting wheel (yes, I always wear goggles and earplugs and you should, too) and then bent them with pliers wrapped in a rag so it wouldn't leave any marks on the metal.  Then I shaped and smoothed the ends on a grinding wheel.  The forks were really black, but I didn't want them to look too new, so I used some OOOO steel wool to give them a little shine but leave the design accented by the remaining tarnish. I think I need to make more of these---I have a whole box of old silver plate!

Picture
Here's another one I made to mount on the door to my room, so I have a place to hang my habit at night. This rolling pin was obviously stored in a garage or an abandoned house, because the other end of it was obviously chewed by a rat! You should have seen the size of the teeth marks---kinda creepy. I'm glad I was able to rescue it and put it to good use. 

Picture
This "chair shelf" is probably the strangest new addition to my room. Click HERE to see the original inspiration---I think the unpainted chair looks much better. I had a single vintage folding chair back stage and never knew what to do with it. Now it's attached to my wall. In case you're wondering, I used the largest plastic anchors and a couple of extra large screws. You might need toggle bolts of mollys, depending on the composition of your wall. 


You know how you take off a pair of pants and figure you're going to wear them again tomorrow? This is the perfect space for hanging up pants, shorts or a shirt, with the seat reserved for my favorite Cardinals hat.  

Picture
I have a rule that for every ten ideas I "pin" on Pinterest, I have to make at least one of them.  Otherwise it's just digital hoarding. 


So what am I making next?


Maybe this . . . 


Picture


                                                                Or this . . .

Picture


  Or even this---I have an antique sewing machine base in storage somewhere backstage, and at least three oak desk tops.


Flea Market Flip's got nothin' on me. 

3 Comments

Sourdough Biscuits

5/14/2015

1 Comment

 
Picture
A few weeks ago I gave a brief lecture on sourdough starters and how to capture wild yeast from the air.  I haven't done much sourdough baking in the last year, but the lecture inspired to renew all my starters and get out some favorite recipes. Among them is a recipe for sourdough biscuits, also known as "Pinch-Offs". They are surprisingly easy to make and the recipe is reliable.

I got this recipe from Sourdough Jack's Cookery and Other Things, a comb-bound booklet that did much to renew the interest in sourdough baking back in the 1970's. "Sourdough" Jack Mabee was an Alaskan chuck wagon cook with decades of experience with sourdough and a wealth of sourdough lore which he shares freely in this book.  It's out of print now but copies show up regularly on eBay. If you are interested in sourdough from a more historical and scientific perspective, be sure to get Ed Woods' Classic Sourdoughs: A Home Baker's Handbook (Ten Speed Press, 2001, ISBN 1580083447).   This book is an updated version of World Sourdoughs from Antiquity (1996, ISBN 0898158435 ) by the same author.  Either book is an excellent resource for sourdough baking, especially for those who want more than recipes.  Wood mixes hard science with a profound respect for baking traditions, so you get baking, history, biology, chemistry, and cultural anthropology all mixed in one entertaining and informative volume. Between Ed Wood and Sourdough Jack Mabee, you’d have all the info you need to become proficient at sourdough.But before you can make sourdough biscuits, you need some sourdough starter. If you don't have any and don't know anything about how to get some, stop reading this blog and go to my lecture notes from a sourdough class I gave at Missouri Botanical Gardens a few years ago. Read and/or download them HERE.

* * * * *
If you DO have starter, here's the recipe I used to make the biscuits pictured above.  I actually doubled the recipe and made a batch in a 12" cast iron skillet, then used the leftover dough to fill the 8" skillet in the photos.

Picture


Sourdough Biscuits

("Pinch-Offs")


½ cup sourdough starter
1 cup milk
2 ½ cups unsifted flour
1 Tbs. sugar
¾ tsp. salt
1 tsp. baking powder
½ tsp. soda
Bacon fat or melted butter

Mix starter, milk and 1 cup of the flour in a large bowl (the night before if biscuits are for breakfast; if for dinner, then in the morning).  Cover the bowl and keep at room temperature to rise.

Turn this very soft dough out onto 1 cup of flour on a bread board. Combine sugar, salt, baking powder and soda with remaining ½ cup flour and sift over the top.  With your hands, mix dry ingredients into the soft dough, kneading lightly to get the correct consistency. Roll out to a 1/2 –inch thickness. Cut out biscuits with a cutter, and dip each in either warm bacon fat or melted butter.

Place close together in a 9-inch square pan and set in a warm place to let rise for about ½ hour. Bake in a moderately hot oven (375 degrees) for 30 to 35 minutes. Makes about 14 biscuits (2 ½ inch).

Alternate method (and the one I prefer): pinch off balls of dough about the size of an unshelled walnut. Dip in melted butter and place close together in a 10” to 12” cast iron frying pan. Allow to rise and bake as directed.

Notes
---I have taken this recipe directly from Sourdough Jack’s Cookery and Other Things because it’s just about the best sourdough biscuit recipe around, and appears to be most authentic.  The book is now out of print but available on eBay. 
---The recipe can be easily doubled for a larger pan (which is what I do when I have a whole community of hungry monks to feed!
---For an herbal variation, add 1 to 3 tsp. dried herbs to the dry ingredients.  1 tsp. sage, 1 tsp. thyme, ½ tsp. savory and ¼ tsp. of ground pepper makes a nice combination.  A quarter to a half cup of grated cheese added to the recipe makes a savory biscuit to accompany soup or stew.


1 Comment

A little herb sauce

5/14/2015

0 Comments

 
Picture
Our Fr. Roger has some dietary restrictions and one of them is that he can't eat tomato sauce, poor fellow. When we get baked mostaccioli (as we did last night), he usually gets a plate of plain pasta. He accepts it with good humor, but I feel sorry for him, even as I mop up the last of my marinara with a chunk of crusty bread. Tonight the kitchen worker Julie and I decided to do something about it and fixed some creamy herb sauce.

After Mass I went to the kitchen and found her already whisking flour and butter in a sauce pan over medium high heat to make a roux. We added about 2 cups of warmed milk and whisked until it was thickened to cream consistency.  I added a teaspoon of vegetable soup base and about a quarter cup of snipped chives, plus three or four chopped lovage leaves, fresh from the abbey herb garden.  A few tablespoons of grated Parmesan cheese and a pinch of dried thyme finished off the flavor profile , plus a little more milk when it thickened too much.

The result was a slightly rich, delicately flavored sauce that prompted Fr. Roger to take seconds on the plain pasta. After supper we discovered that the flavors had deepened and became more complex, and Julie intends to use the leftovers over chicken breast for her supper tomorrow (I'd add a pinch of rubbed sage). 

I'm sure that readers will want a recipe, but since we made it up on the spot and didn't measure much, I don't think I can help you there. However, you can start with Mario Batali's Béchamel Sauce Recipe and add the seasonings mentioned above, although Mario's recipe makes twice as much as what we made, so you"ll have to increase the amounts accordingly. Fresh herbs make a world of difference, so cut back those chives and put them to work on your pasta!

0 Comments

Gluten Free Pizza Crusts---Review #1

5/13/2015

2 Comments

 
Last year when I asked Breadheads on my Facebook Fan Page what area of baking I should explore this year, many people suggested homemade pasta, which isn't really about baking unless you're making lasagne or baked ziti.  So I'm not sure where that's going to go.  BUT a lot of people requested gluten free breads.  I must confess that my success with GF baking has been limited to pumpkin scones with sweet cream cheese filling (click HERE for the recipe), but after attending the Homa Baking Association convention, I realized that a lot of companies are making GF products available.  So I've been getting samples from some of these companies and will posting reviews from time to time.  I hope we'll hear from other GF bakers in the comments section, too.
Picture
I started with pizza, in part because it's one of the things I know best, but also because so many GF bakers are searching fo a good crust recipe.  I tried Hodgson Mills Gluten Free Pizza Crust Mix first (They sent me a case of free samples, but that's the whole of my reward!).  My first surprise was how liquid the dough was--like a thick batter, really---so when you try it don't let that throw you off.  The directions suggest dusting cornstarch on your hands to push the dough into shape on the greased pan, but I wonder if olive oil might be a better solution.  In any case, the directions also have you covering the crusts (the box makes two 12-inchers) with plastic wrap, but I recommend that you give the wrap a good coating with non-stick cooking spray: my wrap stuck to the crusts a bit.   
After rising, the crusts are par-baked for 10 minutes, then adorned with toppings and then go back in for another 10 to 15 minutes.  I got good results by this method overall, but got better results when I par-baked in a pan and then finished the pie off on a pizza stone.  

Picture
My GF friend Brittany and her husband John were the taste testers and gave the crust good reviews.  I thought it wasn't quite as grainy as some GF breads can be, but that sort of added crunch wouldn't be out of place in a pizza crust anyway.  Some people might want to add a little sugar, and I'm wondering if the crust would brown better if one used milk as the liquid---more excuses to test, yay!  The process didn't take too much more time than traditional yeasted pizza dough, and the results are pretty good overall.  

Picture
At the same time  I was planning my GF baking lab, I ran across this link on Facebook for a 2-ingredient pizza dough: Greek yogurt and self-rising flour in equal portions.  The recipe said you could use GF self-rising flour.  Alert and food-savvy Breadheads will know that this is really a biscuit crust, and will not have the taste or texture of traditional pizza crust, GF or not, but it was so simple I had to try it.  The easiest way to measure, by the way, is to empty the yogurt into your mixing bowl and use the same container to measure the self-rising flour.  (I actually used a cup of Hodgsom Mills Multi-purpose Baking Mix, along with a half teasoon of salt and a scant teaspoon of baking powder.)  A minute in the Kitchen Aid on high with the paddle, and I had dough. Because this is a quick bread, it doesn't require a first proof, so I spread the crust n the greased pan and popped in the over for a 10 minute parbake, added toppings and finished it off on the pizza stone.  The center was still a little too soft for my taste, but I may have loaded on too many toppings. It was definitely a biscuit crust in flavor and texture, but the speed and convenience were appealing.


It seems likely to me that I might have even more success with mini-pizzas, just because they would cook faster and thereby produce a crisper crust. Too many toppings also seems to be a problem, so I'm not sure if I'll be able to create a GF deep dish like Lou's LaGrotto or Uno's. If GF Breadheads have had other successes, I'd love to hear from you. In the meantime, God bless and happy baking!


2 Comments

Terra Cotta Baking Dishes

5/6/2015

5 Comments

 
Picture
In my last post I wrote about having obtained a Romertopf terra cotta baking dish. These unglazed clay vessels are the descendants of the first clay cooking pots developed millennia ago.  A covered clay dish can be used to produce moist, flavorful meats and exquisite steamed vegetables, as well as lofty loaves of bread with a delicate, crisp crust.

These baking vessels are pricey--the one pictured above (which can hold a small turkey) sells for around $80. I received mine as a gift from a friend who had located it in a resale shop for a fraction of that price. The instructions call for you to soak the pot in water for 20 minutes prior to use. The dough is allowed to rise to nearly doubled, the soaked top is put on, and then the whole business goes into a cold oven. The oven is then turned to 475 degrees F. and the bread is baked 45 minutes covered, then five or ten minutes uncovered so the top can brown. The steam in the enclosed vessel is what produces the crisp crust.

I discovered that the pot I have is really too large to make a single loaf of bread in it. But I got good results overall and the crust really was exquisite. Serendipitously, I found a smaller version by a different manufacturer in our local resale shop Lily Pads (one that supports providing shelter for the homeless).  It was still $15, but I was happy to support the cause for the chance to do some more experimentation.

Picture
A recipe for two loaves of bread fit the vessel perfectly, and I kept things simple: water, yeast, flour, salt, a little honey, a splash of vegetable oil.  The instructions said to slash the loaf before baking, which can be a dicey operation if you don't have a sharp knife. I find I get great results with an inexpensive sandwich knife with a wavy blade.

Picture
Here it is about to go in the oven, soaking wet. Because I have a con-vection oven, I reduced the temp to 425 degrees, but kept it in the oven the full 45 minutes before removing the lid. As the instruction booklet predicted, the loaf had hardly browned at all (except on the front edge--I think I should have rotated the pot halfway through), so I left it uncovered for another ten minutes before removing it from the oven.   

Picture
Here is the highly satisfying result. The slashes opened up beautifully, the crust was crisp but not overly hard, and the interior of the loaf was soft with a tender crumb. The loaf is still quite large compared to your average grocery store sandwich loaf, but based on how much was devoured at breakfast this morning, I don't think the brethren had any serious problems with that! I was glad to have an extra long bread knife to cut across such a wide loaf.


One other problem I discovered has to do with bio-chemistry. When dough rises in a too-warm environment, the yeast and its accompanying bacteria produce enzymes that are slightly acrid, or at least odd tasting. When you put the terra cotta baker with its dough in a cold oven and let it heat gradually, you create conditions ideal for producing these "off" flavors. (A slow rise in a cool environment, by contrast, produces better flavor and texture.) I noticed the odd aroma/flavor when I sliced into the bread this morning. Toasting helped alleviate this problem, but if you make a PBJ or other sandwich you may notice the difference. Putting a soaking wet, unglazed vessel into a hot oven, however, might be a recipe for a small explosion, or at least a cracked lid, but I suspect I'll give it a try nonetheless.

I'm sure there will be plenty of other terra cotta experiments to come, which I promise to share in this Bread Blog. Does anyone else use a terra cotta making dish or cloche of some kind? I'd love to hear from you. In the meantime, God bless and happy baking!

5 Comments

Baking dishes old and new

4/23/2015

0 Comments

 
Picture
Some time ago I posted on Facebook that I had obtained a Lékué silicon baker, a new product that allows you to mix and bake bread in the same vessel (Click HERE to see the video from the manufacturer). Since I tend to use tools and pans that are decidedly "old school" (anything designed after the 1800's is considered "new-fangled") I wasn't immediately attracted to it, but I had an Amazon gift card and thought maybe I should test it as a service to my loyal Breadheads.    
     In order to make a fair test, I carefully followed the directions for one of the bread recipes that came with the bread mold, including weighing the ingredients European- style (Lékué is headquartered in Barcelona).  I used the recipe titled "Easy-to-Make No-Knead Bread" in part because it requires a long slow rise (6 to 8 hours) which suited my schedule for the day.  I mixed the dough at 12:30 p.m., right after midday prayers.  The mixing process was not enhanced by the floppiness of the silicon mold, and the suggested spatula became increasingly useless as the dough got stiffer, so I switched to a wooden spoon. As directed, I mixed the ingredients, closed up the little tab and covered it with a towel.
     I checked the dough throughout the afternoon, and found it had risen to the top of the rim by 4 p.m. and it never rose any further. I followed the instructions for baking: 425 degrees F. for 40 minutes, then I removed the loaf from the pan and baked it 10 more minutes on the open rack.  The result was an oddly-shaped but definitely crusty loaf of bread, not very browned, but that's what I expected with a recipe that  had no sugar and a long rising period.

Picture
As you can see, the dough was over-risen, because it didn't get any "oven-spring"--extra loft you get in the first 10 to 15 minutes of baking.  Notice too the holes in the surface of the dough which was next to the pan. I suspect that's a function of the wetness of the dough, which was really more like a very thick batter. The finished result, when toasted, reminded me of English muffins. 
Picture
I'll be doing some more experimentation with this new gadget. I did find the "mix and bake in one vessel" aspect appealing, and the mold can be wiped clean with a damp cloth in about 30 seconds. If I do the wet dough recipe again, I think I'll try letting rise only four to six hours and see what happens. There are several more recipes in the booklet to test as well---stay tuned.
Picture
This week I also received a Romertopf unglazed clay pot. The company has been around since 1967 (check out their website HERE) but the technique of cooking or baking in a clay pot goes back to the very origins of of cooking itself. There are plenty of advantages to baking in unglazed clay vessels: more even heat, better crust, and the bread never fails to come out of the pan, among others. The advantage to baking in a covered unglazed vessel is that you can soak the pot in water before the dough goes in, which produces steam during the baking process. The steam allows the dough surface to remain soft during the period of oven spring, making for loftier loaves. The moisture also dissolves sugars on the surface of the dough, so after the steam evaporates, the sugars caramelize and create a glossy, golden brown crust. Read more HERE. There is a style of  clay baking pot with a lid called a cloche, but they are a little pricey (as is the Romertopf pictured above--$80+!) and I could never afford one.  But my friend found one (virtually unused) at a second hand store for a fraction of the cost, and gifted it to me. I'll be baking with it this weekend and give you a further report next week.


God bless and happy baking!

0 Comments

Tsourecki: Greek Easter Bread

4/4/2015

1 Comment

 
Picturehttp://www.marthastewart.com/968095/tsoureki-greek-easter-bread
Full disclosure here: the photo to the left is NOT mine, nor did I make the bread.  This is Martha Stewart's version of Greek tsourecki, a rich braided loaf traditionally made for Easter. The deep red eggs are meant to represent the blood of Christ, and many Greeks consider them an essential part of the bread. But my enthusiasm for this tradition has been dampened ever since I watched a fellow monk cut a slice THROUGH one of the eggs because he wanted a smaller portion, leaving bits of shell all over the table and in the remainder of the loaf. Besides, we get more than enough hard-boiled eggs during Easter week (more on that in my next post).

You might find it unusual that as a monk I'm not a staunch defender of culinary tradition, and in the case of tsourecki I take any number of liberties. The traditional flavorings for this Greek treat are
mastic (a spice made from resin which is dried and then ground) and aromatic mahlab (made from ground seeds of a cherry native to Greece).  If you want a really traditional version of this recipe, you can find it HERE.  


My version of this sweet, rich bread uses orange and anise as flavorings. I omit the red eggs, but there are plenty in dough---five, to be exact, and one more used as a glaze. It also has a whole stick of butter and 3/4 cup of sugar, so it's a very rich dough. The dough is a bit sticky even after kneading, but resist the temptation to add more flour; things will get better after the first rise.

Picture
Large braided loaves are the traditional form for tsourecki, although I've seen some lovely versions in the form of a braided ring or crown (click HERE to see one). My recipe makes two large braided loaves, which may seem like a lot, but you probably have plenty of family coming over for Easter, and this bread makes outstanding French toast.  You can always double wrap one for the freezer to serve on Pentecost.
Picture
The instructions will tell you to roll ropes of dough for braiding, but a slab braid like these beauties here will work just as well and be a lot easier. Not sure what a slab braid is?  Click HERE for a tutorial video from my "Breadhead Minute" series sponsored by the Home Baking Association.
Picture
And here is the glorious result of all that effort.  I'll be serving this lovely loaf at our reception after the Easter vigil, probably with whipped honey butter. The second loaf will be on the monastery table Easter Sunday morning. 
1 Comment

Hot Cross Buns for Good Friday

3/28/2015

0 Comments

 
Picture
Although Hot Cross Buns are a traditional bread for Good Friday, I usually serve them three times between the beginning of Lent and the end of the Easter season on Pentecost Sunday.  This year on Mardi Gras night I wasn't partying, I was making a triple batch of buns!  One was served the next morning for Ash Wednesday, and two were double wrapped in plastic for the freezer.  I pulled one out for the Solemnity of the Passing of St. Benedict, and the other will be served Good Friday itself.
     I know that my fellow Breadheads are just as busy as I am, so I've adapted my previous recipe for Hot Cross Buns to use fast-rising yeast (like Fleischmann's RapidRise or Red Star QuickRise, also called instant yeast) so it only rises once. You can find the recipe HERE.  This version uses a little whole wheat flour, but feel free to make them entirely with all-purpose flour.
     I hope to be posting a few more recipes in the next few days for Holy Week and Easter. I've been working on the spring musical and the brethren have had a loooong Lent 

0 Comments
<<Previous
Forward>>

    Author

    Fr. Dominic Garramone AKA 
    the Bread Monk

    Categories

    All
    Breadhead Bookshelf
    Breakfast Breads
    Buns Rolls And Biscuits
    Craftsy
    Donuts
    Equipment
    Ethnic Breads
    Events
    Gluten Free
    Herbal Breads
    Holidays
    Lake Thunderbird
    Memories Of Mama
    Multigrain Breads
    Pastries
    Pizza
    Places To Visit
    Quick Breads
    Reflections While The Bread Is Rising
    Savory Breads
    Sourdough
    Spirituality
    Stuff Besides Bread
    Sweet Breads
    The Classics
    Tools Of The Trade

    RSS Feed

    Archives

    June 2024
    December 2023
    September 2022
    April 2022
    March 2022
    February 2022
    January 2022
    October 2021
    May 2021
    April 2021
    March 2021
    February 2021
    August 2020
    July 2020
    May 2020
    February 2020
    October 2019
    June 2019
    September 2018
    July 2018
    May 2018
    April 2018
    March 2018
    February 2018
    January 2018
    December 2017
    November 2017
    August 2017
    July 2017
    June 2017
    May 2017
    April 2017
    March 2017
    February 2017
    January 2017
    December 2016
    November 2016
    October 2016
    September 2016
    August 2016
    June 2016
    May 2016
    April 2016
    February 2016
    December 2015
    November 2015
    October 2015
    September 2015
    August 2015
    July 2015
    June 2015
    May 2015
    April 2015
    March 2015
    December 2014
    November 2014
    October 2014
    September 2014
    August 2014
    July 2014
    June 2014
    May 2014
    April 2014
    March 2014
    February 2014
    January 2014
    December 2013
    November 2013
    October 2013
    September 2013
    August 2013
    July 2013
    June 2013
    May 2013
    April 2013
    February 2013
    January 2013
    December 2012
    November 2012
    October 2012
    September 2012
    August 2012
    July 2012
    June 2012
    May 2012
    April 2012
    March 2012
    February 2012
    January 2012
    December 2011
    November 2011
    October 2011
    September 2011

Web Hosting by FatCow