I'll be posting plenty more honey recipes this month, so keep checking in!
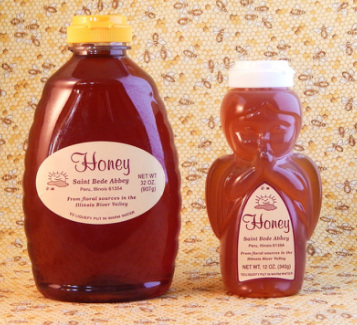
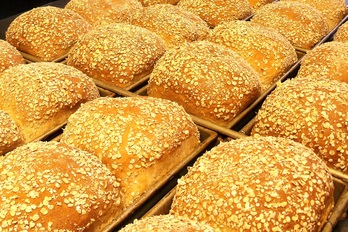
 September is National Honey Month, and so I'm celebrating by featuring my favorite honey recipes on the Bread Blog. Unfortunately, this winter was so harsh that at the abbey we lost all of our bee colonies except one, which we have been nursing back to health. We are blessed to have the assistance of one of our alumni who is going to give us several colonies next year and has also shared a portion of his honey harvest with us.  Honey oatmeal bread is my number one most-requested recipe, both by Breadheads and by the monks of Saint Bede. I make it in huge batches for bake sales and it sells out in minutes. I've shared the recipe several times on the site, but click HERE if you haven't made it in awhile or are still waiting to try it. Just be aware that the dough is VERY sticky because of the combination of honey and oatmeal, so don't be alarmed if you don't get the smooth and elastic qualities of regular white bread. Leave it sticky and soft rather than adding too much flour. Remember too that multigrain breads like this should be baked to a slightly higher temperature---about 200 degrees F.---or they can be doughy in the middle. I'll be posting plenty more honey recipes this month, so keep checking in!
1 Comment
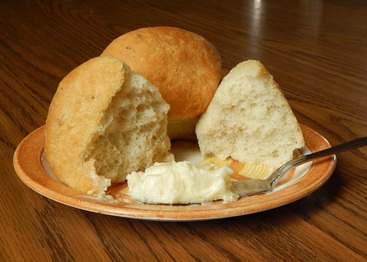 Most Breadheads know that my favorite dough for any kind of roll or bun is my Best Ever Crescent Roll Dough recipe. The added potatoes make for a soft roll with a tender crumb, and is the secret ingredient in almost all of the recipes for state fair and 4-H blue ribbon winners. Today I made some delicious herb rolls to accompany grilled pork chops for Labor Day, using some leftover parsley potatoes that were in chunks, not mashed. To get perfectly smooth potato for the dough I used a ricer. 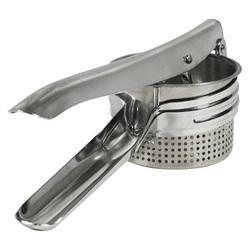 Perhaps not everyone is familiar with this rather old-fashioned kitchen gadget, but there's nothing better for producing light, fluffy mashed potatoes. The cooked, peeled potato pieces go into the hopper, and the two handles are pressed together, like a giant garlic press. The process of extrusion forces air into the potato puree, resulting in lighter, fluffier mashed potatoes that are perfectly smooth, and therefore ideal for bread making. There are commercial versions with a slightly different design, some of which cost as much as $130, but you can get the model pictured here, which is the same one I use, for less that $15 at Target. 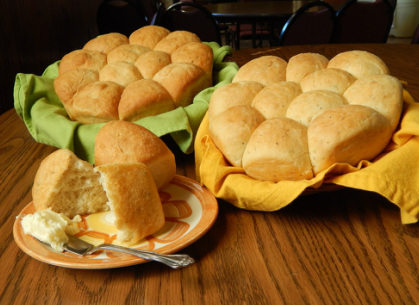 I baked the rolls in round, glass casserole dishes. I like using round pans for dinner rolls, because they look so pretty in a basket on the table. A 1.5 quart casserole dish will hold a dozen rolls made with 2 ounces of dough each. For a 2-quart dish, you can make the rolls 2.5 ounces each. Any leftover dough can be baked in a loaf pan. Remember that when using glass dishes for baking, reduce the temperature by 25 degrees F., because glass heats up faster and retains heat longer. 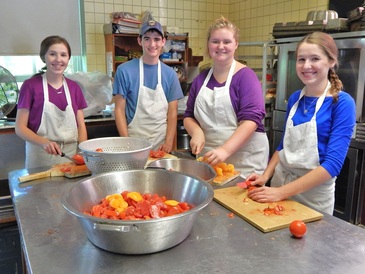 Four freshmen Stage Rats came out today to help me process tomatoes and can pizza sauce. One or two had had some canning experience, so the whole project went smoothly from start to finish. If you are wondering about the sauce recipe I used, I've posted it HERE. It's the "Big Ol' Batch of Pizza Sauce" recipe from season two of Breaking Bread with Father Dominic, also found in my cookbook Thursday Night Pizza. The recipe starts with 25 pounds of tomatoes, and can be frozen in ziplock bags as well as canned. 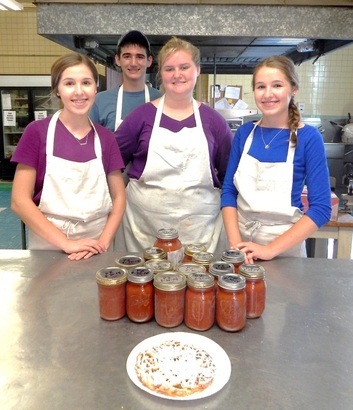 I asked them if they wanted me to make a snack as a reward for their labors, and we settled on funnel cakes, an appropriate treat as we come to the end of the season of county fairs and food festivals. I was delighted to discover this summer that the funnel cakes served at Coors Field in Denver are made from scratch with real batter, not just reheated in oil like I had once at a minor league park---blech! That recipe is also a fave and can be found HERE. The Rats get them several times a year. I spoil them, I know---but they work hard for me all year. This crew will be at the top of the list of invitees to my next pizza party! 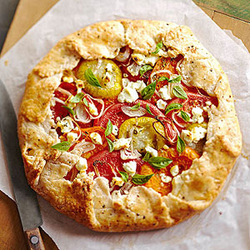 This beauty is a tomato galette, a simple form of tart originally made in France. A galette is also called a crostada if you're in Italy or a "flat pie" if you're on the Great Plains. The filling can be sweet or savory. In this case, it's a little of both, since the fresh heirloom tomatoes are so sweet, but the shallots, herbs and goat cheese make it more savory. The crust also has some cracked pepper in it, so it's got a little bite. The recipe is HERE. 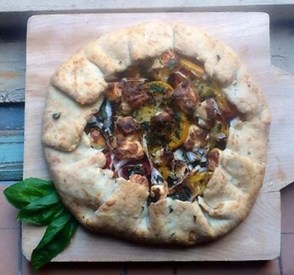 Here's the one that I made today, which you can see looks quite different! The cheese got darker, in part because I used a mix of cream cheese and Parmesan instead of feta cheese, but my friend Jannelle used goat cheese and got the same result. I have a convection oven, so I didn't brush the crust with egg wash because I thought it might get too dark, but I think next time I may brush it on about halfway through the baking process. The main reason I'm showing these two photos is so that Breadheads won't become discouraged when their loaves (or pies or rolls or whatever) don't look exactly like the picture in a cookbook or online. Sometimes cookbook photos have been doctored, or the food was not prepared exactly like the recipe describes, in order to get a better visual result. The size and type of your oven, the metal in your pans, the protein content of your flour, and yes, your level of expertise--these and many other factors can change the appearance of your loaves.
Ultimately, two things matter: the taste and texture of your breads, and the pleasure and satisfaction you get from making something with your own hands and sharing it with others. Glossy photos in cookbooks and Food Network shows with high production values may have improved the quality of our entertainment (and that's debatable!) but they can have the effect of lowering our confidence, in the same way that beauty magazines can make you feel ugly. My tomato galette smelled enticing, and the flavors were subtle and exquisite. No-one who had a slice had seen the Midwest Living photo, so they all remarked on how beautiful it looked, how flaky and tender the crust was, and how perfect the flavors went together. And sixteen minutes after it came out of the oven, there was nothing left but crumbs. So, who cares how it was "supposed" to look? 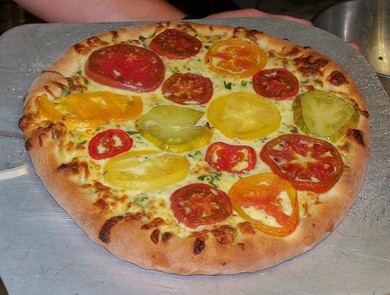 It's the season of fresh garden tomatoes and aromatic herbs in the garden, so I thought I'd share some recipes to make use of all that bounty. My favorites: Four Cheese Tomato Top Pizza (pictured to the left), a bruschetta topping made with tomatoes, garlic, herbs and kalamata olives, panzanella (Tuscan tomato and bread salad) and Tomato Gallette (new for me this year, from Midwest Living). I'm going to be presenting a demo at my next herb guild meeting on this very topic, and I'll have some more photos for you then. But click HERE to get the recipes I'll be making. While researching recipes, I came across a webpage from Southern Living with 31 recipes for fresh tomatoes and herbs, with lots of great ideas: find it HERE. 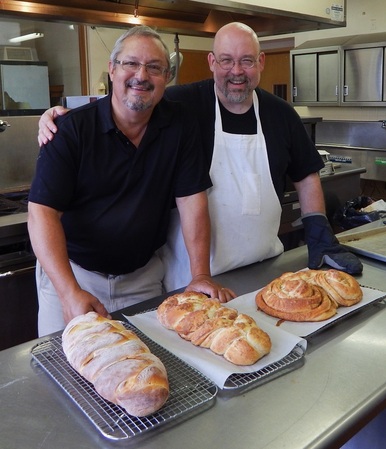 Photo by Jean M. Schildz Photo by Jean M. Schildz On a recent trip to St. Louis I stayed (as I usually do) with the Sisters of Loretto in Webster Groves. They have a small guest room just off the lobby, only a few steps away from the chapel. I celebrate Mass for them while I'm there, and generally I get a chance to bake a few treats for them as well. This trip their kitchen manager John Maggio asked for a bread lesson, specifically on how to shape coffee cakes and breakfast breads. I taught him the lattice braid, and we made one using strawberry filling and the other with peach. 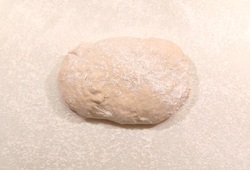 I also made up a shape on the spot. I had intended to make a half-pipe twist (see below) but the dough was really soft and so I had to improvise. Instead, I developed a new way to shape the dough which I am now calling "The Loretto Swirl"! You start with about a pound and a half of soft roll dough. 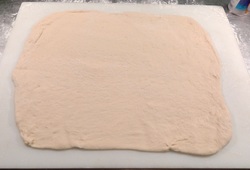 Roll the dough out to about 16" x 20". If it is too elastic and keeps springing back, cover it with a dry towel for 10 or 15 minutes, to allow the gluten strands to relax, and it will be a lot more cooperative. We all feel better after a short nap! 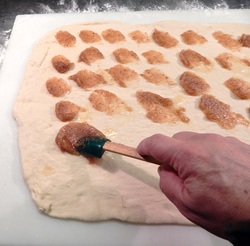 Spread the filling by placing small dabs of it all over the dough as shown here. This method facilitates spreading the filling evenly---much easier than trying to spread a giant glob from the middle all the way to the edges. I used a single 12 oz. can of Solo Almond Cake and Pastry Filling. You can use other flavors of pastry filling or pie filling, sweetened cream cheese or just use a mixture of granulated sugar, brown sugar and cinnamon. 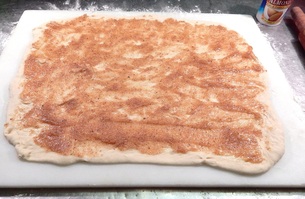 Notice that I've left a slight border all the way around the dough. This makes it a bit easier to handle while rolling it up like a jelly roll. The almond filling acts like a glue to hold everything together, but if you use anything else, you may need to dampen the top edge so it will stick at the end---this is especially true with cinnamon sugar. After you roll the rectangle up into a jellyroll, as you would for cinnamon rolls, place it on a cutting board and starting about 2" from the top, slice it lengthwise down the center. You have to have a really sharp knife for this, or a very large rotary pizza cutter. Leave the top two inches of roll uncut and still connected. Then turn the two halves cut side up. (Click on the images to see the whole picture.) Coil each side into a spiral and form them into a double swirl, being sure to keep the cut side up the whole time. Don't be too fussy about them being even or perfect--the loaf will look beautiful nonetheless. 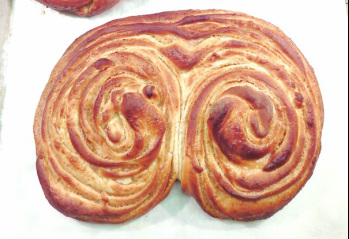 Cover with a clean, dry cloth and let rise for 30 minutes, then bake in a preheated 350 degree oven for 25 to 30 minutes. When done, remove from oven allow to cool on the pan for about 10 minutes and then transfer to a wire rack to cool. Drizzle with icing if desired (I used almond extract instead of the usual vanilla.) You can also use a divided roll to make a half pipe twist. I recently saw this made with pesto for a savory bread. I hope all these photos inspire you to try a new twist on yeasted coffee cakes. I'm sure your family will thank you. God bless and happy baking!
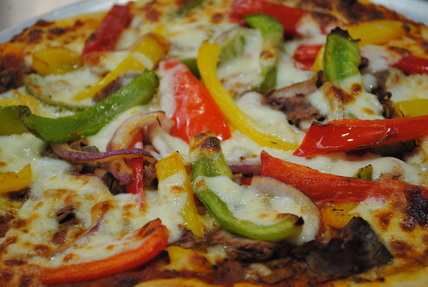 Photo by Elizabeth Steffens Photo by Elizabeth Steffens Whenever I host a pizza party, (which I do regularly) one of the most requested pies is the Italian Beef Pizza. People ask me for the recipe all the time, but there's not a special secret spice blend or exotic technique essential for making this crowd-pleaser. The only important thing: quality ingredients. Home-made dough is a must, of course, preferably a recipe that enjoys a long, slow rise to develop better flavor and texture. If you aren't making your sauce from scratch, I recommend Contadina brand (no, they're not a sponsor---I just prefer their flavor!). Make an effort to find the best Italian beef available, preferably as rare as possible, since it gets cooked a second time on the pizza. My local Hyvee deli has a garlic beef that perfectly flavored and extraordinarily pink, but shop around for what's available in your area. Two other recommendations. 1). Don't over-sauté the peppers and onions or they'll be limp after 10 minutes at 500 degrees--leave a little crunch. 2). Don't omit the bottom layer of smoked mozzarella, because it's essential to the flavors of the pizza. use the more-readily available smoked gouda if you have to. You can get the full instructions HERE. 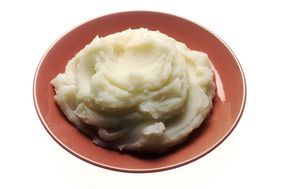 Regular readers of this bread blog know that when we have mashed potatoes for supper at St. Bede Abbey, chances are the leftovers will end up in a batch of dough. The kitchen crew has even taken to making the potatoes without extra flavorings (no garlic, no pepper, no chives) so that I can use them as easily for sweet breakfast rolls as for Sunday dinner. Last night I mixed up a batch of potato roll dough with the intention of making cinnamon rolls for breakfast, only to discover that we were completely out of cinnamon. Fortunately, I'm a 21st century monk with WiFi and an iPad, so I looked up "breakfast rolls" on Pinterest and found a recipe for Strawberry Rolls using pie filling, which I just happened to have in the pantry. Not long ago I made rolls with pineapple filling and orange glaze and the brethren had no qualms about trying something new, so I decided to give it a try. (I also shaped three loaves of potato bread for later breakfasts.) 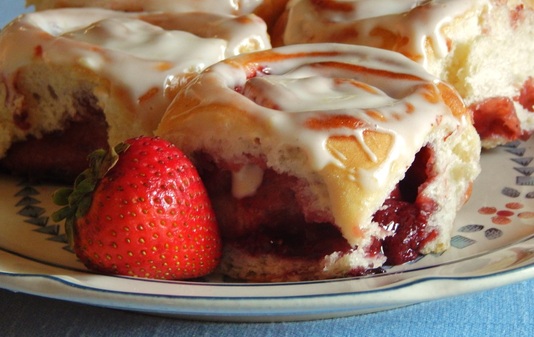 Pie filling is a bit runnier than cake and pastry filling, which is what I usually use for breakfast breads, so it was a bit of a challenge to get the dough rolled up. The results, as you can see, definitely made the effort worthwhile. I drizzled on the lemon cream cheese icing just before morning prayer and put them on the breakfast table. As predicted, my fellow monks made the rolls disappear in no time, so I was glad I kept a few in reserve for food photography later in the day when the light got better. You can find the recipe I used for strawberry rolls with lemon cream cheese icing HERE, although I used my own dough recipe, the ever-versatile dough for Best Ever Crescent Rolls.  Our Father Henry passed away Sunday morning, at age 89. You can read his full obituary HERE. He had taught in the school and eventually served as principal from his ordination in 1952 until 1977. He then began a series of parish assignments until his retirement in 2012. In his later years Fr. Henry suffered greatly from arthritis and a variety of other ailments, including some dental issues. So French or Italian loaves with an ultra-chewy crust were not his bread of choice. What he really loved was potato bread. 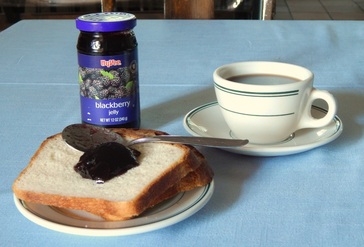 We get mashed potatoes at supper about once a week, and there are almost always leftovers, so I bake potato bread fairly often. The potatoes give the bread a soft crust with a tender crumb, and the dough works well for cinnamon swirl bread or dinner rolls, too. Fr. Henry liked potato bread for breakfast, slathered with blackberry jelly and dunked in his coffee. So last night I baked a dozen loaves of potato bread to serve at the dinner following his funeral this afternoon. It's my way of honoring his memory; I'm sure I'll think of him whenever I put out potato bread for breakfast. You can find my recipe HERE, but if you want to make it how Fr. Henry liked it, omit the seeds. 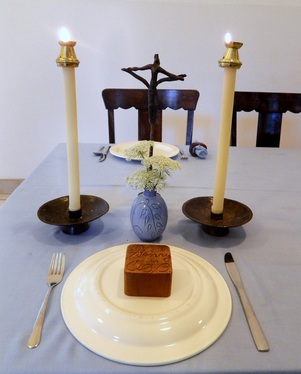 Another monastic custom at the death of a confrere is to continue to set his place at table for a month after his death. A cross and candles are placed there, with the plate upside down and his napkin holder on top. (Every monk has his own distinctive napkin holder---yes, we still use cloth napkins!---often one he made himself.) The custom is a reminder that although our brother is no longer present, we hope to join him at the table of the Eternal Wedding Feast, the Supper of the Lamb. For Fr. Henry's sake, I hope they serve potato bread. On this mountain the LORD of hosts will provide for all peoples 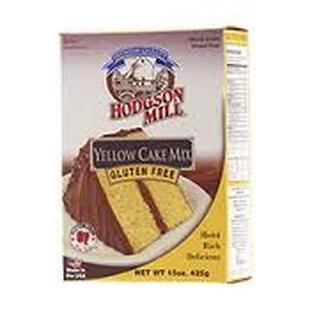 Hodgson Mill sent me some Gluten Free products to experiment with, and I've been enjoying testing all sorts of recipes that use cake mix as a base. As I generally do with product testing, I'm not interested in the recipe on the box---the company tested that recipe a thousand times until it was just right. I want to know what else you can use it for. Turns out this gluten-free cake mix is pretty versatile.  A site with recipes, crafts, coupons, and other homey stuff. A site with recipes, crafts, coupons, and other homey stuff. I started out with a simple cookie recipe I found online, which I made for my monthly Herb Guild meeting. I thought they needed a little more sweetness, so I frosted them with some maple flavored icing, and everyone RAVED about them. Not a soul had any idea they were gluten-free cookies until I mentioned it. I shared the recipe with one of our employees whose mother-in-law is also GF and she loved them so much she refused to share, not even with the her grand kids! The recipe I used is HERE, but I use the cake mix pictured above instead of Betty Crocker. I'm sure you could add any kind of chocolate chips, raisins, cranberries, etc. and get good results. 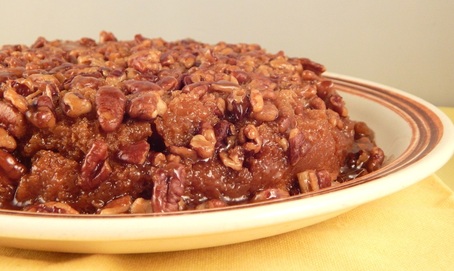 Gluten Free Caramel Pecan Upside-down Cake Gluten Free Caramel Pecan Upside-down Cake Then I tried to imagine what I would really miss if I had to go gluten-free, and I realized that caramel pecan rolls would be very high on the list. As a diabetic I make them only occasionally, and try to make small portions, but if I couldn't have them I'd at least want a decent coffee cake substitute. So I made the cake according to the directions on the box except that I subbed sour cream for the buttermilk and added 2 tsp. of ground cinnamon. After I sprayed the 8" cake pan, I poured in some caramel sauce (see below) and sprinkled on 3/4 cup chopped pecans. Then I spread HALF of the cake batter on top of that---the box makes two 8" cakes, so the other half I used for another recipe (see below). The batter is rather thick, so you might thin it with 2 Tbs. of milk or half and half as I did. The cake then baked at 350 degrees F. for 22 minutes. Be sure to place place a cookie sheet on the shelf below the cake, to catch any drips of caramel that bubble over. When the cake tester tells you it's done, ignore the directions on the box that tell you to wait 10 minutes before removing the cake from the pan. Invert a serving plate on the top and flip it immediately; remove the pan and watch all that caramel goodness ooze down the sides of the cake. Not a single monk had any idea that this breakfast treat was gluten free, and everyone named it an unqualified success, except that I should have made two. Caramel Sauce Topping: 1/3 cup packed light brown sugar, 4 tablespoons (1/2 stick) butter, 3 TBS. light corn syrup, warmed in a sauce pan over low medium heat and stirred until smooth (do not boil). Pour into prepared pan and sprinkle with pecans before adding batter. 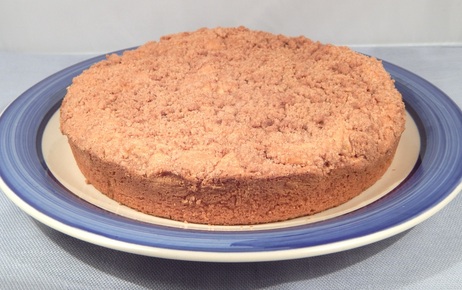 Gluten-free Almond Crumb Cake Gluten-free Almond Crumb Cake However, since the box of mix makes two cakes, I decided to make a second coffeecake, this one with an almond filling and a classic crumb topping. I put half the filling in the bottom of the sprayed 8" cake pan, then spread dollops of Solo Almond Cake and Pastry Filling on top of that, about half the can. Then I spread the rest of the batter and sprinkled on the crumb topping (see below). It also baked at 350 degrees F. for 22 minutes and came out moist and delicious, and just a tiny bit grainy. However, that was barely noticeable because of the crumb topping. (All flavors of Solo's Cake and Pastry Fillings are gluten-free, by the way. If you want to use another product, many grocery stores, including our local Hyvee, now have a list of GF products at the service desk or near the gluten-free aisle.) 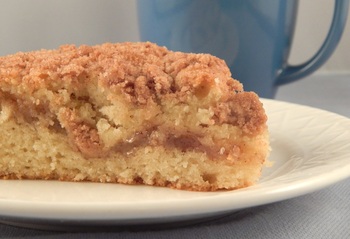 Look at that yummy almond filling---all GF! Look at that yummy almond filling---all GF! Crumb Topping In a small bowl, mix together 1/2 cup gluten-free all-purpose flour, 3 Tbs. brown sugar, and 1/2 tsp. ground cinnamon. Using a fork, cut in 3 Tbs. cold butter until the mixture resembles coarse crumbs. Sprinkle all of mixture on top of cake batter just before baking. If you don't have canned filling, double the dry ingredients of this recipe but increase the butter to a full stick and use half of the mixture as the middle layer and the other half as the topping. 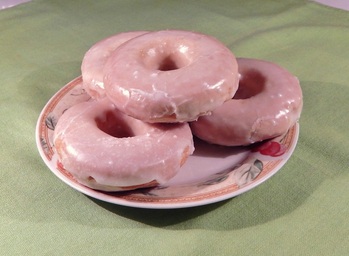 Gluten-free baked donuts with hazelnut glaze Gluten-free baked donuts with hazelnut glaze I've already written in a previous blog about GF baked doughnuts made with this cake mix. They need to be baked a little longer or they can be a bit too crumbly, and they do taste more like a cupcake than a traditional doughnut, but they don't have the dry, grainy texture many GF mixes tend to yield. These seem to be especially well-received by children, so if you're a mom on the lookout for GF treats, get yourself some doughnut pans and try different flavors of GF cake mixes. Another advantage---doughnuts use less frosting than most cakes/cupcakes, so less sugar intake for your tykes. 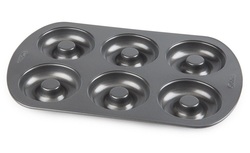 Wilton and Norpro both make these non-stick doughnut pans, for both regular size and mini-doughnuts. You can get them at any store that has kitchen ware, from Target and Walmart to Macy's. A few well-stocked grocery stores carry them, too. I'll be testing more gluten-free products in the weeks and months ahead---stay tuned for my review of gluten-free pizza mixes. Please note: I receive free products from many companies, including the ones mentioned in this post, for the purpose of experimenta-tion and review. I do not receive any additional personal compensation and would refuse it if offered.
|
AuthorFr. Dominic Garramone AKA Categories
All
Archives
June 2024
|