The Bread Monk
  • Home
  • My Bread Blog
  • Breadhead Videos
  • Recipes
  • Fr. Dom's Books
  • Events/Programs
  • Shortcut Stollen
  • New Page

Mmmmm . . . biscotti!

4/11/2013

0 Comments

 
Picture
Some friends of mine recently gave me a few pounds of dutch process cocoa powder.  In case you don't know, this type of chocolate has been treated with an alkali to neutralize its natural acidity. Because it is neutral and does not react with baking soda, it must be used in recipes calling for baking powder.  So I decided to make some biscotti.

The word "biscotti" comes from the Italian for "twice baked," and they were originally developed as a bread or cookie that would keep for a long time, as one might need for a journey or a time of war.  They are very hard and crunchy and are traditionally dunked in vin santo (an Italian sweet wine) or coffee.  The earliest recipes for them had no fat/oil or sugar in them, and many of these early biscotti were savory rather than sweet.  At first pistachios or pine nuts were used, and later almonds, with anise being one of the most popular flavorings for sweet biscotti.  I've made them with all sorts of ingredients, from white chocolate chips to dried cranberries to fresh mint.  Once you get the simple technique, you'll be drawn to experiment! 

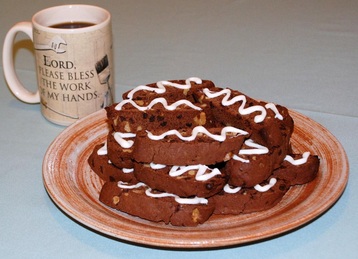
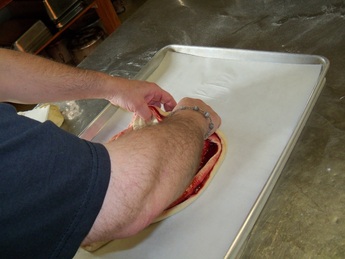
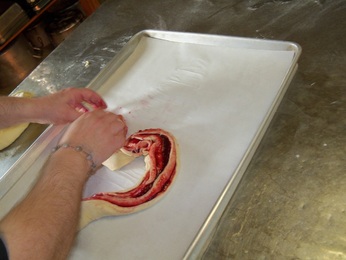
The method for making biscotti is not difficult, but it does take some time because of the two baking periods.  You can make them without nuts if you prefer.  Here's what I did for the ones pictured above.

Double Chocolate Walnut Biscotti
1/3 cup butter, softened
2/3 cup granulated sugar
2 eggs
1 tsp. vanilla extract
1 3/4 cups all-purpose flour
1/3 cup unsweetened cocoa powder
2 teaspoons baking powder
¼ tsp. salt
1/2 cup miniature semisweet chocolate chips
2/3 cup chopped walnuts

Preheat oven to 375 degrees F.  Line a 9” x 13” baking sheet with parchment paper.  In a medium size bowl, cream together the butter and sugar until light and fluffy (a stand mixer is even better!). Beat in the eggs one at a time, then add the vanilla and mix. In a separate bowl, whisk together the flour, cocoa, baking powder and salt; stir into the sugar mixture until well blended. Mix in the chocolate chips and walnuts---I find it easiest to do this last step by hand with a sturdy spoon.

Divide dough into two equal parts. Shape each part into a 9 x 2 x 1” inch loaf.  Place them onto baking sheet, evenly spaced.   Bake for 20 minutes in the preheated oven, or until slightly firm to the touch. Cool on the baking sheet for 30 minutes.  Discard used parchment and line pan with fresh.

Using a wavy knife, slice the loaves diagonally into 1” slices. Place the slices on their sides on the baking sheet. Bake for 10 to 12 minutes on each side, or until dry ands crisp.  Cool completely before storing in an airtight container.

Optional:  Melt a couple of squares of almond bark and drizzle on biscotti in a wavy pattern, as pictured. 


0 Comments

Not baking

4/8/2013

1 Comment

 
I'm not sure if my readers have noticed, but I've been keenly aware of how long it's been since I posted anything on the Bread Blog.  I could claim that there were all sorts of other things that got in my way---the spring musical, my teaching schedule, Lent, community meetings, Holy Week, weekend missions, our Fr. Joseph's funeral, yadda, yadda, yadda.  And I certainly didn't do as much baking during the past two months as usual.  But in point of fact, it has been a conscious choice to scale back. 

Yes, dear Breadheads, I have been trying to be sensible.

I'm sure that those of you who know me well are shocked, shocked at this unexpected revelation.  After all, I am notorious in the monastic community for staying up unreasonably late after a meeting to produce two dozen loaves of multigrain bread for a bake sale, or testing three new recipes simultaneously, or making homemade cream puffs for the stage crew during production week.  But when I baked hot cross buns for Ash Wednesday, I made an extra batch to put in the freezer until Good Friday---entirely too sensible.  I'd have a day off from rehearsals or set building and use the time to grade papers, do laundry and nap---clear signs of the coming Apocalypse.  Easter came and went and I baked absolutely nothing---no pastries, no Austrian povitica, not a single dinner roll.  And I don't feel the least bit guilty.

The fact, the spring musical took a pretty big physical toll on my body, with far too many late night tech sessions going up and down ladders, followed by mornings hobbling like a 90 years old arthritic to the shower.  I soon came to the realization that something had to give, and since I can't quit teaching and don't want to skip prayer, much of my kitchen time had to go.  I made a big batch of white bread for the freezer sometime in early March, and played around with caramel recipes, but otherwise most of my connection with baking came from casually reading bread recipes without any intention of actually making them.

I know this hiatus is just about over.  I've got a pizza party this weekend, and a talk to give next Friday, and it won't be long before there are fresh chives and sage to inspire me.  But it's been a good exercise in restraint, and a reminder that we all need to give ourselves permission to take a break now and then.

As I mentioned, however, I have been experiementing with homemade caramels, much to the delight of my students/test-tasters.   The best recipe I've found is HERE, but be sure you have a large sauce pan with a heavy bottom so you don't scorch anything.  Wonderful as they are, but also a fine recipe with which to make turtles or chocolate covered caramel-peanut clusters!
1 Comment

Cooking as Competition

2/22/2013

1 Comment

 
Picture


Andy Greenwald recently wrote an insightful online article about the trends that led to what he considers the current dismal state of cooking shows.  He observes: "Fueled by the insatiable advertising needs of the Food Network and a viewing public suddenly interested in distinguishing deglazing from deveining, the staid format established by Julia Child and Jacques Pepin was chucked into the garbage like spoiled milk. It was no longer enough to stand behind a stove top and instruct. The new goal was to entertain. Chefs were required to prep themselves right alongside their mise en place, to garnish their dishes not with parsley but with personality."
 
As someone who had to be very much aware of his TV persona during my three seasons of Breaking Bread, I certainly agree with this observation, although I don't think necessarily resulted in bad television.  Yes, there are characters on cooking shows who are becoming increasingly cartoonish---Paula Deen and Buddy Valastro come to mind---as happened to Emeril Legasse around 2005.  When you play a sitcom caricature of yourself, your career has jumped the shark, or at the very least your credibility as a serious chef is questionable.  But chefs like Ina Garten and Giada De Laurentiis demonstrate that "quirky" and "outrageous" and "LOUD" are not the only watchwords for success.  I think Aaron Sanchez is terrific, but he's underutilized both on Chefs vs City and Heat Seekers.  The latter show is dull, because you can't really see how hot that dish is except by the endless groans, weeping and sweating of the hosts, week after week after week.  The problem I have with Chefs vs City is that, like the bulk of night-time food TV, it's a competition.

I don't know which network executives decided that putting The Galloping Gourmet, Beat the Clock and Let's Make a Deal into the TV food processor would result in great entertainment, but I hope they don't get any other ideas soon.  I know that the movement from "cooking shows" to "food TV" reflects a shift in audience tastes, but Food Network programing has also been a catalyst in that very shift.  Don't get me wrong---I love watching cake competitions and have enjoyed some of the episodes of Top Chef Masters and Sweet Genius.  But for the most part, I don't enjoy seeing people struggling with manufactured obstacles and mismatched ingredients with a clock ticking like a time bomb on the back wall of the studio.  Most of all, I don't like watching people run in the kitchen.  I suppose some viewers might take a perverse satisfaction in seeing fancy-schmancy chefs in double-breasted jackets scurrying around in a sweaty panic, but I just feel sorry for them---like I want to step in and say. "Calm down--let me chop that bok choy for you." 

Then there's the whole concept of "winner and losers" that has been a part of American culture since competing European monarchs first started sending ships westward across the Atlantic.  Do I really need to watch falure after failure sent to "pack their knives" in order to appreciate someone's culinary expertise?  Cooking competitions are a good enough surrogate for people who don't enjoy sports; we all like having someone to root for, or just as importantly someone to be against.  It makes for interesting Tweets and postings on Facebook, if that's your primary means of social interaction.  But if I want to connect with fellow foodies, I'd just as soon invite them to the abbey kitchen to bake with me, rather than choose sides in the Sugar Dome.

My aversion to rushed and stressful cooking is at least in part based on the fact that my primary work in the kitchen is with yeast breads, which for the most part refuse to be rushed.  I know that the Quick Rise Method (first proposed in a Farm Journal cookbook in the 60's) and its attendant specialty fast-rising yeasts continue to be popular and profitable, and I've used Fleischmann's RapidRise Yeast a time or two with good results.  But for the most part, I'm a proponent of the slow rise method championed by Peter Reinhart in Brother Juniper's Bread Book: Slow Rise as Method and Metaphor (check it out on Amazon HERE).  I approach baking as a form of relaxation, an opportunity for reflection when I'm alone and re-connection when I'm with friends.  And there's something wonderful about a cooking project that can be virtually ignored for over an hour, while the dough rises mysteriously and majestically in a stoneware bowl hidden beneath a linen towel.

My friends at Back in the Day Bakery understand this, which shows that even a profitable commercial venture doesn't have to be a madhouse in the back room.   Their motto is    “Slow Down and Taste the Sweet Life” and it's "not just a tag line, but a belief tha good food should nourish the body and soul." Cheryl and Griffith Day run this neighborhood bakeshop where all of the products are made in small batches by hand, with an emphasis on quality, local ingredients.   I especially appreciate their love for sourcream-based coffee cakes, which I happen to share!  (Full disclosure---they sent me a copy of their cookbook after we "met" on Twitter, and I responded in kind).

Andy Greenwald's article is worth reading; you'll find it HERE.
    After you read it you might look at food television a little differently, and perhaps become a little choosier about which shows you watch.  Better still, it might make you switch off the TV all together, get out grandma's cookbook, and make her raisin bread recipe to share with your family.

1 Comment

Hot Cross Buns

2/13/2013

1 Comment

 
Picture
Hot Cross Buns are a traditional bread for Good Friday, especially in the Bristish Isles where they originated.  Today the cross is usually made of frosting, but originally it was cut into the dough before baking.  The cross, of course, is a symbol of the Crucifixion, but it's likely cutting a cross or "X" into a roll pre-dates Christianity.  Some food historians believe that the Saxons cut a cross into rolls served in the spring in honor of the goddess Eostre, the sections symbolizing the four quarters of the moon.  In Ireland, an "X" was slashed in every loaf of bread "to let out the fairies" although how they got caught in the dough in the first place is a mystery!  
        Because such rolls were associated with "supersition and popery" their sale was forbidden under Elizabeth I, making them a strictly homemade treat.  Such restrictions were eventually relaxed, leading to the famous seller's cry: "Hot cross buns!  Hot cross buns!  One ha' penny, two ha' penny, hot cross buns!"  The first recorded use of the term "hot cross bun" was not until 1733.  They have come to be associated with Good Friday, funeral dinners, and in some places, Christmas.
        However, my Grandpa Frankie (who was Austrian) loved them so much that my (very Irish) Grandma Tootsie would make them througout the year.  I myself try to make them on Ash Wednesday, Good Friday, and the last Sunday of Easter.  So last night while everyone else was at the community's Mardi Gras haustus, I was in the kitchen making hot cross buns.  I've posted my original recipe HERE, which is from the first season of Breaking Bread.  (N.B.  I usually double or even triple the cinnamon now!)
        Since then I've tried to make a better bun---softer, less dense---so now I take potato roll dough and add the spices and raisins to that.  Any potato roll recipe that makes a dozen rolls will do;  just add a tablespoon of cinnamon and a cup of raisins or currants.  The results really are a bit of heaven, so much so that perhaps they don't even count as a penance!  But if one yummy roll and a bit of coffee is all you eat until your small-bowl-of-soup lunch until your modest-and-meatless supper, well then I'd say Lent is well underway.

1 Comment

Muffaletta Pizza for Mardi Gras

2/10/2013

1 Comment

 
Picture
Since Mardi Gras is this Tuesday, I thought I'd share the recipe for Muffaletta Pizza.  The Muffaletta is a tradtional New Orleans sandwich invented by Italian immigrants that uses deli meats and provolone topped with a garlic olive salad.  Unfortunately, every time I've made it, the pie never stays on the table long enough to get a photo!  If you like salty foods, especially olives, you'll love this pizza.  The printer friendly recipe is HERE.

Muffaletta Pizza  (for a 14” to 16” pizza)
¼ cup pizza sauce (optional)
3/4 to 1 cup olive salad (see below)
3 to 4 oz. each cappocola, mortadella, and genoa salami slices, cut into strips
8 to 10 oz. shredded mozzarella and provolone cheese blend

Roll dough out into a 12” to 14” crust with a thicker outer edge.  Place on a pizza peel well-dusted with cornmeal; par-bake, if desired.   Spread pizza sauce evenly over the crust, if desired.  Layer the olive salad, meats and cheese in that order, and bake pizza on a preheated stone at 500 degrees for about 10-12 minutes, or until cheese begins to brown very lightly.

Notes
---The muffaletta is a sandwich made popular in New Orleans by Italian immigrants.  Originally the name was associated with a round loaf of bread but has become synonymous with a sandwich made with Italian deli meats and cheeses with a garlic olive salad condiment. 
---Another option for the cheese is to take whole round slices of provolone and lay them over the pizza, slightly overlapping, which gives the pie an interesting appearance.  Remember that provolone won’t brown as much as mozz, so don’t overbake.

Olive Salad
¾ cup medium pimiento stuffed green olives
½ cup medium black olives
½ cup Italian mild gardiniera
¼ cup minced red onion
2 tbs. capers, drained
2 or 3 large garlic cloves, mashed and minced
1 Tbs. fresh minced Italian parsley
1 Tbs. fresh minced oregano
½ tsp. red pepper flakes
1 Tbs. balsamic vinegar or red wine vinegar
2 Tbs. olive oil
1 Tbs. grated Parmesan

Drain and coarsely chop the green olives, black olives and gardiniera, and combine them in a bowl.  Add remaining ingredients, give it a couple of twists from the pepper mill and toss until blended.   Cover bowl and refrigerate until use.

Notes
---This is the traditional condiment on a New Orleans muffaletta sandwich, although some recipes have more ingredients: thinly sliced celery, roasted red peppers, artichoke hearts, etc.  I simplified by using gardiniera (an Italian mix of cauliflower, carrots, celery, peppers, etc., usually pickled).  You can experiment with whatever is at the market or coming out of your garden at the moment. 
---Don't have fresh herbs?  Use 1 tsp dried for every Tbs. fresh.


1 Comment

Sweetheart Coffee Cake for Valentine's Day

2/6/2013

0 Comments

 
Picture
Here's a lovely breakfast treat to make for your sweetheart for Valentine's Day breakfast.  It's a heart-shaped yeasted coffee cake that is not much more difficult than cinnamon rolls, so it's well within the reach of most intermediate Breadheads.

The dough used for this coffee cake could be any basic sweet dough, something you might use for cinnamon rolls or soft dinner rolls.

Sweetheart Coffee Cake Yield: 1 loaf, about 12 servings
½  batch (20 to 24 oz.) of Basic Sweet Dough or dinner roll dough
1 (12 oz.) can Solo Cherry Cake and Pastry Filling

On a lightly floured board, roll dough out into a rectangle 12” x 14”.  Top the dough with the filling, leaving 1 inch of the top edge dry.  Roll the dough up jellyroll style.  Lightly brush the top edge with a little water, so it will stick to the roll; pinch to seal.  Using a sharp knife cut the roll lengthwise, leaving about 2 inches uncut at both ends.  Grasp the two sections near the top and rotate them so the interior layers are facing upwards, and pull the top section toward you to form the heart shape (see photos).  Place on a baking sheet or jellyroll pan lined with parchment.  Cover with a dry towel and let rise until doubled, 30 to 45 minutes.  Bake in a preheated 375 degree oven for 20 to 25 minutes or until lightly browned.  Remove from baking sheet and cool on rack.  Drizzle with almond flavored glaze and sprinkle with toasted sliced almonds.
Picture
Here's the dough spread with cherry filling.  You could use any flavor you want, but cherry and raspberry look the most appropriate for a Valentine.

Picture
Here's the jellyroll---the next step (not illustrated) is to put it on a parchment-lined jellyroll pan or baking sheet.  You CAN shape it on the counter and then transfer it, but that can be a little tricky and messy.

Picture
I used my sharpest knife to cut it down the middle, leaving about 2" uncut at top and bottom . . .

Picture
. . . and then used a pizza cutter to make sure it was cut all the way through.  The pizza cutter doesn't cut the parchment or scratch the pan.

Picture
The cut sides are turned upwards.  At this point it looks like a bloody squid on a butcher block, but push on through!

Picture
Grab the two sides near the top and bring them downward to form the heart (bad angle of photo,   I know---sorry!)

Picture
Notice that I actually turned the top edge under to point downwards.  That makes the upper arches more pronounced so you get a classic heart shape.

Picture
The sides of the heart may require a little adjustment in order to get a symmetrical coffee cake, and you'll get filling all over your fingers.

Picture
Shaped and on the parch-ment---you can pinch the bottom edge to make a point (see photo far right).

Picture
Risen 30 minutes---it really looks like a bloody squid now!

Picture
Baked 23 minutes at 375 degrees F.

Picture
0 Comments

Two alternatives to "pans"

2/3/2013

2 Comments

 
Picture
When people think of "bread pans" it's usually an image of metal retangular loaf pans that comes to mind.  But there are plenty of lovely alternatives to the classic sandwich loaf shape, and I made a couple of them this Thursday using leftover pizza dough.

(I would like to insert here a parenthetical comment about the pizza dough that night---I added a bit of gluten powder to the dough, used a bit less flour than the recipe called for, and kneaded it longer than usual.  The dough was mixed with cold ingredients and left to rise slowly from 4 p.m. until 8 p.m.  The results were outstanding.  The dough was both crisp on the bottom and chewy on the outer crust, with a slight char on the bubbly parts.  Hope I can reproduce those results!)

    I deliberately made extra dough so I could have a couple of loaves of bread as well, one for monk breakfast and one as a thank-you for a friend who had done me a favor.  The loaf with the flour swirl on top was produced using the round basket, known as a banneton in France and Belgium and a brotform in Germany.  The inside of the basket is genrously dusted with flour and the ball of dough is placed in it for its final rise or proof.  This basket can hold up to 2 1/2 pounds of dough, although this loaf was only 1 pound, 10 oz.  After the loaf has nearly doubled in volume and the oven preheated with a baking stone,  the loaf is tipped out directly onto the stone.  In an alternative method (which I prefer) a wooden peel or paddle is placed over the basket, the basket and peel flipped over and then the basket removed.  The peel is then used to ease the loaf onto the baking stone.  In either method, you have to take care not to handle the loaf roughly or it will deflate.   As you can see, it produces a stylish loaf that looks like something you'd find in a shop in Provence!

    The other loaf was baked in the stoneware loaf "pan" pictured at the bottom left of the photo.  It's made of unglazed stoneware, and once it's been used a few times it becomes utterly non-stick and produces a lovely crust because it distributes heat so evenly and helps pull off moisture from the loaf.   The pan is set directly onto the oven rack, and like a pizza stone. should never be washed with soap, only wiped off with a damps cloth.  Stoneware pans can be pricey, but I think they're worth the invstment for a true Breadhead.  Pampered Chef has a line of them in a variety of shapes, as does The Baker's Catalog (King Arthur Flour).  However, I've not seen this longer pan in recent catalogues.

2 Comments

"Bread Flintstone" no more

1/26/2013

0 Comments

 
Picture
Although it feels shameful to admit it, I can no longer refer to myself as "Bread Flintstone" for resisting electric or electronic gadgets in the kitchen.  I still prefer a chef's knife to a food processor, am proud to own three different sizes of hand-cranked Foley food mills, and will continue to spread softened butter with a wooden spatula.  But the faculty of Saint Bede Academy were issued iPads this year, and once I discovered the wide variety of food apps available, there was no turning back.
     So today I baked Monkey Bread Muffins with my friend Craig, plus a large Monkey Bread in a bundt pan---two recipes, same temp, different baking times.  So I set two different timers with two different alarm sounds on my Timer+ app (Minama Sofware, FREE, with a couple of upgrades available for purchase).  This morning I also entered several receipes into The Recipe Box (Corpus Collusion, $4.99) which allows me to import recipes instantly from dozens of websites like allrecipes.com and Betty Crocker.  I looked at a LOT of recipe management apps in the iTunes App Store, some of which were free, but I liked the features and the good ratings The Recipe Box has.  The keyboard for entering your own recipes has keys for "tsp", "Tbs", "minced" and other commonly used terms---really like that feature.  The app also helps me generate shopping lists.  Paprika Recipe Manager (Hindsight Labs LLC, $4.99) has similar features, does the "one tap" recipe download on over 190 supported sites, and has Cloud sync capability as well---I suspect I would have enjoyed using it, too.  There are a number of free recipe manager apps out there, but I was willing to pay extra for the features I wanted.  Many of these apps are available for smart phones as well.  If you're new to the whole tablet thing, downlaod one or two free ones to get a feel for them before you decide to purchase one.  And you can bet that if I find other useful kitchen apps I'll be sharing them.   Have a favorite to suggest?  Send me a message below, or tweet me @FrDomGarramone.

Submit
0 Comments

Pizza and Donuts

1/23/2013

1 Comment

 
    K of C events went great last weekend, but I don't have any photos to show for it except the crew from the pizza night at Godfrey and the tables set up with the free goodie bags generously provided by Hodgson Mills.  The other photo below is of me with the brothers from the OMI house of formation, which is where I spent the night---beautiful old house (1920's) built on a bluff overlooking the Mississippi.
Picture
But on my way out of Godfrey on Sunday morning I took a wrong turn which turned out to be a right turn, because I turned up in the parking lot of the LAST MISTER DONUT IN THE UNITED STATES!  Yes, and they still get the same Mister Donut coffee blend from a supplier in Massachusetts, which tastes just like the coffee I used to get on Sunday mornings along with an old-fashioned sour cream donut.  The fellow in the picture is one Caesar Blanco, who bought the franchise in 2004.  At that time most Mister Donuts had already been bought out by Duncan Donuts, and there were only 9 left in Illinois.  Today, he says, his franchise is the very last one left in the U.S., although Mister Donut still has a very strong presence in  Asia, especially Japan.  (I should note that I don't have any independent verification of the "last Mister Donut" claim, and I'm not sure how I'd go about that anyway, but I can say that I haven't seen one for years.)  If you have fond memories of Mister Donut coffee and their giant cinnamon rolls, or maybe want to try a newer product like the croissant with sausage, egg and cheese (I tried it and it's better than a lot of other fast food breakfast sandwiches, IMHO), I recommend you make a road trip to 2720A Grovelin St., Godfrey, IL 62035 (618) 466-6327.  Worth it just for the notalgic smell of the place, especially when they're frying the cake donuts.  Ask for Caesar and tell him Fr. Dom sent you!

    Caesar says he got into the donut business right after retiring from the Navy in '93, and by doing so he was following in a noble tradition.  Donuts were not always as universally popular (or common) as they are now.  What made them so was the Salvation Army serving them to "doughboys" in WWI and the Red Cross serving them to GI's in WWII--the young ladies who served them were called "Donut Dollies".  When the WWII vets returned home, many used their GI Bill grants to open donut shops.  There used to be a donut shop in San Jose with a WWII museum attached to it that chronicled this little piece of Americana, but sadly, Lou's Living Donut Museum was closed in 2006 due to family illness.  I don't know what happened to all the memorablia, but it certainly was a unique shop and I hope the displays were preserved somewhere.
1 Comment

Par Baked Pizza Crusts

1/17/2013

0 Comments

 
Picture
Busy weekend ahead!  Friday I'll be speaking at the Knights of Columbus Hall in St. Charles to give a presentation titled "What Kind of Bread Shall We Be?"---a good way to start your pre-Lenten reflection (see the events page for more details and a contact person).  Then on Saturday I'll be giving a pizza demo and sampling at the K of C in Godfrey IL (also on the events page).   There are still tickets available for both events, so I hope to see you there!

Whever I do a pizza event for more than a dozen people or so, I have to par bake crusts ahead of time--I did ten on Tuesday night and will do another dozen or so tonight.  I thought Breadheads might be interested in the method, so I'm sharing a brief section from my book Thursday Night Pizza (Reedy Press, 2010, get it from St. Bede Abbey Press HERE).  By the way, par-baked crusts are a GREAT bake sale item.


Par-Baked Crusts


A par-baked crust is made with the same dough as the other pizzas in this book, although the more moist Italian-style dough tends to keep from drying out in the process.  Sometimes I’ll make American-style dough with a little extra water and turn the whole batch into par-baked crusts.  Since the crusts are essentially baked twice, a wet dough helps prevent an overly dry crust.

Form the crust according to the directions and place on a peel lightly dusted with cornmeal; dock the dough.  Brush the top of the dough all over lightly with olive oil and allow to rest for 10 minutes. Then bake on a preheated pizza stone at 350˚ F. for 7 to 10 minutes, or until the dough just beginning to brown lightly.  Remove from the stone and slide onto a cooling rack.  If large air bubbles form on the crust while it’s in the oven, pierce them with a fork and deflate them.  When the crust is completely cool, double wrap in plastic wrap and place in the freezer.  Par-bakes may be stored for up to 3 months, but mine never last that long!

To use, unwrap the crust and let it thaw for at least 15 minutes before adding toppings.  Then bake as usual.  The crust will be crispier than with fresh dough, but you may find that you prefer that.  I like a par-baked crust when I’m making a pizza with a lot of toppings, like the Muffaletta of the Pizza Diavolo, because it holds up better.  Using par-bakes is also a great way to serve a lot of pizzas in a hurry.  Using a combination of fresh and par-baked crusts, two culinary students and I once made 54 pizzas in an hour and a half for a fundraiser.


0 Comments
<<Previous
Forward>>

    Author

    Fr. Dominic Garramone AKA 
    the Bread Monk

    Categories

    All
    Breadhead Bookshelf
    Breakfast Breads
    Buns Rolls And Biscuits
    Craftsy
    Donuts
    Equipment
    Ethnic Breads
    Events
    Gluten Free
    Herbal Breads
    Holidays
    Lake Thunderbird
    Memories Of Mama
    Multigrain Breads
    Pastries
    Pizza
    Places To Visit
    Quick Breads
    Reflections While The Bread Is Rising
    Savory Breads
    Sourdough
    Spirituality
    Stuff Besides Bread
    Sweet Breads
    The Classics
    Tools Of The Trade

    RSS Feed

    Archives

    June 2024
    December 2023
    September 2022
    April 2022
    March 2022
    February 2022
    January 2022
    October 2021
    May 2021
    April 2021
    March 2021
    February 2021
    August 2020
    July 2020
    May 2020
    February 2020
    October 2019
    June 2019
    September 2018
    July 2018
    May 2018
    April 2018
    March 2018
    February 2018
    January 2018
    December 2017
    November 2017
    August 2017
    July 2017
    June 2017
    May 2017
    April 2017
    March 2017
    February 2017
    January 2017
    December 2016
    November 2016
    October 2016
    September 2016
    August 2016
    June 2016
    May 2016
    April 2016
    February 2016
    December 2015
    November 2015
    October 2015
    September 2015
    August 2015
    July 2015
    June 2015
    May 2015
    April 2015
    March 2015
    December 2014
    November 2014
    October 2014
    September 2014
    August 2014
    July 2014
    June 2014
    May 2014
    April 2014
    March 2014
    February 2014
    January 2014
    December 2013
    November 2013
    October 2013
    September 2013
    August 2013
    July 2013
    June 2013
    May 2013
    April 2013
    February 2013
    January 2013
    December 2012
    November 2012
    October 2012
    September 2012
    August 2012
    July 2012
    June 2012
    May 2012
    April 2012
    March 2012
    February 2012
    January 2012
    December 2011
    November 2011
    October 2011
    September 2011

Web Hosting by FatCow