The Bread Monk
  • Home
  • My Bread Blog
  • Breadhead Videos
  • Recipes
  • Fr. Dom's Books
  • Events/Programs
  • Shortcut Stollen
  • New Page

New book's table of contents

6/30/2012

0 Comments

 
June 29, 2012

Work continues on the Breadhead book, although the heat kept me from writing on the front patio for most of the day.  Here’s the table of contents (you can see that we’re continuing the “school of baking” motif):

Breadhead Course Syllabus

Lesson One: What is a Breadhead?
Lesson two:  Why be a Breadhead?
Lesson Three: Tools of the Trade
Lesson Four: The Kinds of Flour
Lesson: Five: Introduction to Yeast
Lesson Six: Other Ingredients
Lesson Seven: The Mechanics of Mixing
Lesson Eight: The Need to Knead
Lesson Nine: Spring Break: Resting and Rising
Lesson Ten: Punching Down, Shaping and Baking
Lesson Eleven: How to Choose and Use a Bread Knife
Lesson Twelve: Storing your Bread
Breadhead Practicum Part I
·         Basic White Bread Recipe
                o   Free Form Loaves
                o   Standard Loaf Pans
                o   Pull Apart Garlic Bread
                o   Chewy Rolls
                o   Pizza
                o   Pretzels
Breadhead Practicum Part II
·         Basic Wheat Bread Recipe
                o   Slab Braid
                o   Fougasse
                o   Chop Block Bread
                o   Raisin Walnut Bread
                o   Ham and Cheese Lattice Braid
                o   Herbal Spiral
Breadhead Practicum Part III
·         Basic Sweet Dough Recipe
                o   Braid Top Loaf
                o   Dinner Rolls
                o   Cinnamon Swirl
                o   Cinnamon Rolls
                o   Butterfly Breakfast Rolls
                o   Rose Rolls
Final Exam TBA

As you can see, the book has three “Master Recipes” and the breads that follow are all based on them.  Special thanks to Breadhead, paintballer and SCA enthusiast Jeff Elder for sending me the idea for this three recipe format in a Facebook post. 
0 Comments

Julie & Julia & I

6/29/2012

1 Comment

 
I have been spending this week at our abbey’s little retreat cabin at Lake Thunderbird near Henry Illinois.  I come here every year, in large part because I love the solitude and the quiet.  I see wildlife every day; a wild turkey has been strutting around the woods in the back of the cabin all afternoon, and this evening as I was eating supper on the front patio a fawn, equal parts awkwardness and grace, capered across the lawn.  I like not having to share the kitchen or the remote (no small thing when you normally live in a house full of bachelors) although I haven’t baked a thing, despite the fact that the abbot just had a new oven installed here.  Mostly I come here to write, and this week is no exception.

I’m working on How to Be a Breadhead: a beginner’s guide to baking.  People have been telling me to write a beginner’s book for years now, so here I am at the computer, writing outside in the dark, the keys illuminated by the built-in light of my school laptop.  I spend most of the day here as well, starting at 7:30 a.m. and working six to eight hours.  There’s no land-line and we can’t get cell phone service here—it’s amazing how much work you can get done when the phone never rings. 

But I took a break from writing tonight to watch Julie & Julia, in part because Norah Ephrem, who wrote the screenplay, produced and directed the film, died earlier this week.  I’ve seen snippets on cable while channel surfing between innings of Cardinals’ games or shows on Food Network, but this is the first time I’ve watched the entire movie.  In short, I loved the film.  I’ve been a fan of Julia Child since I was ten, and I could relate to Julie as a writer and blogger and self-taught cook. 

But watching their stories unfold also made me reflect on how different my experience of being a baker has been compared to their lives in the kitchen.  My path has been relatively straightforward: no sexism to confront in a French cooking school, no McCarthyism to threaten my hopes, no meltdowns in the kitchen, no tortured relationships or anguished self-doubt.  At least until now.

What I am beginning to realize, after seeing their passion and struggle and self-discipline, is that the cookbooks I write are not particularly complex or profound.  I read Peter Reinhart’s incredibly detailed descriptions of the science behind baking with a combination of awe and dismay, and see my own recipes as ordinary as those found in a parish cookbook.  I compare my slim volumes to Bernard Clayton’s New Complete Book of Breads (300 recipes, 748 pages) and realize that if you removed all the hardback covers, the stack of my complete works would still come up short. 

I’ve always known that there are far better bakers than I, and a lot of them have never been on TV or published a cookbook.  I can’t make decent biscuits or pie crust, for example, and I admire anyone with the patience for really first-rate pastries. But seeing Julia Child depicted as working for years on a manual typewriter on a book that changed American cooking makes me wonder if a paperback beginner’s book banged out in a year is truly worthy of being called a cookbook at all.

Nonetheless, I keep writing, in part because I belong to an abbey with an aging and shrinking population, and somebody has to pay for health care.  I write because not every aspiring baker has the time and patience for an artisan bread recipe that takes nine hours to complete, regardless of the perfection the crust and the complexity of the flavors.  I write because people taste my honey oatmeal bread and ask for the recipe, and then later tell me it’s become a family favorite.  And I write because when I pull tomato basil focaccia out of the oven, fragrant with herbs and olive oil and real Romano Pecorino, I can’t imagine not wanting to share.

I guess what I’ve come to realize is that ultimately publishing cookbooks is an exercise in humility.  I know what I know because Julia and Peter and Bernard, Beth Hensberger and Ed Wood and James Beard and my mom all know more than I do.  Recognizing that, without resentment or envy or bitterness, is something St. Benedict would want me to do.  He wrote a chapter in his Rule for monks called “The Ladder of Humility,” describing twelve steps leading to monastic perfection.  I know I’m still near the bottom of the ladder and have far to climb, but perhaps I have set my foot, however tentatively, on the next rung.
“Be not arrogant of what thou knowest,
for what artist is in possession of the perfection
to which he should aspire?” 
Egyptian proverb

1 Comment

Bacon Dill Bread, canapes and cream cheese

6/11/2012

0 Comments

 
Picture
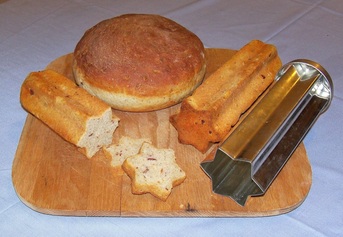
If you read cookbooks from Country Living or Taste of Home, you've probably seen recipes for Dilly Bread before: a loaf baked in a casserole dish, using milk and cottage cheese for a rich, tender crumb, and accented with fresh or dried dill.   Here's a picture of my version (which I baked tonight) and those darker flecks you are seeing are bits of bacon.  Although bacon is becoming over-used these days, it certainly adds a lot to this bread.  About two-thirds of a cup of chopped, crisp bacon (cooked) is added to a recipe that makes two loaves.  You'll find the recipe at the end of this blog.
          You can see that I baked one loaf in a casserole dish and the other in canape bread molds.  These molds used to be available from Pampered Chef and I believe Norpro still makes them.  But evidently lots of people have bought them and never used them, because they turn up at garage sales for 50 cents, or $1.99 at Goodwill, brand spankin' new and still in the box.   That's unfortunate, because they do make beautiful little sandwiches for a tea party or light buffet, and it isn't at all difficult to use them. 
     Just in case you have some and have lost the instructions:  You remove the ends and spray the inside with cooking spray, put on cap one and drop in a small portion of dough (9 or 10 ounces is perfect), put the top cap on and let the dough rise with the mold standing upright.  They bake upright in the oven as well, usually in about two-thirds the time of a full loaf.  Take them out of the oven and let cool with both caps off for 2 or 3 minutes, then tap one end of the mold lightly on the countertop.  The bread loosens up and slides right out, or at least it always has for me.
          The molds come in three shapes---six pointed star, flower and heart--and thanks to garage sales and Goodwill, I own two or three of each shape.  They are a bit awkward to clean (I use a brush or sponge on a long handle) and the best way to dry them is to put them back in the oven as it cools, rather than trying to get into all those corners with a dish towel.    
          I put my star loaves in the freezer (see previous post) since I intend to use them later in the month for a "breads and spreads" buffet.  A little star-slice of bacon dill spread with cream cheese and topped with a little deli ham or ham salad---yum!

Bacon Dill Bread
½ cup warm water (100 to 110 degrees)
2 tsp. brown sugar
2 pkg. active dry yeast
1 c. milk
1 c. cottage cheese
2 Tbs. fresh chopped dill (1 Tbs. dried)
1½ tsp. salt
2/3 cup cooked, crumbled bacon, drained (about 14 to 16 strips)
5 to 6 cups of all-purpose flour

Proof yeast with water and sugar in a small bowl.  Blend milk and cottage cheese in a blender until smooth and warm mixture to 100 to 110 degrees.   Pour milk mixture into a large bowl and add yeast, dill and salt.  Stir in 2 cups of flour until thoroughly incorporated.  Add bacon and mix thoroughly.  Add 3 more cups of flour, one cup at a time, mixing thoroughly each time.  Turn dough out onto a lightly floured board and knead for 6 to 8 minutes, adding small amounts of flour as needed to keep dough manageable.  At the end of the kneading period, dough should be rather soft rather than stiff, but only slightly sticky.  Oil the surface of the dough and place back in the rinsed bowl.  Cover with a towel and allow to rise in a warm place free of drafts for 45 to 60 minutes, or until doubled.  Punch dough down and knead briefly to work out the larger air bubbles.  Dough may be formed into one large or two medium free form loaves and placed on a lightly greased baking sheet, or divided into two and placed in standard loaf pans. (if you make free form loaves, they may not rise as high as in a pan.)  Cover and let rise for 20 to 30 minutes or until nearly doubled.  Bake in a preheated 350 degree oven for 40 to 50 minutes, until lightly brown and loaf sounds hollow when tapped.  Cool on racks.

Notes ---Dill is not a flavoring I much care for (except in pickles) but our Br. Nathaniel finds it irresistible.  Monasteries are like other families---the cook can’t always make what he likes best!---so I developed this bread flavored with dill and bacon.  You’ll often see recipes for “dilly bread” which use cottage cheese for moistness and sautéed onions for flavor, but I find that the bacon in my version is less overwhelming of the dill---I avoid adding caraway seed for the same reason.  You’ll notice that there’s no oil in this recipe---between the bacon and the cheese, there’s plenty of fat to enrich the dough.  If you use lo-fat or fat-free products, the dough will not be as soft and smooth, but the bread will still be delicious.
---You can fry the bacon, drain and then crumble it, or you can cut the bacon into small pieces and then fry and drain it.  Either way works fine for the recipe, although with the latter technique I find myself more inclined to nibble!
---I often bake this bread in a 2 quart casserole dish, but there’s just a little too much dough to fit.  So I divide out enough dough to fill a mini-loaf pan.  That way I can have a sample loaf for my helpers when the bread comes out of the oven, and the large loaf to serve the community.  A pair of 1 1/2 quart casserole dishes works fine, too.


0 Comments

How to freeze bread

6/11/2012

0 Comments

 
Picture
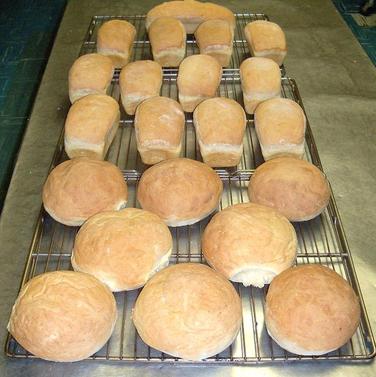
As I noted in my last post, recently we had some smashed potatoes (with the skins) left over from supper.  I ran then through the ricer to smooth them out and remove the skins, and got about 8 cups of creamy smooth potatoes, and made this big batch of potato bread.  The potatoes give the bread a soft, tender crumb, and when the breads go in the oven, they get a lot of "oven spring"--that big jump in volume, sometimes as much as 20%, that comes from the gases within the bread heating and expanding.  The result is a soft, airy, bread that is still hearty and flavorful.   If you want the recipe, click on "Bread Basic" at the top of this page for a link to "Hungarian Potato Bread" (feel free to omit the fennel seeds, as I did).
          Obviously, not even the bread loving monks of St. Bede can polish all these loaves off before they start to go stale, and since I didn't have a sale this weekend, I decided to freeze most of them for use at some upcoming events.  There are two methods for freezing bread, one for short term (3 weeks) and one for long term storage (up to six months).
          No matter how long you intend to store bread, it must be completely cool before you wrap it.  As freshly baked bread cools, moisture evaporates from the warm center to the surface.  If you wrap it while it is warm, the moisture will condense on the crust of the bread and the interior of your wrapper, causing the bread to be soggy when thawed.  I generally wait three or four hours before wrapping freshly baked bread, depending upon the temperature of the kitchen.  Don't try to speed things up by placing the unwrapped bread in the fridge; the surface will cool but the center will remain warm.  Just be patient and wrapped the bread when it's absolutly stone cold.
          If you intend to store a loaf of bread in the freezer for no more than two or three weeks, you can wrap it tightly in a single layer of plastic wrap, or place it in a re-used bread bag and expel as much of the air as possible before sealing it with a twist tie or masking tape.  Store-bought  bread in its original wrapper will keep in the freezer for about two or three weeks as well.   
          However, ordinary bread bags and plastic wrap are not really designed for long-term storage in the freezer.  Bread that will be frozen for more than a couple of weeks must be double-wrapped in freezer quality plastic wrap OR wrapped once in regular plastic wrap and then stored in a zip-lock freezer bag.  Some people suggest one layer of freezer quality plastic and another of aluminum foil or freezer paper.  A vacuum sealer like FreshLock or FoodSaver will also do the job quite nicely--but if you have one, you probably already knew that!
          When it comes time to thaw the bread, a one pound loaf in its wrapper will thaw completely in about three hours at room temperature.  I don't recommend the defrost cycle of a microwave--I think it makes the bread tough and chewy (and not in a good way).  Some people prefer to freeze their bread already sliced, and just remove the number of slices they want.  A slice of frozen bread will thaw on a countertop, uncovered, in about 10 minutes. 
          What about freezing bread dough for baking later?  That's a post for another day!

0 Comments

Herbed Fruit Salad

6/8/2012

0 Comments

 
Picture
I have blogged before about an upcoming herb gardener's retreat on June 23-24, so I've been testing a few recipes in advance.  We had fruit salad at supper last night, and since I've been planning to serve fruit salad on Sunday morning or the retreat, I thought I use the leftovers to test a couple of herbal combinations I've been meaning to try.  Everyone has seen recipes for fruit salad with mint, but I've also had a very fine dinner salad with orange slices, red onion, and slivers of fennel bulb that was excellent.  The light licorice flavor of the fennel complemented the orange very nicely.
          I have plenty of spearmint in the garden, so I snipped a few sprigs of that along with fennel and anise hyssop (this last herb having a similar but distinct licorice flavor as well).  I minced the herbs fine with my mezzaluna.  In one bowl I tried mint and fennel with the orange/pineapple/strawberry/melon mix, in the other bowl mint and anise hyssop and the same fruits.  I let the flavors marry for about two hours and then tested it with my chef friend Chad who happened to be in the kitchen.  We both agreed that the mint and fennel combination was much better, even after multiple tastings back and forth.
          So a basic recipe: 2 cups of mixed fruit (make sure there's some orange in there, go easy on the strawberry, and keep all the juices); and 2 teaspoons each of fresh minced spearmint and fennel leaves.  Toss the whole business gently, cover and refrigerate for at least two hours.  You could try other mints (lemon mint, apple mint, peppermint) or even pineapple sage or lemon verbena.  A pinch or two of ground coriander could give it a little exotic edge, as would freshly grated ginger.
          Tonight, back to bread--potato bread, to be exact, because we had lef

0 Comments

Breadhead Bookshelf: The Cornbread Book

5/31/2012

0 Comments

 
This post is the first of a series called "Breadhead Bookshelf" in which I review bread books in my collection that I think belong in your collection, too.

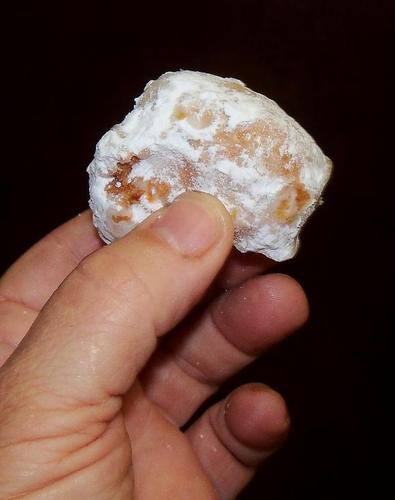
I decided to reward myself after grading all my history finals AND putting in the herb garden with a treat I haven't had in years: corn fritters.  I first encountered them at the Heart of Illinois Fair in Peoria, Illinois.  There was a church group that had a stand selling corn fritters, made fresh before your eyes, and they were exquisite.  If you don't know what corn fritters are, they are fried bits of batter (very similar to an eggy waffle batter) with corn kernals mixed in.  They are usually rolled in granulated or powdered sugar and served warm.
Picture
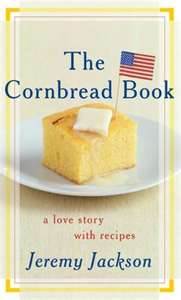
     I had never made corn fritters before, so I decided to go old school and look in my cookbooks before resorting to the Internet.  The Joy of Cooking had a recipe for corn fritters with a very small amount of batter mixed with corn and fried in a pan---probably very traditional somewhere in the U.S., but not what I was looking for.  I found the right recipe in a book by Jeremy Jackson titled The Cornbread Book: a love story with recipes (William Morrow, 2003.)
     Jeremy is my kind of cookbook writer: witty, casual, slightly irreverent without being sarcastic, and passionate about his subject.  Plus, he's really done his homework: his first chapter is titled "A Pithy and Perfunctory History of Cornbread in these United States," and he starts with "7,000 years ago, some mopey bloke was slumping by his fire somewhere in the highlands of Mexico" and takes you all the way through Columbus, the failed Roanoke Colony, Huck Finn,  Thoreau, American cookbooks of the 1700's and 1800's, cornbread during the two world wars and the Jiffy box.  Whew!
     The book has brief but useful sections on ingredients and equipment, but it's the recipes that will dazzle and eventually entice you to fire up the oven and get out  a cast iron skillet: Sweet Cornbread, Ozark Cornbread, Gem and Pearl Breakfast Muffins, Gold Nugget Popovers, Velvet Spoonbread (!), Popcorn Focaccia (!!), Choco-Corno-Espresso-Almondo Biscotti (!!!)  Uncluttered pages and clear, detailed instructions make this a book worth buying and using regularly.

Picture
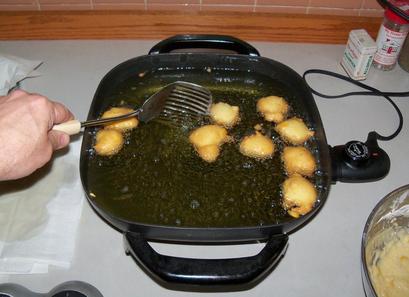
I don't have permision to share his corn fritter recipe (although I'll work on that) but I thought you might like to see them being fried . . .

Picture
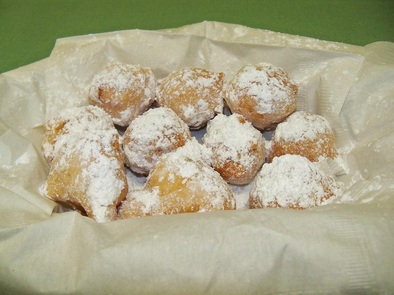
...and the finished product, which were enjoyed by my fellow monks at haustus tonight, but even more by me!

Picture


Mmmmmmm . . .

0 Comments

Coffee Cake Exceptionale

5/30/2012

0 Comments

 
Didn't have time to make a yeast bread tonight, so I made a quick coffee cake instead.  I've had this recipe for years and I've never found better.

Coffee Cake Exceptionale
¾ cup butter
1½ cups of sugar
3 eggs
1 ½ teaspoon vanilla extract
3 cups flour
1 ½ teaspoons baking powder
½ teaspoon baking soda
¼ teaspoon salt
1½ cups sour cream

Filling

¾ cup brown sugar
½ cup chopped nuts
1½ teaspoons ground cinnamon

Cream butter and sugar in mixer on high until light and fluffy.  Blend in eggs and vanilla until smooth.  Sift dry ingredients together.  With the mixer on low speed, alternate adding the sour cream and the dry ingredients until all is blended.  Grease and flour a 9″ x 11″ pan.  Layer half of the batter in the pan, then half of the filling, then another layer of batter.  Sprinkle the rest of the filling on top.  Bake in a pre-heated 350° F. for 60 minutes, or until a toothpick inserted in the center comes out clean.  May be served warm or cold. 

This is the version (slightly adapted) I received from some friends in their extended-family cookbook—thank you, Kathy Miller of Norway, Iowa!  I have made lots of variations on this recipe with regard to the filling.  Tonight I used a small can of Solo Apricot Filling and sugared walnuts for filling, with more chopped walnuts on top.  But I’ve used pie filling of various flavors, fresh fruit tossed with powdered sugar and cinnamon, fig preserves and golden raisins, and chopped dates with pecans, just to name a few.  My creations have always been devoured by brother monks, so don’t be afraid to experiment!  

0 Comments

Fresh herbs and pizza

5/20/2012

0 Comments

 
Picture
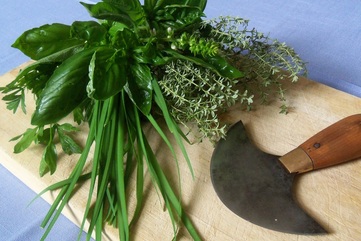
I've been working in the herb garden every afternoon, so when pizza night rolled around on Thursday, I decided to make sausage with my own herbs.  Last year I saved some fennel seed and dried a  few red peppers, so I crushed those in a mortar and pestle, then used my mezzaluna (the "half-moon" knife in the picture) to mince garlic chives, basil, oregano, rosemary and a tiny bit of sage to add to the mix---and don't ask me about amounts because this was all by eye.  Salt, garlic powder, black pepper, all into the mixer with a pound of ground pork and a pound of ground turkey.  Wow!  SO much better with the fresh herbs.  My two kitchen workers were eating it out of the bowl like it was snack mix.
          I also added some garlic chives to the dough, and used My House All-Purpose Seasoning for the salt.  I found out about this great seasoned salt at a food show in St. Charles many years ago, and I love it!  It's a mixture of coarse salt and seven herbs, with no MSG, artificial flavors, oluten, oils, sugars, preservatives or additives.  Does wonders for foods on the grill, and I would make vegetable beef soup without it.  Full disclosure: I know the guys who own the company, but I don't get any free product or anything.  I just really like this product: check out their website here.  The dough made a great pizza crust, but I also baked a loaf of it and it made a fine breakfast the next morning, toasted and lightly spread with cream cheese.
          More work in the garden this afternoon, and maybe a little baking tonight.  Once finals start on Tuesday I won't have much free time!

0 Comments

Blurb for my new book

5/17/2012

1 Comment

 
OK, my publisher asked me for a blurb for the new book, and here's what I wrote: 

How to Be a Breadhead: a beginner’s guide to baking
A “Breadhead” is a dedicated baker, someone who bakes often, who thinks and dreams about bread and is not afraid to experiment.  In this new book by Fr. Dominic (“The Bread Monk” of public television fame), you’ll learn more than just basic techniques---you’ll find out why yeast behaves the way it does, how to substitute different flours in a recipe, and how to take a simple dough and make it extraordinary for a special occasion.  Starting with tools of the trade (you need less than you think), Fr. Dom takes you through the baby steps of baking all the way to beautiful loaves that will amaze and delight your family and friends.  Special attention is paid to kneading (a stumbling block for many beginning bakers) and simple shaping techniques that can make your loaves look terrific.  You’ll find braided loaves, flatbreads, pretzel bread and bagels, dinner rolls that look like roses, butterfly-shaped breakfast treats, and a muffin recipe that uses a secret ingredient: melted ice cream!  And all in Fr. Dom’s funny and friendly style of instruction, with helpful photos and illustrations.

Now I just have to write a book that looks like that---no pressure.
1 Comment

"Hurl"

5/14/2012

0 Comments

 
Picture
One of the joys of being a Stage Rat is to work as a counselor for our summer theatre camp for grade school children, and one of the best aspects of theatre camp is the snacks.  I try to strike a balance between the sweets that they crave and the healthy stuff they should be eating, so one day they'll get watermelon slices and the next homemade caramel corn.  One of the camp favorites is what we call "Fruit Poop"(grade school potty humor), a jumble of Froot Loops, peanuts and mini-marshmallows held together by peanut butter and almond bark. 

Picture
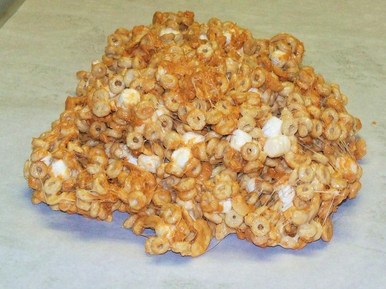
"Hurl" in its second stage.
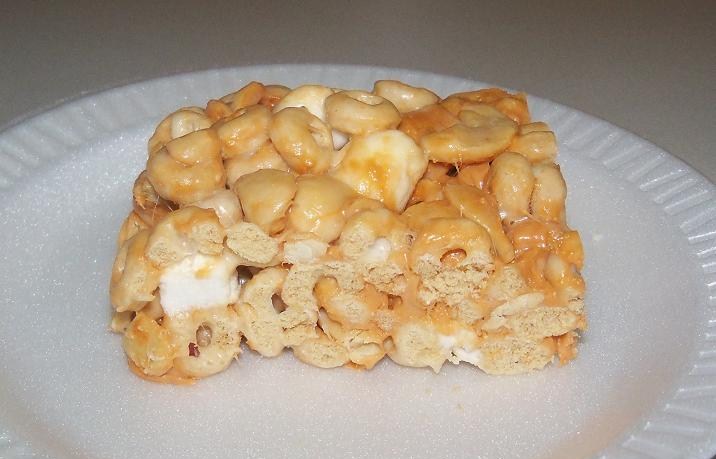
Our love for this sugary treat has led us to experiment with other confections involving cereal, most recently a snack bar with Honey Nut Cheerios, melted marshmallows, mini-marshmallows, nuts and butterscotch chips.  We've tried sugared walnuts for the nuts, then a combination of walnuts, pecans and sunflower seeds, but settled on cashews as the best choice, which makes the bars a bit pricey to make, so we'll reserve this recipe for special occasions.
          The only problem was coming up with a name for this decadent dessert, which actually took us longer than it took to eat the first experimental batch.  Something of a breakthrough was acheived when one of the Rats noted that at one stage in the recipe the whole mess looked like regurgitated cereal (remember, I'm dealing with teenagers here, but the photo above offers some rationale).  We had several minutes of hysterical innovation, including the suggestion that we simply give it the onomotopaeic name of "Huuuuuaaagh!", but we finally settled on "Hurl" as being easier to pronounce and spell.
          I am fairly certain that I am the only monk in the history of the church who has experiences like this.

Picture
0 Comments
<<Previous
Forward>>

    Author

    Fr. Dominic Garramone AKA 
    the Bread Monk

    Categories

    All
    Breadhead Bookshelf
    Breakfast Breads
    Buns Rolls And Biscuits
    Craftsy
    Donuts
    Equipment
    Ethnic Breads
    Events
    Gluten Free
    Herbal Breads
    Holidays
    Lake Thunderbird
    Memories Of Mama
    Multigrain Breads
    Pastries
    Pizza
    Places To Visit
    Quick Breads
    Reflections While The Bread Is Rising
    Savory Breads
    Sourdough
    Spirituality
    Stuff Besides Bread
    Sweet Breads
    The Classics
    Tools Of The Trade

    RSS Feed

    Archives

    June 2024
    December 2023
    September 2022
    April 2022
    March 2022
    February 2022
    January 2022
    October 2021
    May 2021
    April 2021
    March 2021
    February 2021
    August 2020
    July 2020
    May 2020
    February 2020
    October 2019
    June 2019
    September 2018
    July 2018
    May 2018
    April 2018
    March 2018
    February 2018
    January 2018
    December 2017
    November 2017
    August 2017
    July 2017
    June 2017
    May 2017
    April 2017
    March 2017
    February 2017
    January 2017
    December 2016
    November 2016
    October 2016
    September 2016
    August 2016
    June 2016
    May 2016
    April 2016
    February 2016
    December 2015
    November 2015
    October 2015
    September 2015
    August 2015
    July 2015
    June 2015
    May 2015
    April 2015
    March 2015
    December 2014
    November 2014
    October 2014
    September 2014
    August 2014
    July 2014
    June 2014
    May 2014
    April 2014
    March 2014
    February 2014
    January 2014
    December 2013
    November 2013
    October 2013
    September 2013
    August 2013
    July 2013
    June 2013
    May 2013
    April 2013
    February 2013
    January 2013
    December 2012
    November 2012
    October 2012
    September 2012
    August 2012
    July 2012
    June 2012
    May 2012
    April 2012
    March 2012
    February 2012
    January 2012
    December 2011
    November 2011
    October 2011
    September 2011

Web Hosting by FatCow