The Bread Monk
  • Home
  • My Bread Blog
  • Breadhead Videos
  • Recipes
  • Fr. Dom's Books
  • Events/Programs
  • Shortcut Stollen
  • New Page

Ham and Cheese Lattice Braid

3/8/2021

1 Comment

 
Picture
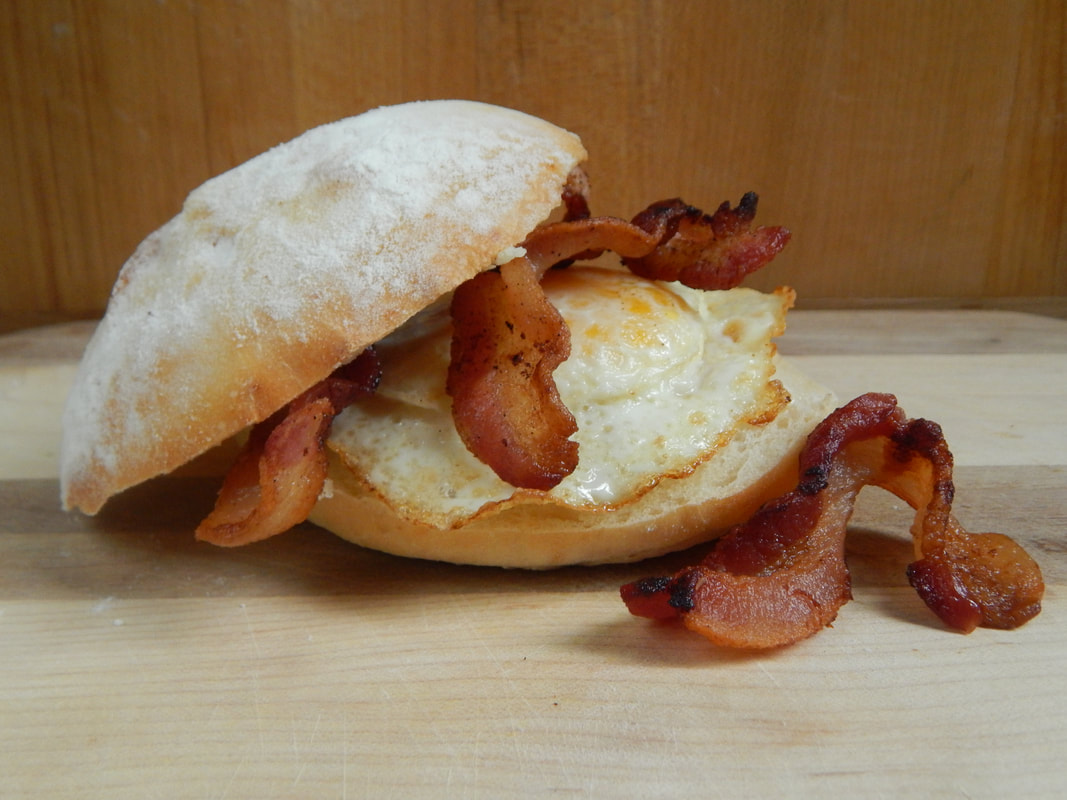
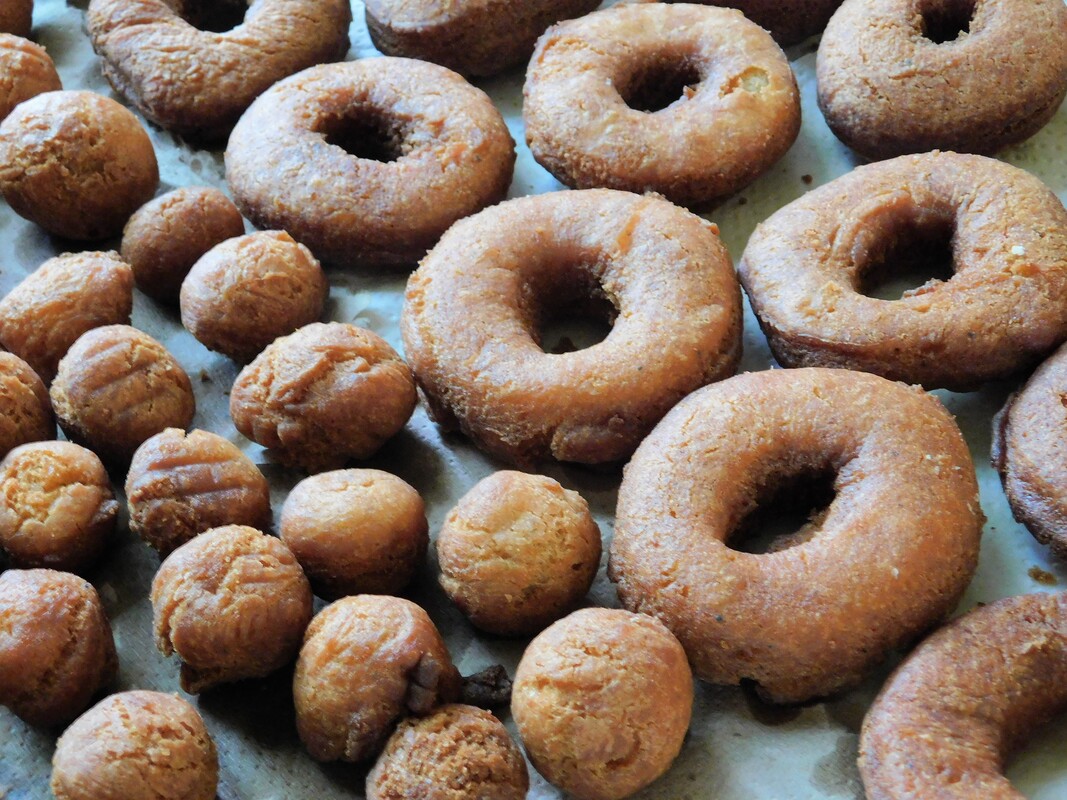
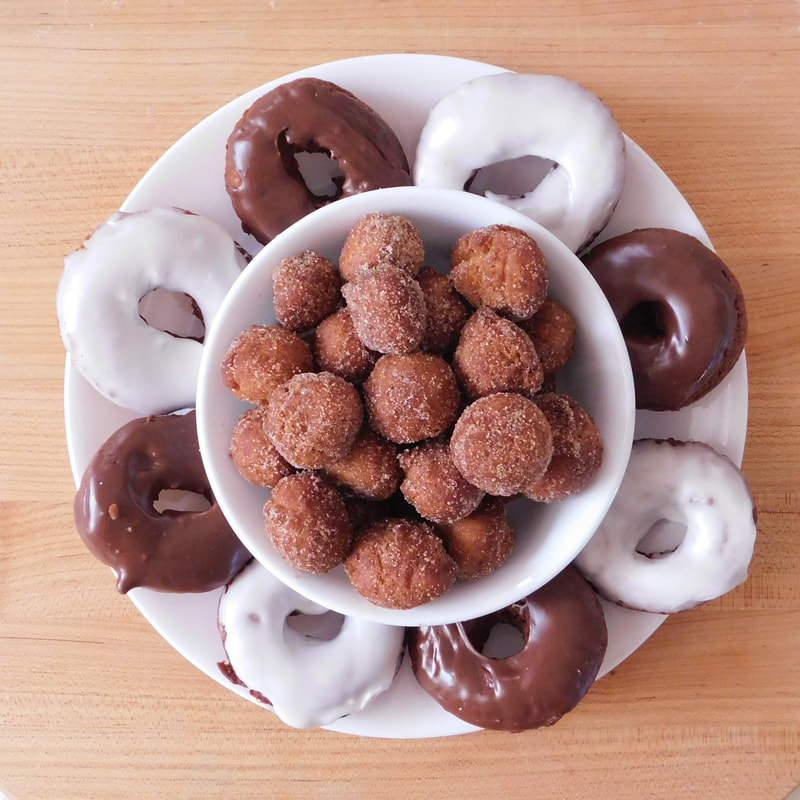
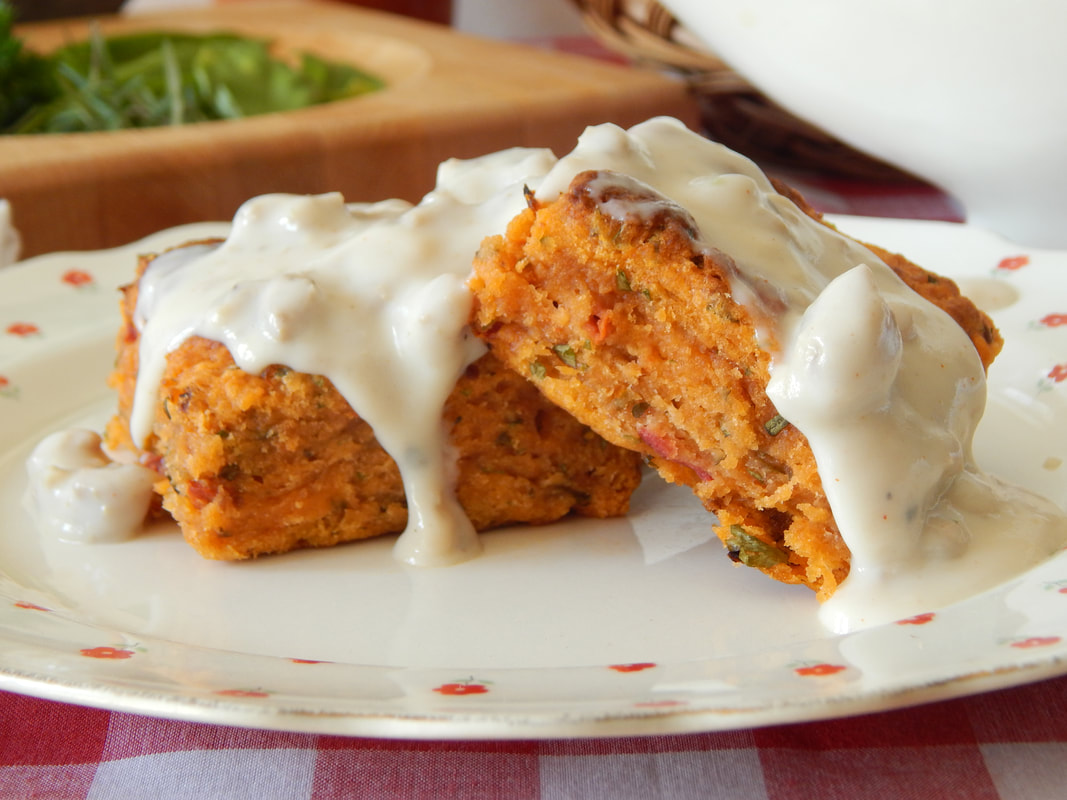
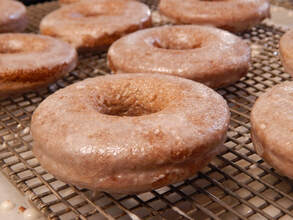
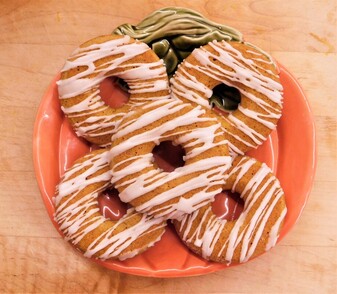
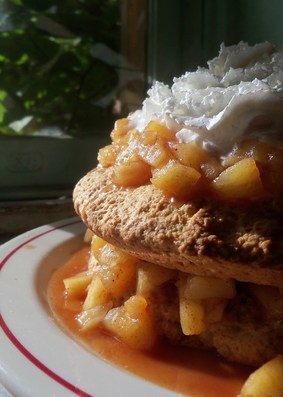
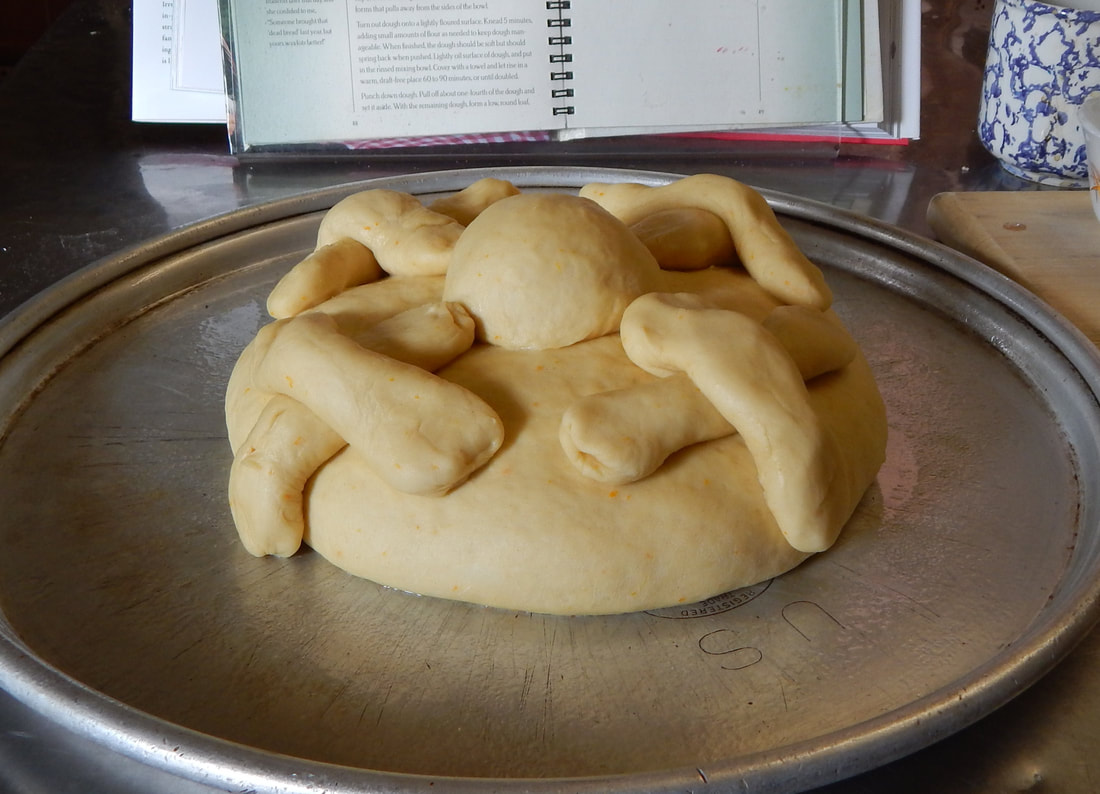
With the restrictions of Covid I have been unable to do much in the way of live demonstrations. But I discovered. almost by accident, that public libraries are eager to do enrichment programs via Zoom or Facebook live, so I've been doing quite a few narrated PowerPoints lately. My first was on baking for the Holidays, then for Valentime's Day I presented how to make puff pastry treats from scratch. They were, according to the officials at these libraries, quite successful, and evidently they spread the word, because I'm getting one or two more requests every week!

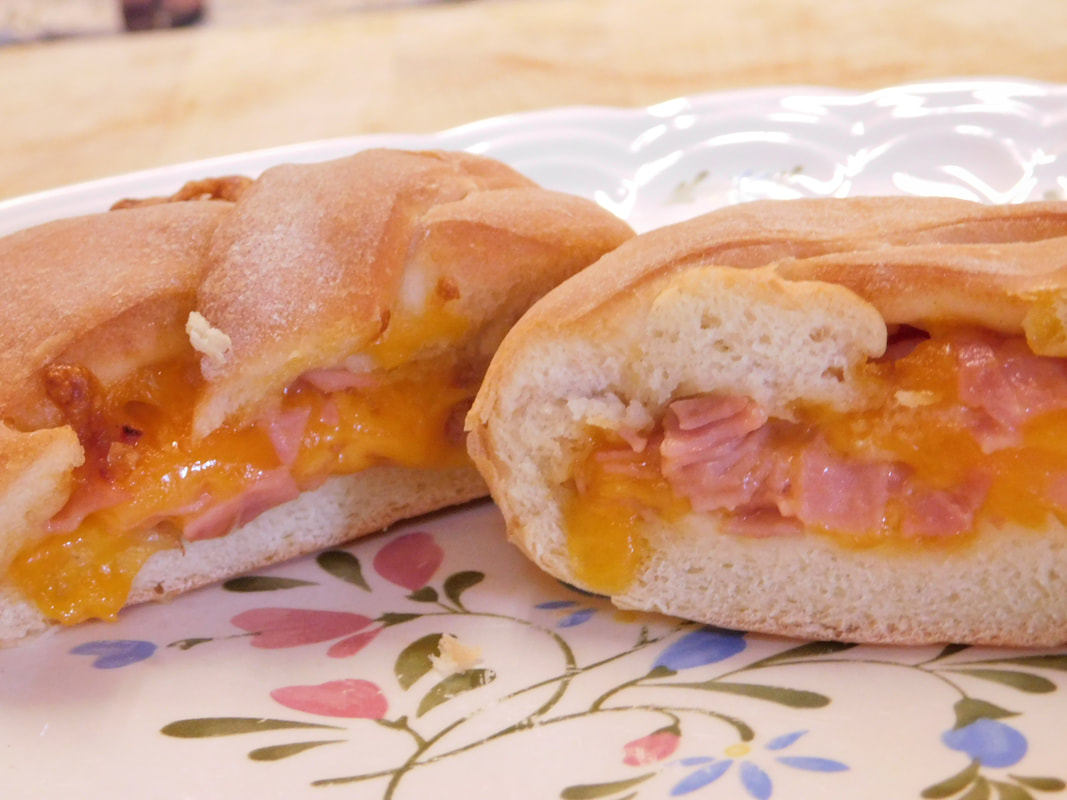
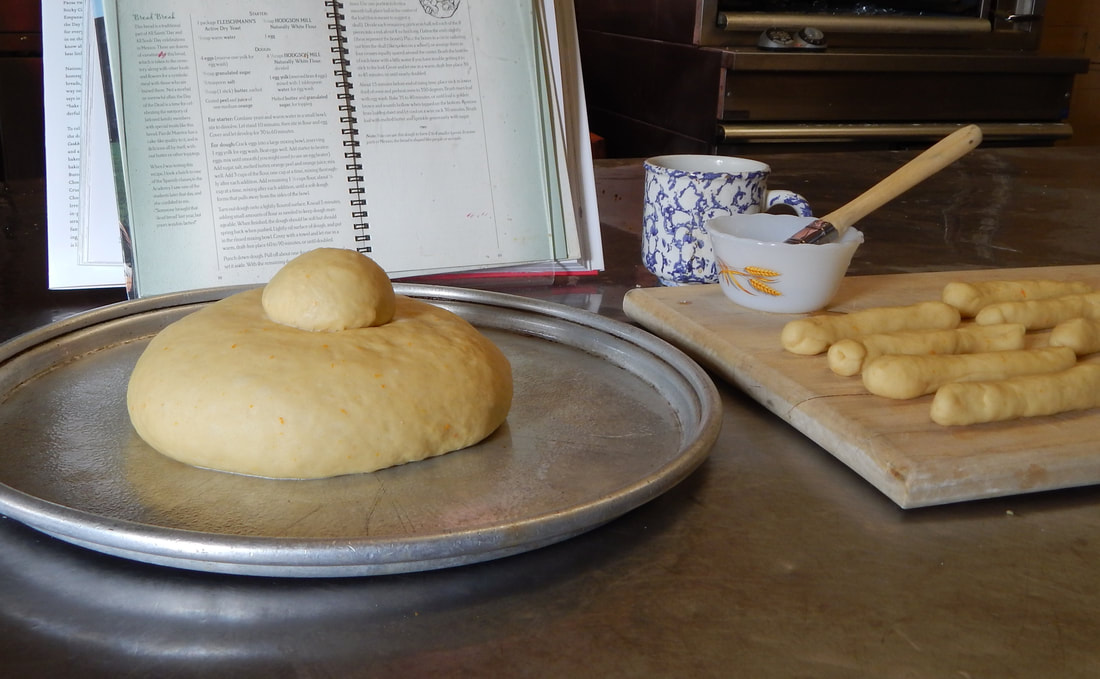
Here's one of the recipes I present for a variety of programs. This Ham and Cheese lattice braid goes great on a brunch buffet or next to a big pot of chili (which is how I served it to the monks!). You can use any dough--white, wheat, rye, herbal--equivalent to a single loaf of bread, which is about 1.25 lbs.

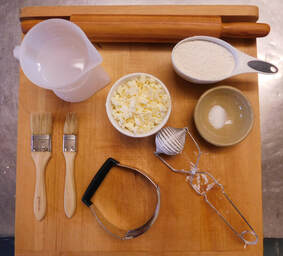
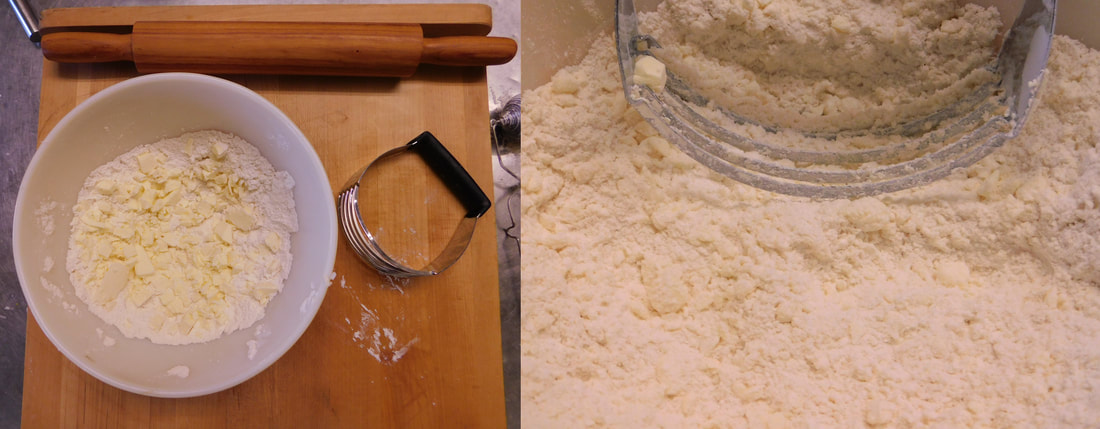
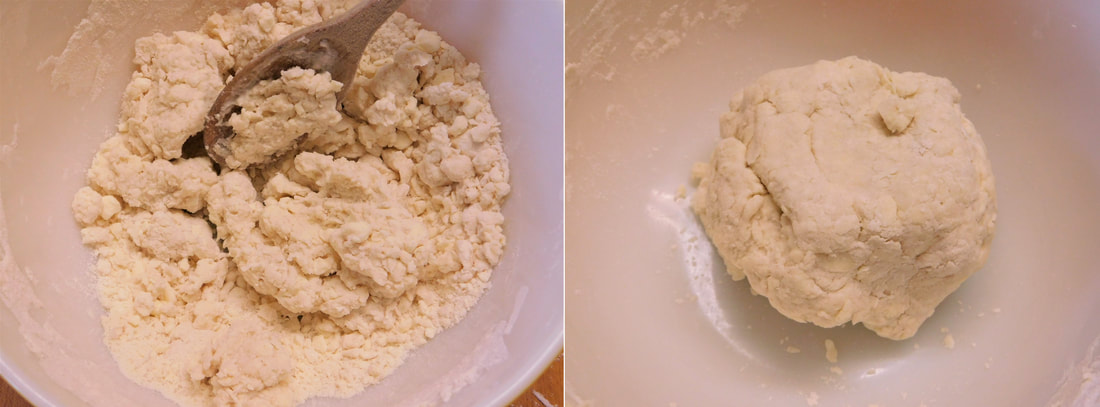
Read the instructions and then look at the step by step photos, and you'll soon see that if you can roll out dough for cinnamon rolls or pizza, you can manage this dramatic loaf.


Ham and Cheese Lattice Braid

Enough dough for 1 loaf of bread (about 1.25 to 1.5 lbs.)
1 ½ cups coarsely chopped ham
1 ½ cups sharp Cheddar cheese
1 egg beaten with 1 tablespoon of water for egg wash (optional, my photos don't show it)

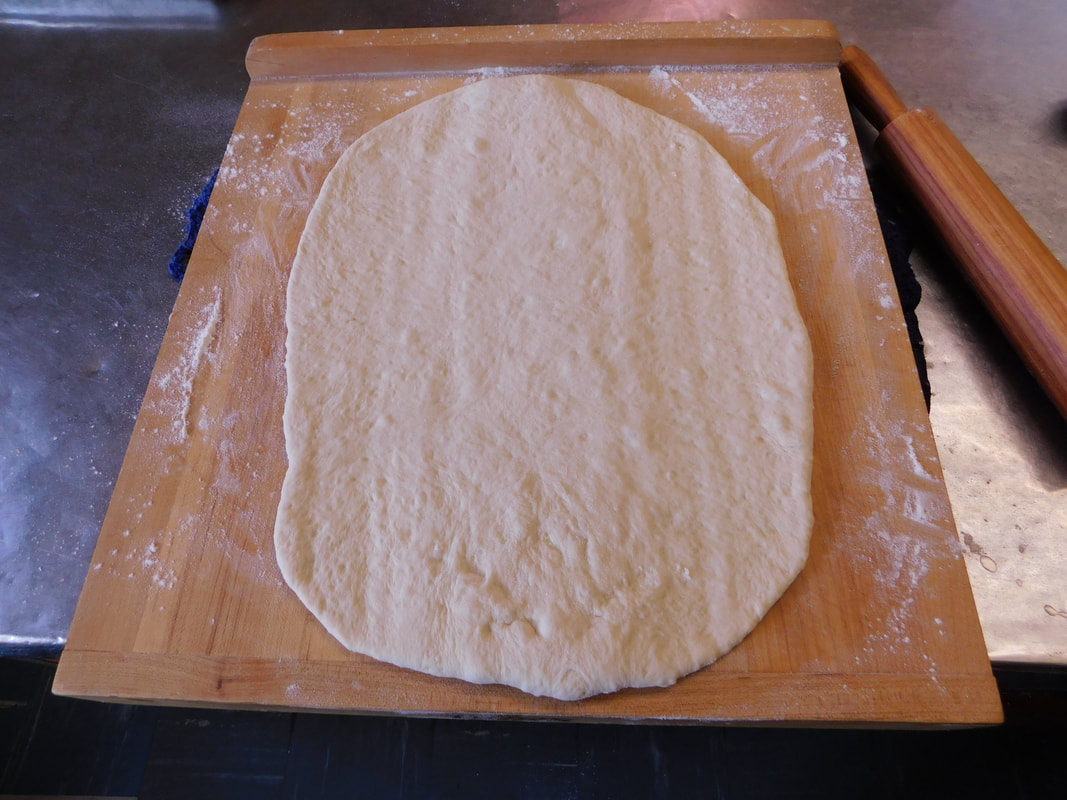
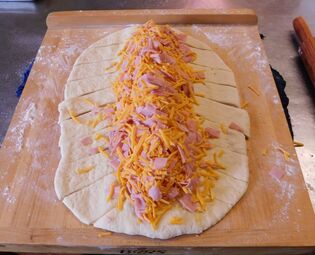
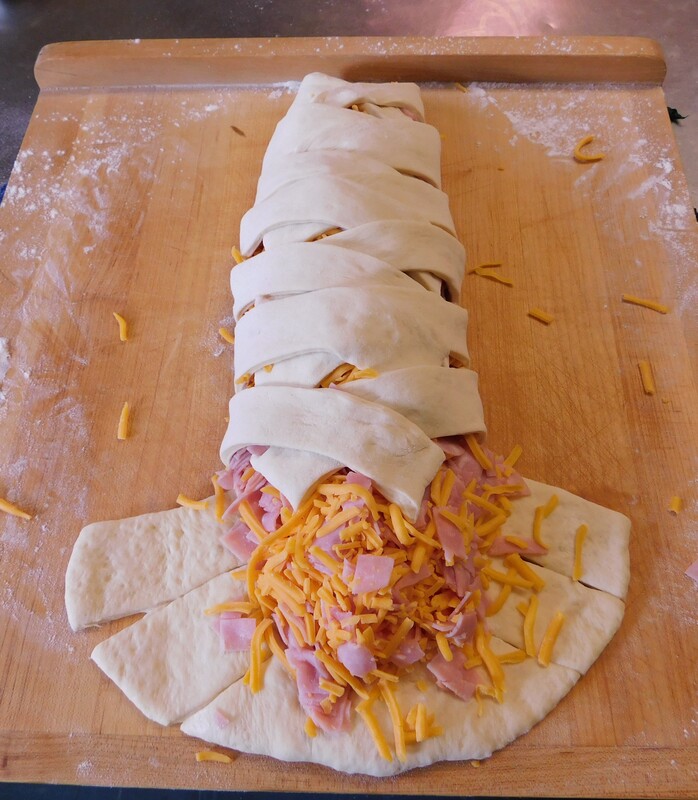
Punch down dough and knead lightly to expel larger air bubbles. Cover with a clean, dry cloth and let rest 10 minutes to allow the gluten strands to relax so it will be easier to roll out.  On a lightly floured board, roll out to a rectangle about 18 x 10 inches.  Prepare filling by combining ham and cheese in a medium size bowl and tossing to mix.  Spread filling lengthwise in the center third of the dough, pressing it together lightly.  

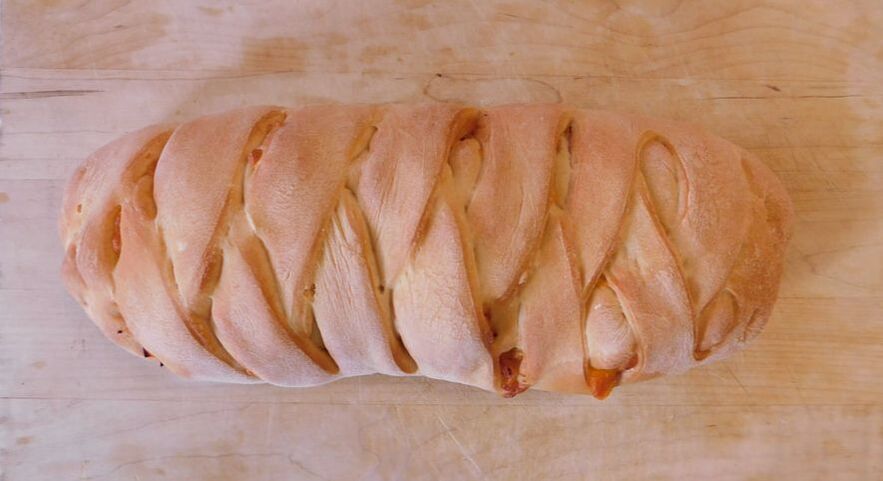
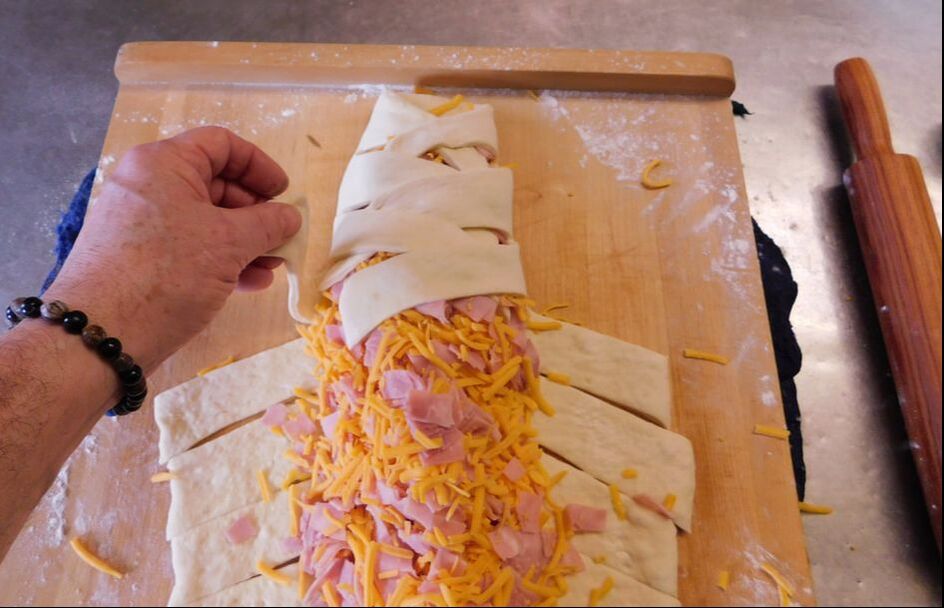
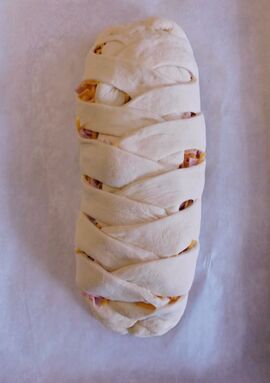
Using a sharp knife or a small pizza cutter, cut each outer third of the dough (the part not covered by the filling) into 5 to 10 diagonal strips, cutting from the edge of the dough to about 1 inch from the edge of the filling (see photos).  Lightly brush strips with water.  Fold strips over filling, alternating left and right, being careful not to stretch the dough.  Tuck in the ends of the last strips and pinch to seal.  Carefully transfer to a lightly greased baking pan.  Cover and let rise in a warm, draft-free place for 30 minutes or until doubled.

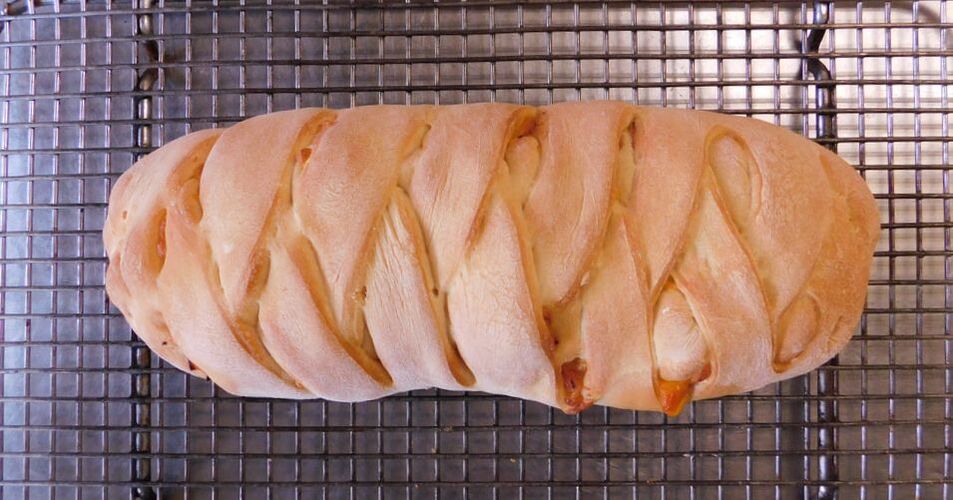
If desired, brush surface of loaf with egg wash.  Bake in a preheated 375° F. oven on the middle shelf for 30 minutes or until golden brown and the temperature of the filling is at least 160 degrees.  Allow the loaf to cool on the pan for 10 minutes before removing to a wire rack to cool slightly before serving.

Notes
--I have taught this technique to every level of baker, including junior high and high school students, and the results have always been spectacular.  Just make sure you don’t roll the dough out too wide (use a ruler to check the dimensions) and you should do just fine.
--For a more interesting texture, add a half cup of chopped walnuts to the filling.
Picture
Picture
Picture
Picture
Picture
Picture
Picture
1 Comment

Scottish Baps

3/5/2021

0 Comments

 
Picture
Baps are a traditional breakfast bread in Scotland, where they are sliced lengthwise and filled with a fried egg and a couple of strips of bacon, or used for a sausage sandwich.  In the Scottish countryside, it was common to wrap such a sandwich in waxed paper and tuck it in a jacket pocket to enjoy on the morning walk in the hills with your dog.  Commuters would (and still do) grab one on the way out the door for breakfast on the train.  For a slightly less messy sandwich, chop the bacon and use it for filling for a one-egg omelet---just the right size for this bun.

This is a non-traditional recipe in that it has no milk or lard in the dough but instead uses cheese for flavor and texture. Scotland produces some mighty cheddars, so that’s what I chose. Try pepper jack cheese for a spicier version; the resulting rolls would be enjoyed by anyone who puts Tabasco sauce on scrambled eggs.

Cheese Baps

1 ½ cups lukewarm water (100 to 110 degrees F.)
1 pkg. active dry yeast
1 tsp. sugar
3½  to 4 cups all-purpose flour, divided
1½ tsp. salt
1 cup shredded sharp cheddar cheese
milk and flour for topping

In a medium size bowl, sprinkle yeast, sugar and ½ cup flour into lukewarm water and stir until thoroughly dissolved.  Allow yeast to develop for 5 minutes.  Stir in the salt.  Add three cups of flour, one cup at a time, mixing after each addition until the flour is completely incorporated.  Stir in cheese and mix thoroughly.  About 2 tablespoons at a time, knead in enough of the remaining flour to make a soft, slightly sticky dough.  Knead for 6 to 10 minutes, until dough is smooth and satiny.  Lightly oil the surface of the dough and place it back into rinsed bowl and cover with a clean, dry towel.  Allow to rise in a warm place free from drafts until doubled, about 60 minutes.

Turn dough out of bowl and knead gently to remove larger air bubbles.  Divide dough into 8 to 12 pieces and shape each piece into a slightly flattened oval. Place ovals on a lightly greased baking sheet, spacing them as far apart as possible—you may need two pans. Cover and let rise for about 30 minutes or until almost doubled in volume. Just before placing in oven, brush each oval lightly with milk and sprinkle heavily with flour.  With a floured finger, make a deep impression in the center of each bap.  Bake in a preheated 425 degree F. oven for 15 to 20 minutes or until golden brown.  Cool slightly on a wire rack; cover them with a light dish cloth as they cool to keep them soft.


0 Comments

Homemade Puff Pastry

2/7/2021

3 Comments

 
Store-bought puff pastry is over-rated, in my opinion. It's flaky, but without much flavor or character, so I thought that it was time for me to learn how to make puff pastry from scratch. Numerous Pinterest posts told me how easy it was, so I decided to find out for myself. 

They were right. It IS easy. If you can roll out dough for sugar cookies, pie crust or cinnamon rolls, you can manage puff pastry. 
So here's the recipe I settled on, after a brief period of research and experimentation.
​
Picture

Homemade Puff Pastry

1 scant cup of flour (one cup minus 2 tablespoons)
¼ tsp. salt
1 stick of unsalted butter, chilled and chopped
¼ c. ice cold water

In a medium mixing bowl, whisk together the flour and salt. Add the chilled butter and use a pastry cutter to cut the butter into the flour. (In a warm kitchen, you might refrigerate the bowl for 20 minutes before getting started.) 
Picture
Add the ice cold water and mix quickly with a dough whisk or sturdy wooden spoon. Once it comes together in a rough mass, shape it into a ball.
Picture
Flour your work surface (wood works best in my experience) and flatten the dough slightly. Dust the dough and your rolling pin with flour and roll out the dough into a 12” x 8” rectangle. Using a lightly damp pastry brush, brush off the excess flour with a pastry brush. Fold the top third of the dough towards the center (like folding a letter), and brush off the excess flour again. Fold the bottom half up and press lightly.

Give the dough a quarter turn, and repeat the same steps at least 3 more times (I’ve done it up to five times for extra flaky results). The dough will become increasingly smooth with each turn. Wrap the dough in plastic film and refrigerate for 30 minutes to an hour before using. 

Picture
All-purpose flour work just fine for this recipe, and if all you have is salted butter, reduce the salt to 1/8 tsp. Some recipes recommend using ice cold butter run through a cheese grater, which is fine except that I hate having to wash cheese graters!

This makes roughly the equivalent of a single sheet of boxed puff pastry. A nice small batch for just a few treats! Start to finish, you can have this done in 15-20 minutes, plus chilling time. Less time than a trip to the store and much better.

So what to do with your homemade puff pastry dough? Here's a link to a BuzzFeed article  to get you started. These Cheese Puffs are especially easy.
​
Picture
3 Comments

Quick Cake Donuts

8/18/2020

1 Comment

 
PictureSome of these donut cutters look like they might be used for bagels, but I've never seen a "cut-out" bagel recipe!
As regular readers of my blog have figured out by now, I really love donuts. They constitute an entire category in this blog (look at the list to the right) and I often dedicate a day off or part of my vacation to exploring the donut shops of a particular city or region. I also have an extensive collection of donut cutters---the hand turned cherry wood one in the bottom right was inherited from my mother and is a special treasure. 

PicturePlain glazed donut . . . mmmmm!
I love yeasted donuts (plain glazed, thank you very much) but they require a commitment of several hours, so I can’t always fit them into my schedule. Cake donuts are quicker but often require special equipment (either a batter dispenser for fried donuts or special pans for the baked version). So when I saw a recipe for a cake donut that used a soft dough instead of a batter, it quickly moved to the top of my “Recipes to Try” list. I was especially attracted to this recipe because it makes use of mashed potatoes, a common leftover in the monastery! 

Picture
The dough Quick Cake Donuts is quite soft---flour the counter well before rolling it out. You can also just press it out with your hands.
As I always do, my first trial I tried the recipe exactly as I found it. I thought the amount of potato was a bit much---I liked the texture, but I don’t think a donut should taste “potato-y.” I also like a cake donut to be sweet enough without any toppings of any kind, so I had to increase the amount of sugar slightly (and, by extension, the butter!).  The dough is very soft, a lot like drop cookie dough, so resist the temptation to add more flour or you'll lose the tenderness of the texture.
Picture
The dark flecks in this dough is freshly ground nutmeg.
Read this carefully! The picture above is an example of what NOT to do! If the cut out donuts sit too long before frying, they can stick to the counter, or the hole is difficult to remove. I cut out only four at a time, fry them immediately, and repeat until the dough is used up.
Picture
Quick Cake Donuts, fresh from the fryer!
You’ll need about 2½″ of oil to fry the donuts, so use a Dutch oven or a deep cast iron fryer over medium heat: bring the oil temperature up to 375° F. A thermometer is really necessary here, unless you have a calibrated electric skillet. Fry the donuts three or four at a time, turning once: about 2 to 4 minutes per side, until browned. That may seem like a wide range of time, but a cast iron fryer, a deep skillet and an electric fryer all behave differently, so you’ll need to experiment a bit. Keep an eye on your oil temperature---if it’s too cool the donuts will be greasy, if it’s too hot they’ll be dark on the outside and doughy in the middle.

Because of the starchy potatoes, the resulting donuts are tender in the middle but delightfully crispy on the edges. I think they are perfect without any toppings whatsoever, but some of the brethren are fond of cinnamon sugar and icing, so I make a selection. Try them this weekend, and you might discover a new family favorite!

PictureI asked Fr. Michael what he thought about this photo, and he said "That would definitely make me come to breakfast!"
Quick Cake Donuts
 
¼ cup (½ stick) of softened butter
1 cup granulated sugar
1 egg (room temp)
2 tsp. vanilla extract
¾ cup mashed potatoes
¼ cup milk (2% or skim)
2 ¼ cups of all-purpose flour (plus more for the work surface)
2 tsp baking powder
½ tsp. table salt
1 tsp. nutmeg (½ tsp. if grated fresh)
 
Vegetable shortening or oil for frying
Cinnamon sugar, powdered sugar, icing, etc. as desired
 
In a medium size bowl, cream the butter and the sugar until fluffy. Add the egg and vanilla and beat until the mixture is glossy. Add the mashed potatoes and milk and beat until well blended (instant potatoes mix in easily, real potatoes may not quite incorporate all the way---no worries!)  
 
In a separate smaller bowl, combine flour, baking powder, salt and nutmeg and whisk until thoroughly blended. Add the dry ingredients to the potato mixture and beat just until evenly combined. The dough will be soft and fairly sticky, rather like cookie dough. Allow to rest in the bowl for 10 minutes.
 
Generously dust a counter or board (wood is best) with flour and turn the dough out onto the floured counter. Sprinkle the top with flour as well. Flour your hands and press the dough into a rough oval about ½″ thick, or use a floured rolling pin. Cut out donuts using a donut cutter (I like to use a small one, about 2½″ across). Gather up the scraps and press them together into a ball, then flatten again to cut out more donuts. The remaining scraps can be rolled into balls to go in with the donut holes.  
 
Use a Dutch oven or a deep cast iron fryer over medium heat: bring the oil temperature up to 375° F. A thermometer is really necessary here, unless you have a calibrated electric skillet. Fry the donuts three or four at a time, turning once: about 2 to 4 minutes per side, until browned. Transfer the cooked donuts to paper towels to drain. Fry the donut holes at the end all at once, stirring constantly so they are cooked on all sides.
 
These donuts are just sweet enough that you can enjoy them without any topping or glaze, but you can toss them in cinnamon sugar, sprinkle them with powdered sugar, dip them in a glaze, etc.  

1 Comment

Tomato Basil Scones

7/4/2020

1 Comment

 
Recently my fellow monks and I have been doing more of our own cooking, in part because the pandemic has reduced our need for outside kitchen help---no students, no faculty, fewer support staff, etc. Most evenings our meal is prepared for us and all we have to do is warm it up and put it out on the hot cart, but three nights a week one of the brethren cooks a meal of his own choosing, depending upon his level of kitchen experience and how much prep time he might have.
Picture
For nearly four weeks I have been somewhat laid up with a herniated disk in my back, which made standing or walking for any amount of time intensely painful, so I've not volunteered for awhile. But time, prayer, and physical therapy have improved my mobility, so I signed up to fix supper on Thursday. Naturally, I tend toward a menu that is "bread forward" to use a trendy restaurant term, so I decided on Tomato Basil Scones with Italian Sausage Gravy.  ("It's not just for breakfast anymore!")
PictureA delicate sprig of rosemary against the ivy wall of my garden
The basil and rosemary in our kitchen garden is large enough to harvest a few sprigs, although the parsley is being sampled daily by the two groundhogs who live nearby, so I may have to make do with dry until I can get some chicken wire in place! I may toss in a little marjoram as well, since that herb is in need of a gentle pruning. Come to think of it, some garlic chives might make a welcome addition, but then again, I don't want to add too many flavors to compete with the Italian sausage gravy. You can find my recipe for Italian sausage HERE, and pretty much any sausage gravy recipe will do. 

My first attempt at this recipe included some shredded zucchini, since I had some monster squash to use up. The zucchini added too much liquid and almost no flavor, so I abandoned it in scones and stuck to walnut zucchini batter bread from then on! It’s unusual for a scone recipe not to include some kind of dairy for the liquid, so you may find the texture a little off-putting at first, but the flavor is exquisite.
 
It may seem a bit odd to make scones in a square cake pan, but the dough is easier to manage that way and makes for neat and even servings. They are also modestly sized, in contrast to the giant wedges you see in some coffee shops. If you make it as a scored round on a baking sheet like traditional scones, reduce the baking time to about 20 minutes.

I'll be serving this for supper along with fresh green beans from Br. Luke's vegetable garden (steamed in a little chicken broth) and some kind of side salad.  Dessert? Well, I'm thinking about Pecan Pie Bars . . .

PictureFresh or dried herbs may be used in Tomato Basil Scones, just as one can use fresh or canned tomatoes.

Tomato Basil Scones
 
2 cups all-purpose flour
2 tablespoon sugar
2 teaspoons baking powder
½ teaspoon baking soda
½ teaspoon salt
¼ cup (½ stick) cold butter cut into slices
2 tablespoons minced fresh basil (2 tsp. dried)
2 tablespoon minced fresh parsley (1 tablespoon dried)
½ teaspoon minced fresh rosemary (¼ teaspoon dried and ground)
½ cup chopped sun-dried tomatoes (not in oil)
¾ cup crushed tomatoes
 
Preheat oven to 425° F. and lightly grease an 8 x 8-inch cake pan.  In a medium-size bowl, whisk together flour, sugar, baking powder, baking soda and salt. Cut in butter with a pastry blender or two knives until mixture resembles coarse crumbs. Stir in herbs and sun-dried tomatoes until evenly distributed. Add crushed tomatoes and mix until dough forms into a ball. Knead gently for five or six strokes. Press dough into pan until spread evenly in pan. Using a bench knife or spatula, divide into 9 squares. Bake for 20 to 25 minutes or until browned and the scones are slightly firm to the touch. Allow to cool in pan for ten minutes before serving warm. 

Picture
Tomato Basil Scones with Italian sausage gravy for breakfast, lunch, dinner, midnight snack---whatever!
1 Comment

Baking Mix Recipes

5/4/2020

1 Comment

 
With Breadheads and newbie bakers alike finding it hard to locate yeast during the quarantine, I thought I would offer instruction on how to create a "no yeast" multigrain baking mix which can be used for quick breads like muffins, biscuits, waffles and the like. Here is the short video I made with instructions. The recipe follows.
Multigrain Baking Mix and how to use it
 
If you already use baking mixes, you might be surprised to see that this version requires refrigeration, but you might be equally surprised to discover that the package on the commercial versions also recommends that you refrigerate their product after opening. But most baking mixes use shortening and have a number of preservatives and therefore are more “shelf-stable” as they say in the food biz. My version has no preservatives and uses butter (far fewer trans fats), which with the addition of whole grains makes it a healthier alternative. (If you’re going low-fat, use only one stick of butter.) You can use it one-to-one in any recipe that calls for baking mix.
   
Multigrain Baking Mix
Ingredients:
3 cups all-purpose flour
1½ cups whole wheat flour
¾ cup quick cooking oatmeal
½ cup yellow cornmeal
¼ cup milled flaxseed
2 tablespoons baking powder
1 tablespoon salt
1 cup (2 sticks) cold unsalted butter, cut into slices
 
Place dry ingredients into food processor and process until thoroughly mixed. Add butter and pulse until well blended. Store in an airtight container in the refrigerator up to 6 weeks (depending upon how fresh your butter is). If you use salted butter, reduce the salt in the recipe by ½ teaspoon.

Picture
 Pancakes
2 cups baking mix
1 cup milk
2 eggs
N.B.: This is the classic recipe, but I think these are better with 1¼ cup of milk and only one egg.  I can't imagine you need anything more than the ingredients!


Picture
Waffles
2 cups baking mix
1 1/3 cups milk
2 eggs
Separate the eggs, then beat the milk and yolks Add milk mixture to baking mix and stir until just combined. Whisk egg whites until stiff peaks appear and fold gently into batter.  Use in waffle iron according to manufacturer's instructions.
NOTE:
​If you like a waffle with a crisp exterior, leave the waffle iron closed until the steaming stops.

Picture
(OK, the picture here isn't blueberry muffins--those are chocolate and butterscotch chips---but you get the idea!)
Blueberry Muffins

2 cups baking mix
1⁄3 cup sugar
2⁄3 cup milk
2 tablespoons vegetable oil
1 egg
3⁄4 cup frozen blueberries
 
Heat oven to 400 degrees and coat muffin pan with cooking spray. Combine sugar, milk, oil and egg in a small bowl and beat well. Place baking mix in a medium bowl and add liquid, stir until just moistened. Gently fold in the blueberries. Divide batter evenly in 9 muffin cups.
Bake 13 to 18 minutes or until golden brown.

Picture
Baked Cinnamon Donuts with Chai Glaze
Donuts
1¾ cup of baking mix
1/3 cup granulated sugar
½ tsp. ground cinnamon
¾ cup 2% milk
1 egg
¼ cup vegetable oil
 
Preheat oven to 375° F. and lightly grease a donut pan. In a medium-size bowl, combine flour, sugar, salt, and cinnamon and whisk thoroughly to combine. In a separate bowl, whisk together milk, egg and oil. Pour milk mixture into dry ingredients and stir until smooth. Divide batter into pan. Bake in preheated oven for 15 to 20 minutes or until slightly firm to the touch and an inserted toothpick comes out clean. Cool in pans for five minutes before removing from pan to a wire rack; frost while warm.
 
Chai Frosting
Make one cup of sweetened chai tea. In a small sauce pan, bring to a boil, then reduce heat to a low simmer. Reduce to about ¼ cup of thick syrup. Immediately add 1 cup of powder sugar and a pinch of salt, and whisk until smooth. While mixture is still warm, use to lightly glaze donuts.


Picture
Pumpkin Spice Donuts
2 cups baking mix
2 teaspoons pumpkin pie spice
1 cup pumpkin puree (not pie filling)
2 eggs
3/4 cup liquid pumpkin spice creamer (or 1/2 cup milk)
¾ cup packed brown sugar
¼ cup canola oil


Preheat oven to 350 degrees F. Prepare two donut pans (12 donuts total, or 24 mini donuts) with cooking spray and set aside. In a medium size bowl, whisk together baking mix and pumpkin pie spice. In a separate bowl, combine pumpkin, eggs, creamer/milk, sugar and oil. Add the flour mixture to pumpkin mixture and stir until nearly smooth—do not overbeat. Allow to sit for 5 or ten minutes while the whole grains absorb the liquid, which takes longer than with all-purpose flour.
 
Transfer the batter to a large ziploc bag and expel excess air before sealing. Snip one corner of the bag and pipe batter into donut pans---each section will be slightly more than half full. Bake for 12-15 minutes or until donuts are lightly browned and spring back when touched. Allow donuts to rest about five minutes in pan before removing to cool on a wire rack.

Glaze or frost as desired, or toss in cinnamon sugar. 


Picture
Welsh Cakes
2 cups baking mix
1/3 cup granulated sugar
½ teaspoon cinnamon
¼ teaspoon freshly-ground nutmeg
½ cup currants or raisins
1 large egg
1/4 cup cold milk
Butter for the pan

Combine baking mix, sugar and spices in a medium-size bowl and whisk to blend.  Stir in the currants. In a separate small bowl, beat the egg with the milk; stir into mixture to make a soft dough. Turn the dough out onto a lightly floured board and knead briefly, 8 to 10 strokes. Lightly flour the board, then roll the dough to a 1/4-inch thickness. Cut into rounds with a fluted cookie cutter (2½” or 3”size).  Heat a cast iron skillet over medium-low heat (or use an electric skillet set to 350° F).  Brush the surface of the pan lightly with butter and cook the cakes for about 3 minutes per side, or until they are golden brown. (I usually test one first to make sure I have the temperature correct--they should come out soft in the middle but not at all doughy).  Remove to a wire rack and sprinkle with granulated sugar.  Serve warm.


Picture
The photo shows the version with a strawberry cake filling, but any way you make this coffeecake it's delish!
Quick Cinnamon Coffee Cake
Streusel
2/3 cup baking mix
2/3 cup packed brown sugar
1 teaspoon ground cinnamon
3 tablespoons cold butter
 
Coffee Cake
2 cups baking mix
1/8 teaspoon baking soda
2 tablespoons granulated sugar
¾ cup sour cream
1 ½ teaspoons vanilla
1 egg
 
Heat oven to 375°F. Spray bottom and sides of 9-inch round cake pan with cooking spray and dust with flour. Combine 2/3 cup baking mix, brown sugar and cinnamon in a small bowl. Cut in butter using pastry blender, until the mixture resembles coarse crumbs; set aside.
 
In medium bowl, combined  baking mix, baking soda, and sugar and whisk until blended. In a separate bowl, beat sour cream, vanilla and egg until smooth. Stir into dry ingredients until combined. Spread about 1 cup of the batter in pan. Sprinkle with about 3/4 cup of the streusel. Drop remaining batter evenly over top of streusel and sprinkle remaining streusel over top.
 
Bake 20 to 24 minutes or until golden brown. Let stand 10 minutes before removing from pan and allow to cool slightly before serving.
 
Variations
Add another tablespoon of butter to the streusel. Peel and core two medium baking apples and slice them thinly. After you put half of the batter in the pan, arrange apple slices on top and sprinkle with half the streusel. Add the second layer of batter and the remaining streusel. Bake as directed—may need up to 25 minutes in the oven. You can do the same with fresh or even canned peaches, but cut them into small pieces.
 
Make only half of the streusel. After you put half the batter in the pan, add a layer of cake and pastry filling or pie filling. If you use cherry filling, use almond extract instead of vanilla, and add some slivered almonds to the top streusel.
 
Omit the cinnamon from the streusel recipe, and use 1½ to 2 cups of fresh strawberries as the filling. You can use half brown and half white sugar for the streusel.

Picture
Whole Grain Nutty Shortcake with Tart Apple Topping
3 cups of multigrain baking mix
½ cup light brown sugar, firmly packed
¼ teaspoon ground nutmeg
½ cup coarsely chopped pecans
1 egg
¾ cup of milk
 
 APPLE TOPPING
½ cup brown sugar
2 tablespoons cornstarch
1 tsp. ground cinnamon
¼ tsp. salt
1 ½  cups apple cider or apple juice
5 cups tart apple pieces (peeled, cored, quartered and sliced)


Heat the oven to 425 degrees F. Combine baking mix, brown sugar, nutmeg and nuts in a medium size bowl. In a separate bowl, whisk together egg and milk. Add milk mixture to flour mixture and stir until blended; beat for one minute. Divide dough in half and into two greased 9-inch pie pans.  Bake in the preheated oven for 15 to 20 minutes, or until lightly browned and slightly firm to the touch.

While the shortcake is baking, make the topping.  Combine the brown sugar, cornstarch, cinnamon and salt in a large saucepan. Stir in the cider and cook over medium high heat until the sauce is clear and thickened. Turn the heat down to medium, then add the apples.  Cover and let simmer until the apples are tender. Spoon half of the apple mixture over each shortcake layer (you may serve them individually or stacked.)  Serve warm with whipped cream and toasted pecans for a garnish.

1 Comment

Five Marbles

2/26/2020

16 Comments

 
I will begin by admitting that this post has virtually nothing to do with my baking, apart from the fact that my friend's family loves my pizza and my potato bread. But this is the forum where I express my most important ideas, so it seemed a good place as any to share.
Picture
Every morning when I get dressed in my monastic habit, I make sure I have what I’ll need for the day: a pen and a notecard to write on, my keys, a clean handkerchief—and five marbles. This last addition to my pockets requires some explanation.
​

When I was younger I collected marbles, and learned all the jargon for marbles of various sizes and materials: shooters and scaboulders, aggies and immies, cat’s eyes and chinas, steelies and swirls and sulphides. I was an avid collector throughout grade school and even into high school, but eventually the sectioned jewelry box holding my marble collection ended up on the top shelf of my closet. Recently I found a good reason to take some out. 

A few months ago a good friend of mine confided in me that he was feeling especially burdened. There are serious health issues in his family, and the accompanying stress of dealing with doctor’s appointments, insurance and other financial matters was weighing heavily upon him, along with the usual obligations of being a husband, parenting small children, maintaining a home, and meeting work and social commitments.

 “I know it’s my burden to bear and no-one else’s,” he said. “I don’t resent having it and I’m never going to lay it down. But sometimes it gets really hard.”


It’s important for you to know that I have my friend’s permission to share his story. It’s also important for you to know that my friend is not one to whine or feel sorry for himself, and he rarely complains, in spite of the serious struggles that face him every day. I admire him for maintaining a positive attitude and a cheerful disposition in the face of genuine suffering, in addition to being generous with his time, energy and affection.


Picture
Over the next few days I spent a lot of time thinking and praying about my friend and his burdens. I found myself feeling increasingly uncomfortable, because I realized how often I exaggerate my own burdens and feel sorry for myself. My friend feels like Atlas, walking around with the weight of the world on his shoulders, and what am I carrying?

 I’ve got the equivalent of a pocketful of marbles.

​I have little personal acquaintance with genuine suffering. I have stresses, frets, frustrations and setbacks, a few daily annoyances and occasional disappointments. But the kind of burdens my friend carries? Not even close. A bad knee gives me some pain, and keeps me from taking the stairs two at a time like I used to, but I’m not strapping on a brace or levering myself into a wheelchair every morning. Monastic life imposes some physical and financial limitations on me, but they were freely chosen, and I don’t have any reason to fear that the power will be turned off or my medical bills won’t be paid. But still I complain, mumble under my breath, and (occasionally) curse out loud at “how difficult everything is.”


My friend’s honesty in admitting his struggle made me take a hard look at myself, and I determined that I needed a daily reminder of the relative lightness of my sufferings. So I got out my box of marbles, chose five to symbolize the various burdens I carry, and resolved to keep them in my pocket as a reminder of how small those burdens really are.

Picture
​I chose this marble to symbolize the burden of my sins, which I carry with me all the time, as we all do. The red spatters symbolize the blood of Christ, whose saving death ransomed me from the power of the Evil One. “But if we walk in the light as he is in the light, then we have fellowship with one another, and the blood of his Son Jesus cleanses us from all sin.” 1 John 1:7

But that’s not quite right, is it? It was Christ himself who carried the burden of my sins, of all our sins, when he shouldered the cross and bore it on the long road to Calvary, to crucifixion and death. I came to realize that what I am actually carrying are the consequences of my sins. My sins are “washed clean by the blood of the Lamb,” but well we know that often the consequences of those sins remain and must be borne: the damage done to our relationships, the negative effects on our families, our society; the self-inflicted wounds still within my own heart. A “momentary light affliction” but a real one nonetheless.

Picture
The second marble I chose is made of stone—carnelian agate, to be precise. I chose it as a symbol of the heft and hardness of my grudges: heavy, impenetrable, and seemingly impossible to set down. It’s a standard joke in my family that we’ll all develop Irish Alzheimer’s—you forget everything but your grudges. I suspect the Italian side of my family has a similar cultural tendency. Daily I carry the burden of my own pettiness, and the shame of being a priest who sometimes struggles to forgive. Again, it’s a small burden, but one I’d rather not carry at all.  

Picture
The consequences of my sins and reality of my grudges led me to this black glass marble, which represents all the people who harbor resentment, dislike or even hatred against me. I was explaining the five marbles to an old friend who blurted out, “Nobody hates you, Dom!” God bless his generous heart, but I know better.

 It’s a small marble, because I would like to believe that such people are indeed few. Some are angry with me because they were looking for something to be angry about, and I happened to get in the way. I suspect that for some, it is self-hatred that makes them hate me. But I also must admit that I have sometimes been careless of people’s feelings, and for them their anger is justified. It’s good for me to carry a reminder to work hard to avoid making such missteps again.

Picture
This marble is made of clay, and it is the smallest in my collection. It represents the clay vessel of my aging body. My so-called physical sufferings are indeed the smallest of my afflictions, a tiny clay marble compared to the heavy burdens of illness and infirmity borne daily by millions of people with far greater patience and courage than mine.
​

 We are temples of the Holy Spirit, “But we hold this treasure in earthen vessels, that the surpassing power may be of God and not from us” 2 Cor 4:7. When my joints ache and I have trouble getting out of chair, the marbles in my pocket jostle and clack together as a reminder of Paul’s observation: “He has said to me, “My grace is sufficient for you, for power is perfected in weakness” 2 Cor 12:9

Picture
This last marble is the most important of the five I put in my pocket every morning. It was handmade in Germany sometime in the mid to late 1800’s. At the core is a lovely multicolored swirl of glass, but its beauty is obscured by the damage to the surface of the marble. It’s scuffed, scarred and chipped by the way it has been treated—it doesn’t even roll straight anymore.

This little glass sphere is a symbol of the people who have been so damaged by their experiences that their fundamental beauty is hidden, both to themselves and to others. The exquisite colors of their souls go unnoticed, the glorious image of the divine likeness at the center of their true selves is concealed by a veil of pain. I carry this marble as a reminder to pray for all those who need some gentle, compassionate polishing, that I must strive to see their inner beauty and to find ways to reveal it to them and to others.

That responsibility was placed on upon me by the bishop when he laid his hands on my head in the rite of ordination. Some days it feels like a heavy load, but more often my ministry is a privilege and a great, singing joy. 

Since I started putting the five marbles in my pocket every morning, my life has been improved in every way. I am more grateful for my blessings, more patient with everyday annoyances, more conscious of how I treat others and more careful not to add to their burdens. Many of my friendships seem deeper, somehow, as I am more mindful of others’ genuine suffering and less concerned about my own modest afflictions. All I have to do is reach into my pocket and rattle the marbles around to dispel any self-pity.
I’m grateful to my friend for trusting me enough to share his struggles with me. I resolved to be the best friend I could be to him, “the best version of myself” as Matthew Kelly would put it. But under the gentle prodding of the Holy Spirit, that resolve has gradually expanded to include everyone I meet. I’m a better man, a better monk, a better friend, thanks to my friend’s honesty. I still fail, sometimes grievously, to be that better man. Those failures are a reminder that the heaviest burden all of us carry is the weight of our imperfect human nature. Fortunately, there is a remedy for that: “Bear one another’s burdens, and so you will fulfill the law of Christ” Gal 6:2.
16 Comments

Pan De Muertos

10/31/2019

0 Comments

 
Picture
 November 2nd is the feast of All Souls in the Catholic Church, a day when we remember all of our beloved dead, especially the recently deceased. The feast originated in Benedictine monasteries associated with the abbey of Cluny under St. Odilo in the 11th century and later spread to the entire church.

Every culture has its own traditions regarding the commemoration of the dead, but the Mexican "Day of the Dead" or Dia de Los Muertos is surely among the most colorful and diverse celebrations. You can find more about the traditions associated with this feast HERE. Among them is a sweet bread known as Pan de Muertos, and I highly recommend that you try it, no matter what your ethnic or cultural heritage.

There are dozens of variations for this bread, which is taken to the cemetery along with other foods and flowers for a symbolic meal with those who are buried there. Not a morbid or sorrowful affair, the Day of the Dead is a time for celebrating the memory of beloved family members with special treats like this bread. The decorations on top are mean to suggest a skull and crossed bones. You can use the dough to form 2 – 4 smaller loaves as well.  In some parts of Mexico, the bread comes in the shapes of people or animals, and it is often brushed with butter and sprinkled generously with coarse sugar before serving. Pan De Muertos has a cake-like quality to it, and is delicious all by itself, without butter or other toppings.


When I was testing this recipe for my PBS show, I took a batch to one of the Spanish classes in the Academy.  I saw one of the students later that day, and she confided to me that “someone brought that ‘dead bread’ last year, but yours was lots better!” This year I have a lecture to give out of town on November 2 and won't be able to bake, but I may just mix some up later in the week. You can find my recipe HERE.

Picture
Picture
Picture
0 Comments

Memories of Mama: Christmas Cut Out Cookies

10/2/2019

0 Comments

 
Picture
My mother was the Cookie Queen, at least among our relatives and friends. In addition to having whole bookshelves of cookie books, she owned literally thousands of cookie cutters of every possible theme and subject. Peanuts, Sesame Street, Looney Tunes, and Winnie the Pooh all made it into the collection, along with cutters for every imaginable holiday, civic or religious. The cutters to the left are from the Robin Hood set that were placed in bags of Robin Hood Flour as a premium in the 1960's. Obviously, the Friar Tuck cutter is among my personal favorites. Mom even had a special recipe and cookie cutter for Groundhog Day! 

It may see a bit odd to be posting an article about cut out cookies in October, since we usually associate that kind of baking with Christmas. I hasten to point out that my mother had two large boxes filled with nothing but Halloween themed cookie cutters (including a fairly large one of Snoopy asleep on top of a Jack O' Lantern) , plus cutters for fall and Thanksgiving. But my real motivation in writing this post is that this summer my publisher said he wanted me to produce a short book of holiday recipes. I knew I had to include Mama's Sugar Cookie Recipe, so on a warm night in early October I was baking and decorating Christmas trees.

Picture
Some of my favorite memories of Christmas center around baking and decorating cut-out sugar cookies. One year Mama baked about a dozen large angel cookies, and had my sister Eileen and I decorate them to depict her closest friends and co-workers, including their eye color and hairstyles. They were all delighted with such a unique gift, and several of those ladies saved their cookie portraits, carefully wrapped in tissue, and displayed them every year. 
I suspect my mother's favorite recipe came from a magazine ad or the back of a package, and I'm sure many Breadheads will be using the same or a similar recipe as a family favorite. It uses almond extract instead of vanilla, cake flour in place of all-purpose, and when she rolled the dough out, she sprinkled the counter with powdered sugar instead of flour. The shortening in the recipe ensures that cookies keep their shape during baking, instead of spreading out as butter cookies often do. Try it "as is" before you make any changes---you'll be happy with the results, I'm sure, and the house will smell heavenly. 
Picture


Mama's
Sugar Cookies

½ cup shortening
1 cup sugar
2 well-beaten eggs
2 Tbs. cream
1 Tbs. almond extract
3 ½ cups cake flour
2 tsp. baking powder


Place flour and baking powder in a medium bowl and whisk until well blended; set aside.  Cream shortening with sugar until light and fluffy (this is best done with a stand mixer, if possible). Add eggs, cream and almond extract and beat until smooth. Add sifted ingredients to creamed mixture and mix well. Shape into a mound, cover with waxed paper or plastic wrap and chill thoroughly (at least two hours). Working with about 1/3 of the dough at a time, roll out on a board lightly dusted with powdered sugar---dust the rolling pin with powdered sugar as well.  Cut out with assorted cutters as desired.  Place cookies on a lightly greased cookie sheet, or use parchment paper.  Bake in a preheated 375 degree oven for about 8 minutes (less for smaller cookies) until the edges of the cookies are just slightly browned.

0 Comments

Welsh Cakes

6/11/2019

1 Comment

 
Please forgive my long hiatus from the Bread blog! I can honestly say I have no idea how or why I got so neglectful, but I'm resolved to make it up to my loyal Breadheads.

One of my most popular bread demos in recent years has been one using a multigrain baking mix I developed. It's used in the same way as
BisquickTM but has more whole grains and fiber, plus it uses unsalted butter instead of shortening. My first blog about it is HERE along with the recipe. It will also be featured in an upcoming book, along with several quick and tasty recipes. I use it most often for waffles, but I also keep it on hand for pancakes, muffins, biscuits and more unconventional recipes, like Welsh Cakes. 
Picture
Welsh Cakes are like a cross between pancakes and English muffins, all of these being small breads cooked in a skillet. Welsh cakes are thicker and heartier than pancakes, but not as dense and chewy as English muffins. With a baking mix, they take little time to prepare, and with the addition of spices and dried fruit of various kinds, you can produce a variety of flavor profiles, one of which is sure to become a favorite. Traditionally one uses cinnamon and nutmeg along with raisins or currants, but I like using Chinese five spice for the light licorice flavor of the anise and the light kick from the pepper in the blend. This spice blend is now available in most grocery stores, usually in the baking aisle, but sometimes with the Asian foods. In case you don't have it in your area, you can find a recipe for it HERE

​Welsh Cakes

2 cups baking mix
1/3 cup granulated sugar
½ teaspoon cinnamon
¼ teaspoon ground nutmeg
½ cup currants or raisins
1 large egg
1/4 cup cold milk
Butter for the pan

Combine baking mix, sugar and spices in a medium-size bowl and whisk to blend.  Stir in the currants. In a separate small bowl, beat the egg with the milk; stir into mixture to make a soft dough. Turn the dough out onto a lightly floured board and knead briefly, 8 to 10 strokes. Lightly flour the board, then roll the dough to a 1/4-inch thickness. Cut into rounds with a fluted cookie cutter (2½” or 3”size). If you don't have a fluted cutter, use an ordinary biscuit cutter, but one that has sharp enough edges to cut through the raisins/currents. 

Heat a cast iron skillet over medium-low heat (or use an electric skillet set to 350° F).  Brush the surface of the pan lightly with butter and cook the cakes for about 3 minutes per side, or until they are golden brown. (I usually test one first to make sure I have the temperature correct--they should come out soft in the middle but not at all doughy).  Remove to a wire rack and sprinkle with granulated sugar.  Serve warm. 
1 Comment
<<Previous
Forward>>

    Author

    Fr. Dominic Garramone AKA 
    the Bread Monk

    Categories

    All
    Breadhead Bookshelf
    Breakfast Breads
    Buns Rolls And Biscuits
    Craftsy
    Donuts
    Equipment
    Ethnic Breads
    Events
    Gluten Free
    Herbal Breads
    Holidays
    Lake Thunderbird
    Memories Of Mama
    Multigrain Breads
    Pastries
    Pizza
    Places To Visit
    Quick Breads
    Reflections While The Bread Is Rising
    Savory Breads
    Sourdough
    Spirituality
    Stuff Besides Bread
    Sweet Breads
    The Classics
    Tools Of The Trade

    RSS Feed

    Archives

    June 2024
    December 2023
    September 2022
    April 2022
    March 2022
    February 2022
    January 2022
    October 2021
    May 2021
    April 2021
    March 2021
    February 2021
    August 2020
    July 2020
    May 2020
    February 2020
    October 2019
    June 2019
    September 2018
    July 2018
    May 2018
    April 2018
    March 2018
    February 2018
    January 2018
    December 2017
    November 2017
    August 2017
    July 2017
    June 2017
    May 2017
    April 2017
    March 2017
    February 2017
    January 2017
    December 2016
    November 2016
    October 2016
    September 2016
    August 2016
    June 2016
    May 2016
    April 2016
    February 2016
    December 2015
    November 2015
    October 2015
    September 2015
    August 2015
    July 2015
    June 2015
    May 2015
    April 2015
    March 2015
    December 2014
    November 2014
    October 2014
    September 2014
    August 2014
    July 2014
    June 2014
    May 2014
    April 2014
    March 2014
    February 2014
    January 2014
    December 2013
    November 2013
    October 2013
    September 2013
    August 2013
    July 2013
    June 2013
    May 2013
    April 2013
    February 2013
    January 2013
    December 2012
    November 2012
    October 2012
    September 2012
    August 2012
    July 2012
    June 2012
    May 2012
    April 2012
    March 2012
    February 2012
    January 2012
    December 2011
    November 2011
    October 2011
    September 2011

Web Hosting by FatCow