|
A few photos from my most recent pizza party, with a couple older photos mixed in---didn't always have time to take a picture! Had great help from an alum and his wife, both with kitchen and waitstaff experience. The dessert course was a big hit: double chocolate biscotti and maple pecan biscotti served with pistachio almond ice cream. The chocolate biscotti recipe you can find all he over Internet, but the maple pecan recipe came from HERE.
0 Comments
 Yesterday I was interviewed on Michael Feldman's "Whad'Ya Know?", for a live broadcast from Five Points in Washington IL. It was a fundraiser for Peoria Public radio (WCBU 89.9). What a great event! They had a good crowd, and the musical guest was David Hoffman, who played with the Ray Charles Orchestra for many years---that alone was worth the price of admission! The show's producer Adam had been in contact with me for several weeks prior to the event, and he said that after looking over my recipes, Michael said he wanted me to bring Monkey Bread and Deer Poop! I pointed out to him that neither of those recipes actually require me to mix dough, which is, as they say, "my thing"! He said to use my best judgement, so I brought along some Magic Bread as well, which led to one of the bigger laughs on the program. Here's the whole program---I'm in the first segment, after the monologue, at about 11 minutes in. Here are the recipes we talked about:
Deer Poop Candy Monkey Bread Muffins Magic Bread Herbal Encouragement Bread  When a Loretto sister asks you if you'd be willing to do a fundraiser for an orphanage, you'd better say "yes" or you'll go straight to hell. That's what went through my mind when Sr. Mary Ann of the Loretto community at Lockwood Center in Webster Groves asked if I'd be willing to provide some kind of auction item for St. Vincent Home for Children. "Pizza Party for Eight" I said, with only the slightest hesitation---after all, you never know if the person who buys your party is going to have decent ovens or be any fun to be around. Happily, for my most recent venture I was lucky on all counts: lovely home, enjoyable company, gracious hosts and a pair of terrific ovens. The pizza menu (voted on by the guests) included Pesto and Prosciutto, Italian Beef, Four Cheese Tomato Top, and Pizza Diavolo (the hot one!). The pizza pictured above was our first of the night, made with pesto cream sauce and prosciutto rotola. "Rotola" is a product made by Volpi Meats in St. Louis and as a pizza topping it's nothing short of spectacular. The folks at Volpi roll up sheets of mozzarella with prosciutto, salume, basil, or sun dried tomatoes, so once you lay down a little sauce, all you have to do is cut slices of the rotola and arrange them on top, and there's your cheese and toppings in one step. I added some red onions to the one pictured above, but the rotola alone works just fine.  Actually, just "fine" is an understatement, because what you end up with are pools of melted mozz with a spiral of fried ham embedded in the center of them. Here they are on top of a regular tomato-based pizza sauce (OK, I say "regular" but it's actually completely homemade from Br. Luke's tomatoes and my herbs!) Want to check out Volpi's rotola? Click HERE, and if you get a chance to visit their shop on the Hill in St. Louis, bring a cooler to take home some fresh salsiccia as well. (And no, I don't work for Volpi and they haven't paid me for this post, although I am friends with some of the staff and sometimes they give me free guanciale!) Okay, I know you're dying for the pesto cream sauce recipe, but I can't really give you much here except the base sauce: Béchamel Sauce Any kind of milk will do from skim to half and half, or even (as I used for the party last night) heavy cream. Then I whisked in about a quarter cup (??) of pesto sauce, just the stuff from a jar, and some "pizza sprinkle" herb mix I found in an Italian grocery somewhere. This produced way more sauce than a needed for one pizza, but some lucky guest at the party went home with the rest to make a knockout pasta for her Monday brown bag lunch.
Here are some photos of the other pizzas as well:  Saturday June 22 I was in St. Louis to teach two sessions of beginning baking at the Missouri Botanical Gardens Kemper Center. If you've never taken a class there or visited the home gardens there, it's well worth a road trip. We had two sessions with a dozen bakers in each. Most of the participants had never baked bread before, (although we had one or two ringers!) so it was challenging and exciting for all. I was genuinely pleased to see a great variety of people: adults of all ages, both men and women, and all of them eager to learn.  Many of the students said that the best part of the class was to get individual instruction in kneading, which in my experience is one of the aspects of yeast bread making that people find the most difficult. After the dough was ready for its first proof, we made ice cream muffins while it rose: 1 1/2 cups of melted ice cream PLUS 1 cup of self rising flour EQUALS batter for 6 muffins!  For the shaping methods I demonstrated both the smooth top and the braid-top loaves and they could choose which form they wanted to try. The results coming out of the oven were satisfactory all around, and everyone went home with a fresh, hot loaf of bread and a goodie bag from Hodgson Mill, who also provided all the flour, yeast and vital wheat gluten for the event. The general consensus seemed to be that my next class there should be pizza!  Over this Christmas break from school we made good use of the kitchen in the girls' boarding house and shot 29 one-minute instructional videos for the Home Baking Association. If you don't know anything about this organization, check out their website at www.homebaking.org. The organization is dedicated to advancing home baking by education in the home and the classroom. Their website includes loads of info, instructions, glossaries, recipes, tips and techniques---and pretty soon, my videos as well! We call these short interstitials "Breadhead Minutes" and they are going to be broadcast on PBS, distributed by the HBA to home ec and culinary classrooms nationwide, posted on this website, and eventually have their own YouTube channel. I hope to be creating other video content for this website as well, since the school just gave every teacher an iPad. The Breadhead Minutes are actually only about 49 seconds once you add an intro, an outro and the sponsor roll-in, so theres not a lot of time to show anything in detail. So I'm hoping to make a few longer video segments to help Breadheads learn the basic of mixing and kneading and some of the finer points of shaping.  The videos were shot by Bill Streeter, the same videographer who shot the "How to Be a Breadhead" pledge special (still not released) and I really like working with him. His son Ainsley (in the red shirt)operated the B-roll camera. They're both very laid back and quite patient, even when the "Kinds of Yeast" segment took ELEVEN takes! That was on day one of the shoot and it was brutal---we only got 8 shot out of the 26 minimum we were contracted to do. I was both exhausted and discouraged at the end of the day, believe me.  Day two, however, I had a lot more help, as my student and loyal Stage Rat Brandon came out to lend a hand. His assistance made a huge difference, and the second day we shot 21 segments in about 11 hours. Some of them were shot in a single take, and none of them took more than three tries. I actually had plans for as many as 34, so the HBA would have a lot to choose from for their 26 and I'd have extra content for my website. Nonetheless, I'm happy with the result, and I can't wait to see the finished products. Speaking of which, I should have a sample video posted here early next week. Eventually all these instructional videos will be collected on a single page of the website so Breadheads can work their way through a whole tutorial. Keep checking back here for updates!  I was recently asked to judge a gingerbread house contest at the Reddick Mansion in Ottawa, Illinois. There were fewer entances than last year, but we still saw some genuine creativity. The winner was the ski lodge, but the People's Choice Award went to the church, which had lighted stained glass windows made of melted candy. The large gingerbread playhouse was made by the staff and was shingled with 72 boxes of Triscuits! We judges also had the opportunity to tour the mansion and to learn about its history. It's worth a trip to the mansion just to see the beautiful woodwork, antique furniture and the fireplaces. I've included a photo gallery, with the photos in no particular order. 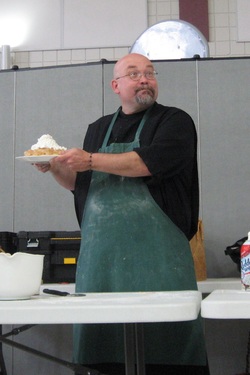 Had a great time at Effingham a couple of weekends ago, doing a demo for the local HCE. We made ice cream muffins, pumpkin scones and nutty whole wheat shortcake with tart apple topping. St. John's Lutheran Church was the venue and the staff there was very hospitable. Best of all, a representative from Hodgson Mills was there and brought gift bags for everyone! She took some pictures, which I have posted here along with some photos from the church. I had meant to get back to the blog a lot sooner after my return from St. Louis, but shortly thereafter I developed some serious adominal pains and spent three days in the hospital. Still no diagnosis, symptoms have subsided considerably but still pesist. They have ruled out appendicitis, colon cancer, gall bladder, kidney stones, ulcers, and pregnancy. Please keep me in your prayers. But enough about that. While I was in St. Louis I was privileged to teach an afternoon class to the advanced pastry students at L'Ecole Culinaire (website here) on Monday. We took a basic roll dough and made slab braids, bambino bread, and rose rolls. The students were enthusiastic and made some lovely breads, although some of them need to work on their rolling pin technique--a perennial struggle! Tuesday night I was in Smithton, Illinois for an herb bread demo sponsored by the Metro East Herb Guild in Belleville. For that presentation I made bacon dill bread, herbal rose rolls, and tomato basil focaccia. I had hoped to give you links to those recipes, but I'm having trouble logging on to Google Docs, so I'll just post them here. Bacon Dill Bread ½ cup warm water (100 to 110 degrees) 2 tsp. brown sugar 2 pkg. active dry yeast 1 c. milk 1 c. cottage cheese 2 Tbs. fresh chopped dill (1 Tbs. dried) 1½ tsp. salt 2/3 cup cooked, crumbled bacon, drained (about 14 to 16 strips) 5 to 6 cups of all-purpose flour Proof yeast with water and sugar in a small bowl. Blend milk and cottage cheese in a blender until smooth and warm mixture to 100 to 110 degrees. Pour milk mixture into a large bowl and add yeast, dill and salt. Stir in 2 cups of flour until thoroughly incorporated. Add bacon and mix thoroughly. Add 3 more cups of flour, one cup at a time, mixing thoroughly each time. Turn dough out onto a lightly floured board and knead for 6 to 8 minutes, adding small amounts of flour as needed to keep dough manageable. At the end of the kneading period, dough should be rather soft rather than stiff, but only slightly sticky. Oil the surface of the dough and place back in the rinsed bowl. Cover with a towel and allow to rise in a warm place free of drafts for 45 to 60 minutes, or until doubled. Punch dough down and knead briefly to work out the larger air bubbles. Dough may be formed into one large or two medium free form loaves and placed on a lightly greased baking sheet, or divided into two and placed in standard loaf pans. (if you make free form loaves, they may not rise as high as in a pan.) Cover and let rise for 20 to 30 minutes or until nearly doubled. Bake in a preheated 350 degree oven for 40 to 50 minutes, until lightly brown and loaf sounds hollow when tapped. Cool on racks. (Don't have a picure of this yet.) Tomato Basil Focaccia Dough 2 cups tomato juice 1 pkg. active dry yeast 2 tsp. salt 1/4 cup chopped sun dried tomatoes 1 cup whole-wheat flour 2 Tbs. olive oil 4 to 4 ½ cups white bread flour 2 Tbs. finely chopped fresh basil OR 1 Tbs. dried whole basil leaves OR 2 tsp. ground dried basil Topping olive oil kosher salt Scald tomato juice in a saucepan over low heat, but do not allow to boil. Add the sun dried tomatoes and cool to lukewarm. Pour into a mixing bowl. Stir in yeast and 1 cup of whole wheat flour and allow to rest for ten minutes. Add olive oil and salt and mix well, about 100 strokes by hand. Add flour, one cup at a time, until you get a soft dough that is rather sticky. Knead on a lightly floured board for about 5 minutes, until the dough is smooth and elastic but still a bit sticky (be careful not to add too much flour in the course of kneading). Give the mixing bowl a quick wash, oil the surface of the dough lightly and place it in the bowl. Let rise, covered with a towel, in a warm place free from drafts, until doubled---about 1 to 1 ½ hours. Punch down, and divide into two portions. Flatten each portion into a round, flat loaf, about ½ inch thick. Place loaves on a baking sheet that has been sprinkled with cornmeal (you may need 2 sheets). Brush on about 1 Tbs. of olive oil on each loaf. Allow to rise, uncovered, for 30 minutes. Dimple dough with your forefinger, each dimple being about ½ inch apart. Brush top with olive oil and sprinkle lightly with kosher salt. Bake at 400 degrees until lightly browned, about 20 minutes. Remove from oven and cool loaves for 10 minutes before serving. 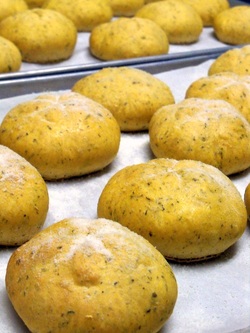 I often make tomato basil kaiser rolls topped with parmesan for sandwiches or to accompany pasta with cream sauces, but you can also bake this bread into a regular loaf pan and use it to make the best grilled cheese sandwich ever! Rose Rolls
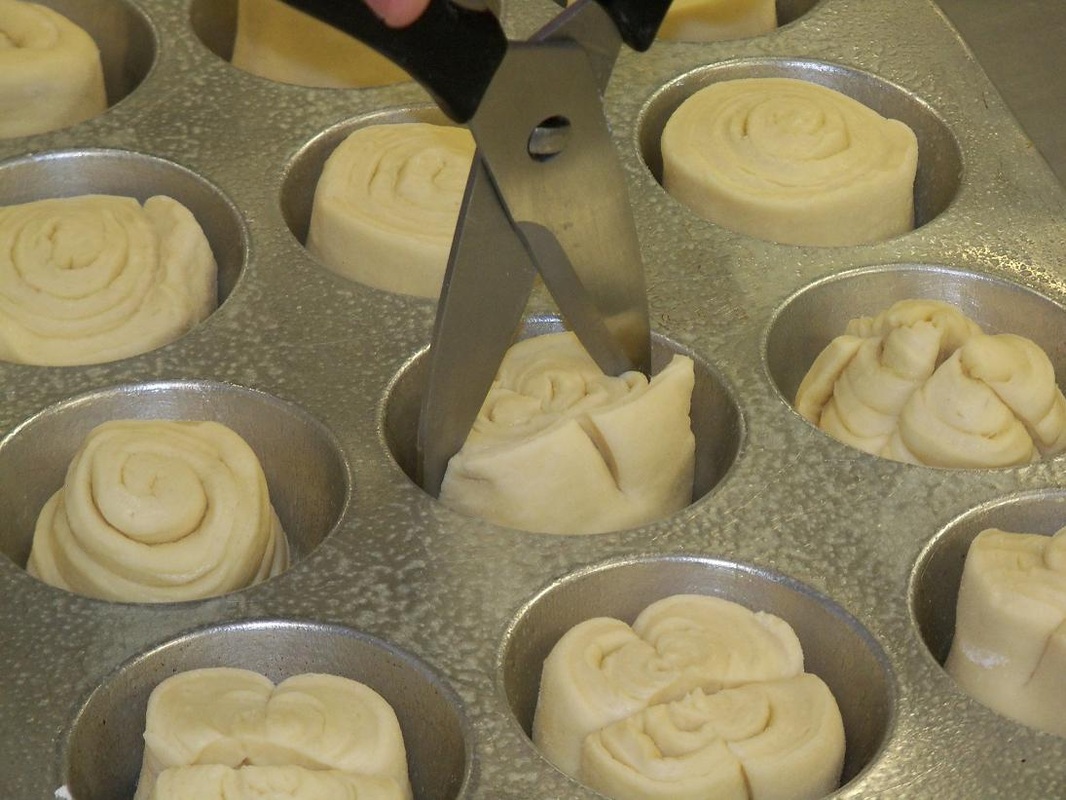
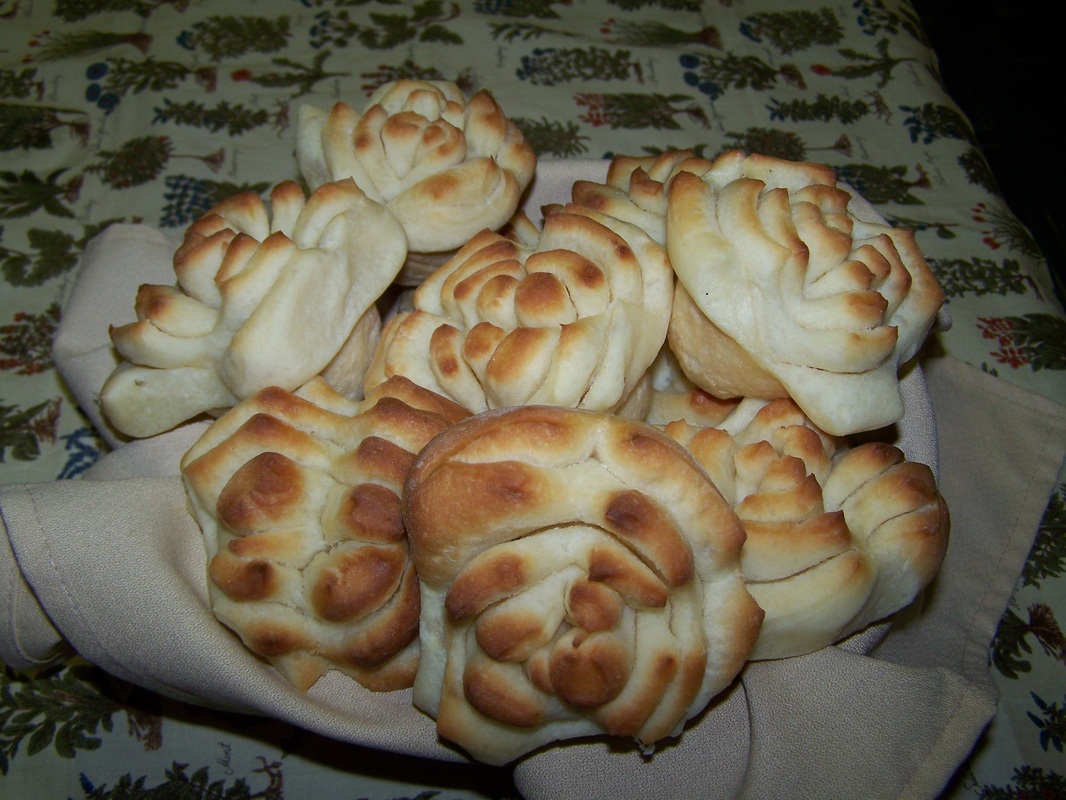
Use any recipe for one dozen dinner rolls, preferably one that uses milk as the liquid. On a lightly floured board, roll dough out into a rectangle 12” high by 15” wide. Brush the dough with the melted butter, leaving 1 inch of the top edge dry. Sprinkle on about 1/2 cup of fresh chopped herbs. Roll the dough up jellyroll style. Lightly brush the top edge with a little water, so it will stick to the roll; pinch to seal. Using a sharp knife cut the roll into 12 even pieces. Cut side down, place them one by one into the cups of a lightly greased muffin tin. Using a pair of scissors cut an “X” in the top of each roll---you should cut about 2/3 of the way through the roll. Cover and let rise in a warm place until doubled, 30 to 45 minutes. Bake in the preheated 375 degree oven for 10 to 12 minutes, or until lightly browned. Remove from pans and place on wire racks to cool slightly. If desired, brush tops of rolls with more melted butter before serving warm.  The Stage Rats came out last night to get ready for today's Illinois Valley Herb Guild plant sale and garden faire. Most of them laid down the tarp on the gym floor and set up tables while freshman Brandon Glynn and I made honey oatmeal bread to sell at the faire. The faire was a success and the Guild sold a good number of plants but we still have some left over, including a flat of basil, if anyone is interested. I like baking for big events, although I can never seem to make enough bread to last for more than an hour or so. The record was the 120 loaves I made for a Medieval Faire some years ago that sold in 45 minutes. Sometimes when I bring loaves to a church bake sale, they never make it to the table because the workers buy them before the doors open! (That says more about the power of homemade bread than about my abilities.) We only baked 26 loaves last night; one went to the monks, one to an auction winner, and one went home with one of the Rats whose mom requested one. The rest sold in about an hour. The auction winner mentioned above is my dentist, who attended our Academy's annual dinner auction this year and successfully bid on "Bread for a Year" (I think the winning bid was $450). Every time I bake for the next year, I'll set aside at least one loaf for his family. His daughter goes to the Academy, so I suspect she'll be the delivery service during the school year. I did this last year, too, and realized at some point that I'd gone a whole year without making caramel pecan cinnamon rolls, so last's year's winner will get an additional treat sometime soon! I'll be sure to post pictures of those, too, which will make you want to learn to bake them yourself, I'm sure. Recipe to be posted with the pictures. Speaking of events, be sure to keep checking the "Upcoming Events" page. I have a lot of appearances to make this summer, many of which will be open to the public. I always post contact information for the group organizing the event. I just posted info about a class I'm teaching at St. Louis Missouri Botanical Gardens July 7th, but the class is already full---all 20 spots were reserved within 24 hours of the first e-mail! But I'm giving a similar program in the Belleville IL area earlier in the week--details coming soon. On Saturday May 5 while the Academy students were getting ready for pro, I was in Saint Louis shooting a new PBS pledge special titled "How to Be a Breadhead"; a beginner's baking book with the same title will be published in August when the program airs. A lovely lady who is a friend of my publisher's wife very graciously let us invade her home for the day---and it did indeed take the whole day, from 7 a.m. until 11 p.m. It took three hours to just to set up the lighting (always harder in a home than in a studio) and as you probably know, rising dough cannot be rushed!  This is me with Bill Streeter, the videographer. It was a pleasure to work with him, since he's laid back but also engaged in the creative process and very collaborative. He'll be editing the video AND designing the book cover--- a true modern Renaissance Man!  Here I'm getting my shiny bald head dusted with powder by Bill's assistant Eric. He did everything from makeup to camera operation to dishes. We were lucky to have him around. Some other pictures from the shoot are below.  This chop block bread was one of the stars of the show, and it's not at all difficult to make once you have the basic techniques of kneading down. You start with a whole batch of wheat or multigrain dough, and after the first rise you knead in a cup of shredded cheddar plus two cups of chopped vegetables (in this case, 1/2 cup minced onion, 1/4 cup chopped carrots, 1/2 cup each of chopped broccoli and celery). This last step is messy by hand, and at first the vegetables come squirting out the sides and make it look like epic failure. But be patient and keep pushing them back in as you knead, and before long you'll have a homogenized dough. Or throw the whole business in the stand mixer with a dough hook and mix it at medium for three or four minutes-same result! Pat the dough into a big oval about 2" thick on a cookie sheet, let rise for 30 to 45 minutes, and then bake at 350 F. for 45 to 55 minutes. The onions and other veggies on the outside get lightly toasted and make this bread smell amazing! |
AuthorFr. Dominic Garramone AKA Categories
All
Archives
June 2024
|




 RSS Feed