The Bread Monk
  • Home
  • My Bread Blog
  • Breadhead Videos
  • Recipes
  • Fr. Dom's Books
  • Events/Programs
  • Shortcut Stollen
  • New Page

Using the good vanilla

8/25/2012

1 Comment

 
Lately many of the recipes I’ve been using call for vanilla extract, most recently the one for caramel corn.  Bonfire season has begun, and that means snacks.  Besides, it’s also football season, and making caramel corn is great way to use up the leftover stadium popcorn from the concession stand.  Usually when I make something that requires vanilla, I use the cheap stuff that comes in a one gallon plastic jug from the food service.  But I have friends who go to Mexico, and often they bring me back the real deal: pure vanilla made by steeping vanilla beans in water and ethyl alcohol.  
            Vanilla beans are expensive (they’re the seed pod to a kind of orchid!) and so I’ve been abstemious about using my cache of Mexican vanilla, until I realized that my frugality had in fact turned into hoarding.   After my friends came back from south of the border this year, bearing two more varieties of vanilla in very cool bottles, I went to place them on my spice shelf only to discover that I still had two and half more bottles left !  What was I saving them for anyway?  An emergency call from Ron Ben-Israel?  Not wanting to be featured on an episode of some new series on TLC about people who can't cook because their kitchen is filled with all the foods they're saving for "a nice dinner", I resolved to use only the good vanilla from now on.     
            Admittedly, the folks at Cook’s Illustrated say that in anything cooked above 300 degrees F., many of the 250 different chemical compounds that give pure vanilla its complex flavor and aroma begin to bake off.   So in a cake (internal temp about 210 degrees F.) real vanilla might make a difference, but not in a cookie, which gets much hotter.  You can really tell the difference in puddings, pastry cream and frosting.  You can see the account of their tests and the results here. 
            Coincidentally, butter, sugar and corn syrup in the appropriate proportions turn into hard caramel at 300 degrees, so you’d think there wouldn’t be much difference between my Mexican vanilla and the cheap stuff when it comes to caramel corn.  But I’ve been told by various Stage Rat taste testers that they can tell if I’m being stingy, and recently a junior high girl had a bite of caramel corn made with real extracto de vainilla and her eyes went wide and she gasped, “Wow!  What did you do different?!”  Then she took a bigger handful.  
            And that’s good enough for me, no matter what Christopher Kimball may say.  So I’ve been using my high quality pure vanilla in everything lately, from caramel corn to pumpkin scones to frosting on cinnamon rolls, and yes, even ordinary chocolate chip cookies.  And even if the difference is negligible in some baked goods, the enjoyment I get from opening the bottle and smelling that sweet, spicy, slightly boozy aroma makes it worthwhile.  As I measure out a generous teaspoon of flavorful extravagance, I feel like a real chef, and for a guy who got his culinary education between his mother’s kitchen, the public library and PBS, that feeling is no small thing.
1 Comment

Apricot Chutney and Pumpkin Scones

8/24/2012

0 Comments

 
There are several "Fall Quick Breads" demos on my schedule, so I've been experimenting with pumpkin scones.  Still haven't got it quite right, so no photo or recipe yet, but it will be coming soon.  In the meantime, here is the recipe for Apricot Chutney that I'm blending with cream cheese to use as a filling for the pumpkin scones. 

Apricot Chutney

1 30-oz can of apricot halves in heavy syrup
2 cups golden raisins
½ cup freshly minced onion
1 or 2 Tbs. Balsamic vinegar
½ tsp. powdered ginger
¼ tsp. crushed red pepper
¼ tsp. ground cumin
pinch of ground cloves

Remove apricot halves from syrup and coarsely chop them.  Place chopped apricots, about half the heavy syrup, and the raisins and onion into a medium size saucepan and bring to a simmer over medium high heat, stirring constantly.  (Discard remaining syrup.) Add remaining ingredients and mix well.  Reduce heat to low and simmer 15 minutes or until thickened, stirring occasionally.

            I should add here that I adapted this recipe somewhat for the current baking sessions.  I have fresh hot red peppers coming in from the garden, so I minced about a half a pepper instead of using the dried stuff.  I also used fresh ginger and subbed a minced garlic clove for the onion, and added a teaspoon of roasted and freshly ground coriander.  Chutneys come in lots of different combinations of spices, so you should do a little research and then experiment.
            By the way, mix some of this spicy-sweet chutney with whipped cream cheese, and you’ve got a delicious spread to put on top of turkey sandwiches or toasted bagels, and it's excellent all by itself on top of Belgian waffles, too.

UPDATE AFTER BREAKFAST SATURDAY MORNING
I served the pumpkin scones with the apricot chutney/cream cheese filling, and they were all eaten.  But after trying one myself I think I have too many things going on at once in this recipe: the spices in the chutney were co-opted by the spices in the scone dough, so nothing was distinct about the filling, plus the scone needed a little more salt.  (This last, entirely accurate observation came from Chef Ron our kitchen manager).  Think I'll try two more versions: one with just the chutney and another with a filling made with creamcheese sweetened with powdered sugar and beaten with an egg, which should yield a custardy, cheesecake-y kind of filling (I hope!).  Plus my friend Yvonne wants a gluten free version.  I love having so many ideas to explore!  Unlike Julie Powell having meltdowns on her way through Mastering the Art of French Cooking, I don't have a soul-destroying government job and a horrible commute, so this seems more like play than work.
0 Comments

Honey Whole Wheat

8/22/2012

0 Comments

 
My friend Moira sent me the following Facebook message: 
        "With cooler temps, I can actually turn the oven on. ready to move beyond
         pizza dough and onto bread (thank you for your inspiration). Have a stone ground
         whole wheat flour and flax meal. oh and some stone ground buckwheat flour.
         recipe(s) you reco?"
             Well, Moria, in fact I do!  Sometime after the airing of our first season of Breaking Bread, a woman named Anna Druelinger sent me several recipes, including one for multigrain bread that she developed back in 1976, and very kindly anticipated that I might make use of it by adding at the bottom of the page: “You have my approval to use these recipes as you desire.”  I have adapted her original version somewhat, and scaled it down to produce two loaves instead of four.
            At Saint Bede Abbey, Fr. Marion of happy memory was one of the biggest fans of multigrain breads, especially toasted for breakfast.  He’d pass up any number of coffeecakes, pastries and doughnuts for the sake of toasted wheat bread with butter and honey.  This bread already has plenty of honey flavor already, so butter alone may be just right.  I specify light honey in the recipe; if you have honey that is dark and more strongly flavored, you may want to reduce the amount to 1/3 cup.  And for you locals, the 2012 St. Bede honey crop is now on sale in the our business office: $5 for a honey angel, $11 for a two pounder.

Anna’s Honey Bread
1½ cups whole wheat flour
¼ cup quick cooking oats
¼ cup rye flour or buckwheat flour
¼ cup wheat germ (but you can sub flaxseed meal if that's what you have, Moira!)
¼ cup wheat bran
2 teaspoons salt
2 packages active dry yeast
2 cups milk
½ cup light honey
¼ cup vegetable oil
1 egg, lightly beaten
3 to 3 ½ cups bread flour

In a large mixing bowl, combine whole wheat flour, oats, rye flour, wheat germ, wheat bran, salt and yeast; mix well.  In a saucepan, heat milk, honey and oil to 130 degrees F.  Stir into dry mixture and beat for 2 minutes, then add egg and beat for 1 minute more.  Let the batter rest for 5 minutes as the various grains absorb moisture.

Add 3 cups of bread flour, one cup at a time, mixing thoroughly after each addition.  Turn dough out onto a lightly floured surface and knead for 3 minutes, adding small amounts of the remaining flour to keep the dough manageable.  Cover the dough with a clean dry dish towel and allow to rest for 5 minutes, again as the flours absorb the moisture.  After the resting period, knead the dough for another 5 to 7 minutes.  The resulting dough should be sticky but not gooey, firm but not stiff.  Lightly oil the surface of the dough and place it in the rinsed mixing bowl.  Cover with a towel and let rise in a warm, draft-free place for 60 to 90 minutes, or until doubled in bulk.

Punch down dough and knead briefly to work out the larger air bubbles.  Divide dough in half and form into loaves.  Place loaves in lightly greased 8 ½ x 4 ½ x 2 ½-inch loaf pans.  Cover with a towel and let rise for 30 to 45 minutes or until nearly doubled in bulk.

Preheat oven to 350 degrees.  Bake 40 to 45 minutes or until loaves are dark brown and sound hollow when tapped.  Remove from pans and let cool on wire racks.

Note: If you don’t have any wheat germ or bran, you can substitute crushed bran cereal.  The oats, rye/buckwheat flour and honey combine to make an unusually sticky dough, so resist the temptation to add more flour than is absolutely necessary to keep the dough from sticking to your hands.  Don’t push downward too hard as you knead and you’ll have an easier time of it.

0 Comments

Dinner roll stamps

8/22/2012

4 Comments

 
Picture
Picture
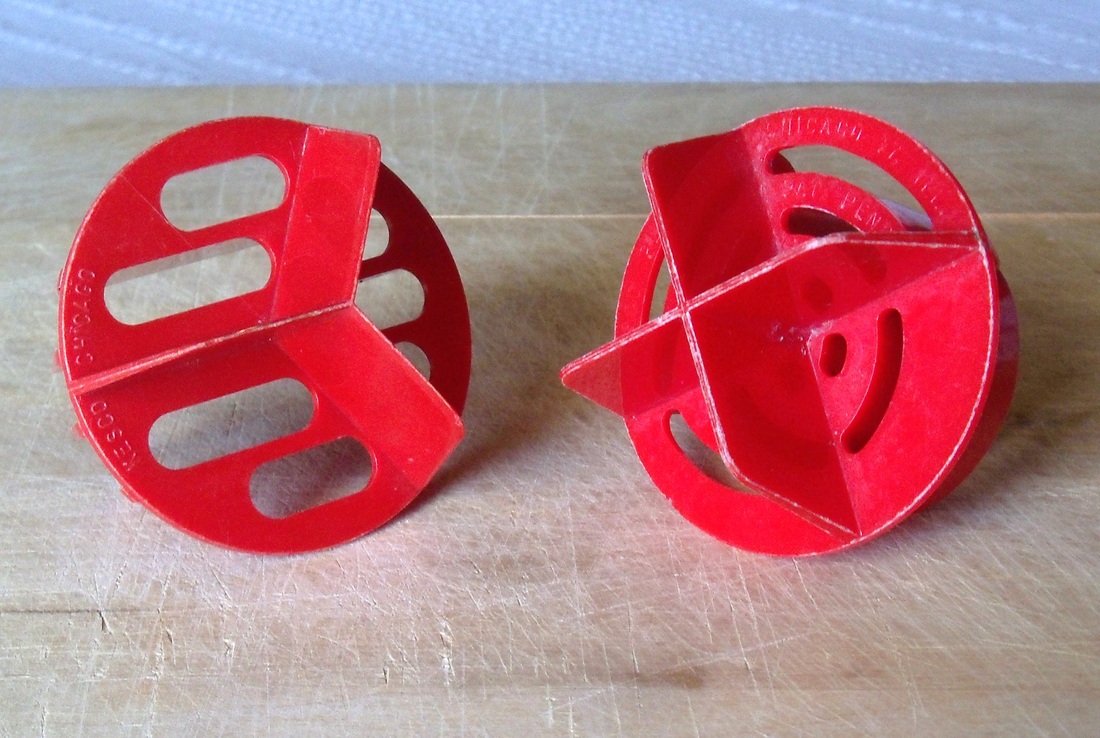
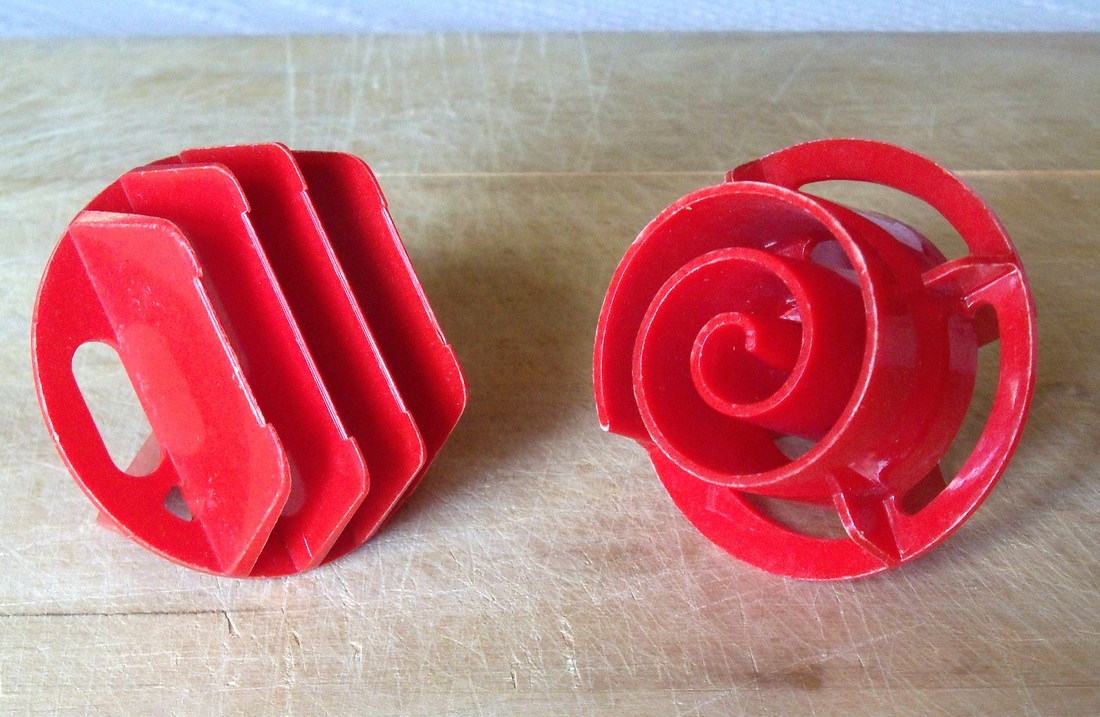
Pictured above are some vintage dinner roll stamps given to me by my mom, who said she found them while searching for a particular cookie cutter (and my mom's cookie cutter collection could be a blog all by by itself!).  She said she never used them much and of course there was no instruction sheet, but didn't that seem like the sort of thing you should blogging about?  So next time I mixed up some dinner roll dough, I tried them out.
Picture
Picture
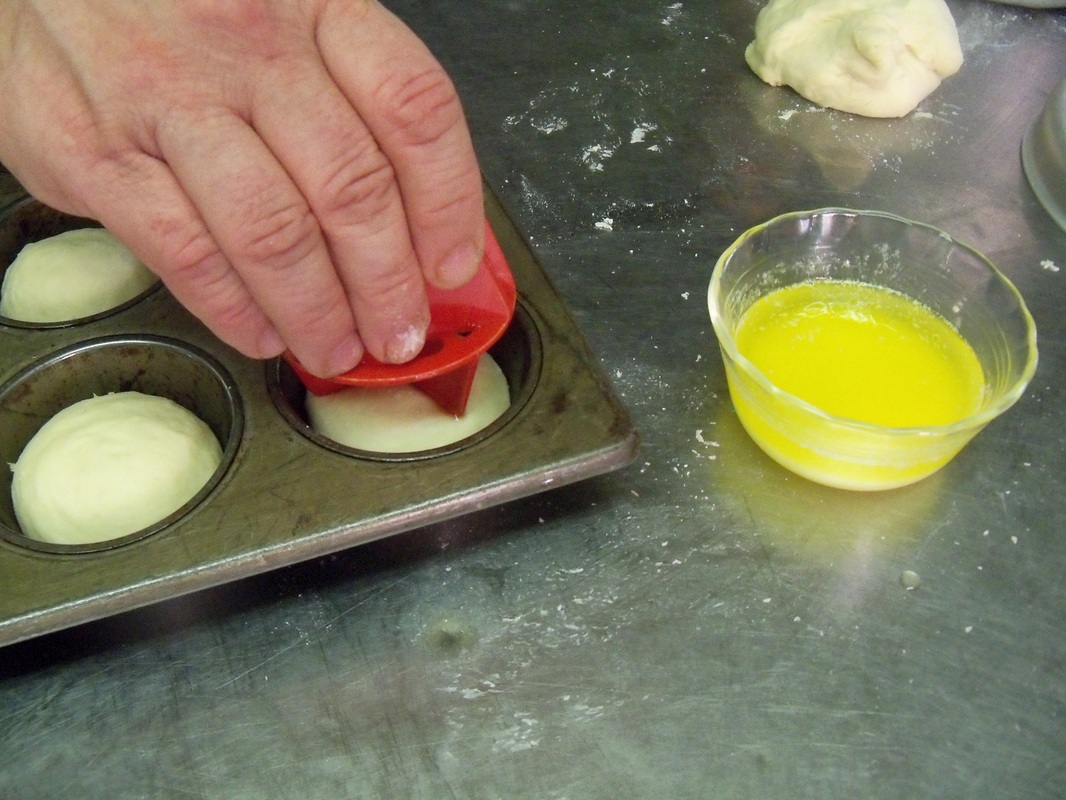
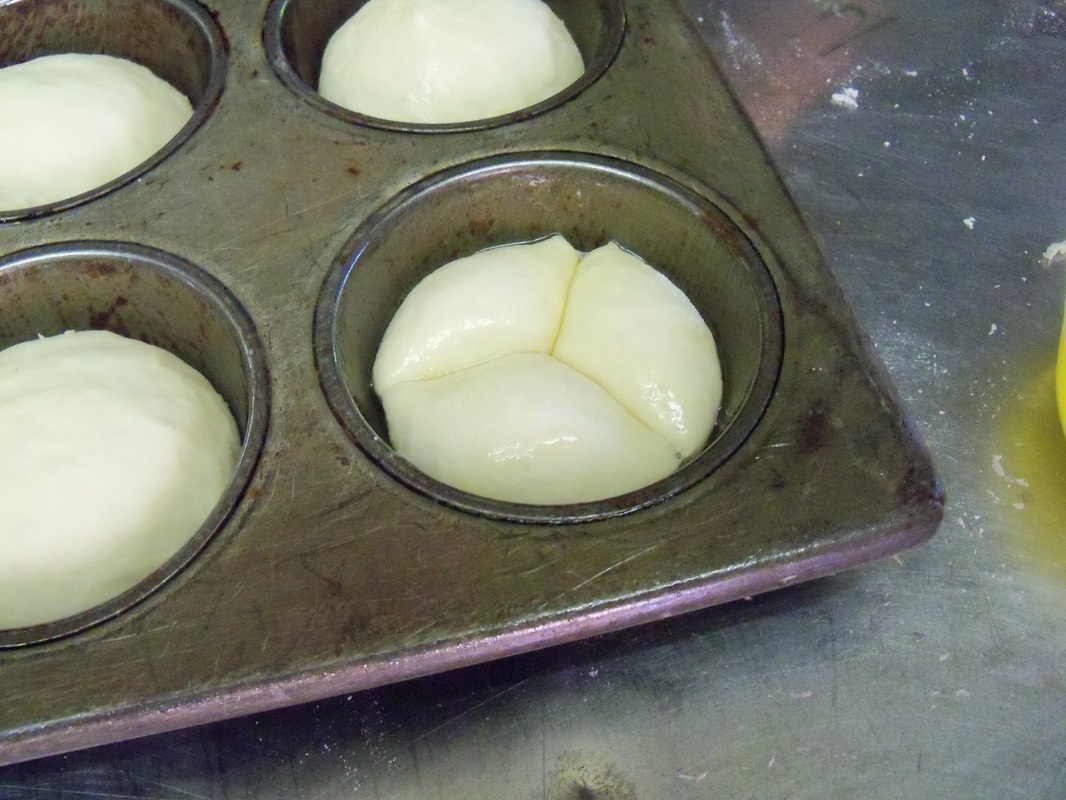
The idea, at least, seems like a good one.  Instead of having to roll out tiny balls of dough for cloverleaf rolls---and good luck making them come out all the same size---you just roll out a dozen balls, pop them into the muffin tins, apply the stamp dipped in melted butter, and voila!  Perfectly shaped cloverleafs, or hot cross buns, or fantans, or (and I'm so skeptical about this last idea I didn't even try it) spiral cinnamon rolls. 
Picture
Picture
Picture
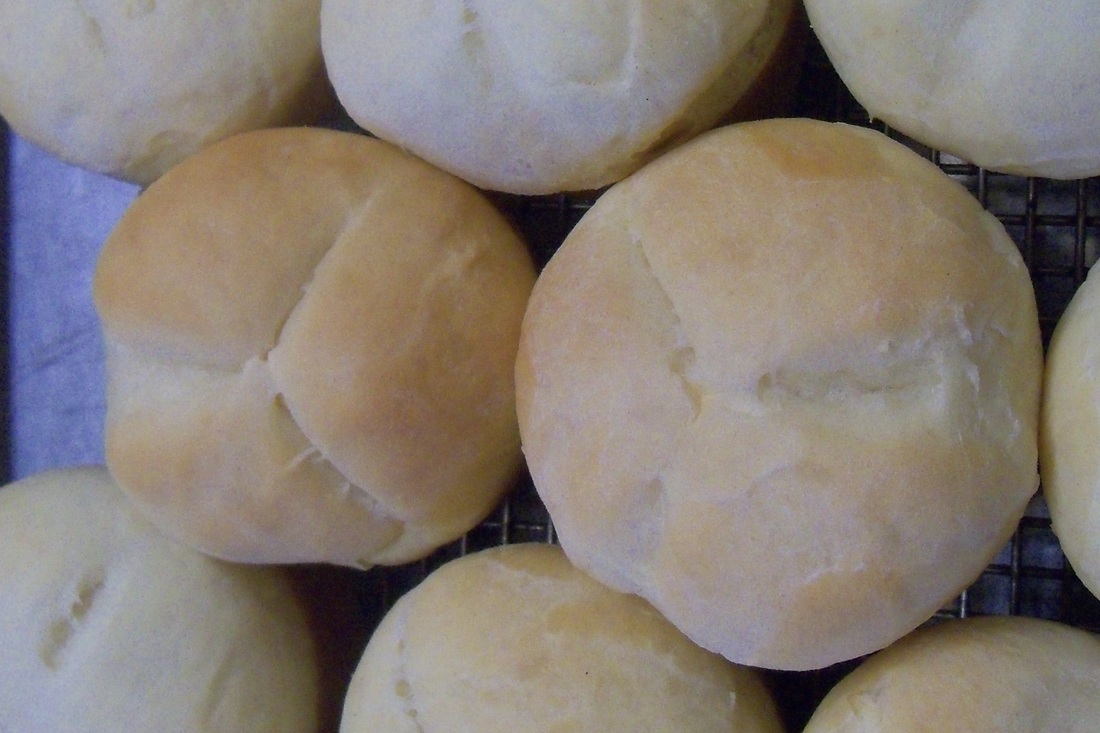
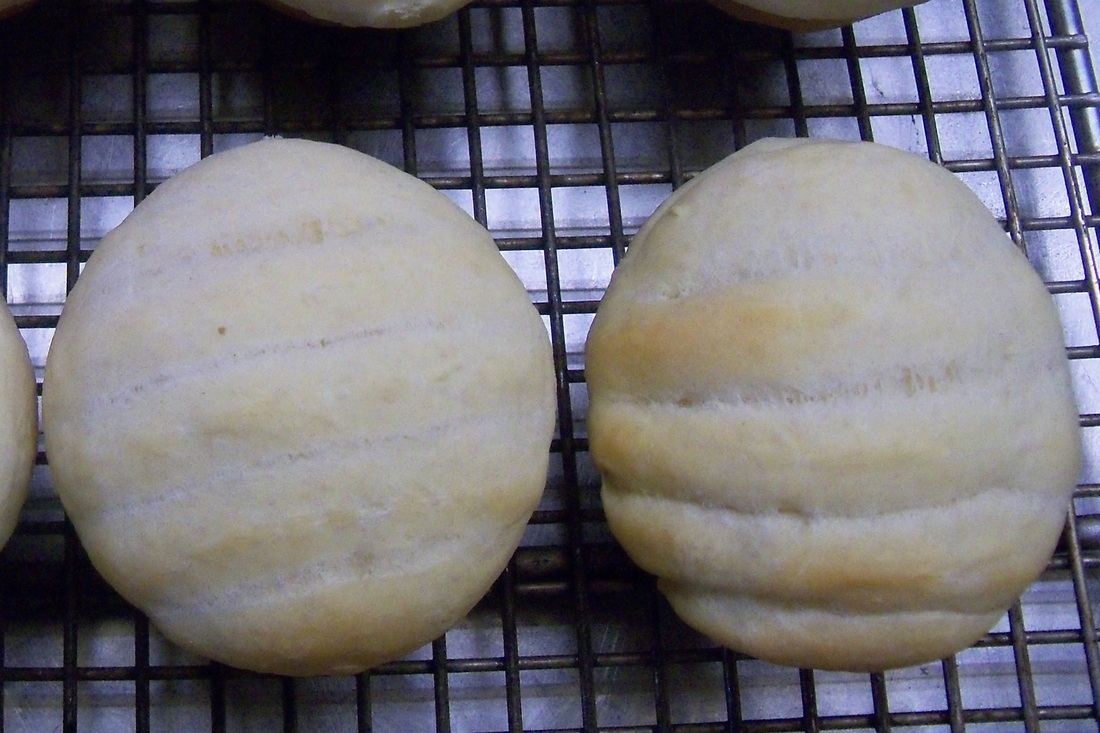
As you can see from the results, my skepticism proved to be well founded.  Even the best of the finished rolls (pictured here) lack the lovely appearance of "made-by-hand-even-though-it's-a-pain-in-the-neck" fantans and the like.   To be fair, I may try again with a dough that is no quite so soft as the potato roll dough I used for these rolls, so they may hold their shape a little better.  Also, it appears you can use more than about 1.75 oz. of dough---even 2 oz. seemed too much for the stamp to handle.
            In spite of the disappointing performance of the stamps, the monks devoured the rolls so enthusiastically that I suspect they didn't examine their appearance too closely!
4 Comments

Finally!

8/21/2012

1 Comment

 
Yesterday my editor and I made the final corrections on the new cookbook--at last!  As my friend Vernon used to say about term papers: "I was so glad to put that baby to bed--it's been crying all month long!"  
            One thing that has consistently amazed me about the editing process: absolutely glaring mistakes you don't catch until the third or fifth or tenth time through the text!  Misplaced captions, dangling participles, missing letters, unclear instructions--we still found all of these kinds of things in the final read-through, even though we also had a professional copy editor go through it as well.  Imagine being a beginner baker and reading that you should "lace the dough onto a baking sheet."        
            My chef friend Ron looked the manuscript over for me as well, and he gave it a good review, noting that every time he had a question about some part of the instructions, I would answer it in the next sentence.  His mother also gave the book a thumbs-up, but she may have been unduly influenced by the monkey bread I sent home with Ron for me!
                
Picture
I took most of the photos for the book, or had my students and friends take pictures while I shaped dough.  My favorite photo is this one taken by another chef buddy, Jim Behrends.  It appears on the back cover of the book.  It goes off to the printer on Wednesday, to VersaPress in Easte Peoria (whom I would recommend to anyone looking to get a book printed).  The book is being printed with an enclosed wire binding so it will lie flat on the counter top while you are working.  Nothing worse than a cookbook that won't stay open while you are trying to read instructions or follow illustrations.  I expect to pick them up from the printer by October 1, perhaps sooner.

1 Comment

Tomato Puree and Homemade Donuts

8/17/2012

1 Comment

 
Br. Luke is bringing in about 20 pounds of tomatoes every day, so it's the time of year I start thinking about storing the harvest from my herb garden, which I generally do by canning them in the form of pizza sauce.  (The only other herbs I store are fennel seed and hot peppers, which I dry and grind up for hot Italian sausage, but that's for another post). 
Picture
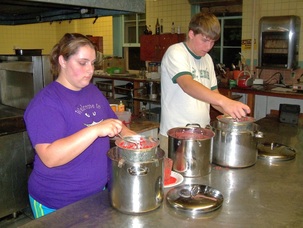
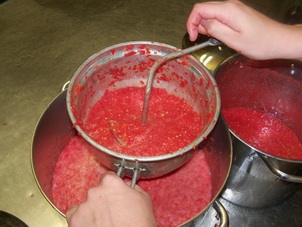
So I took about 50 pounds of tomatoes, washed and cored them, cut them into quarters and ran them through the food processor for a rough chop.  Then, as I often do for larger culinary endeavors, I enlisted the help of my Stage Rats, who ran the tomatoes through a Foley food mill, which yielded a pulpy, fragrant tomato puree.

Picture
        Every kitchen ought to have a food mill, which can rice, grate, mash and puree foods while removing skins, peels and seeds.  Mothers use them to make homemade baby food, canners use them to process fruit for jams and jellies, and they're handy for applesauce and even cracker crumbs.  They can be a bit fussy to clean and a food processor might be more efficient for some jobs, but its ability to screen out skins and seeds makes them a valuable tool.
        Unfortunately, a food mill will set you back anywhere from $35 to $80 when you buy them new, so I recommend you keep an eye out at garage sales, flea markets and the Goodwill store.  I've gotten all of mine (I own four of different sizes) for less than $10 each.  Look for a mill that isn't too rusty or dented.  The center shaft should turn smoothly without being wobbly, and the interior blade should press firmly against the screen.   Get the largest you can find and afford, and pretty soon you'll be making homemade applesauce without having to peel all those apples!
    

Picture
We finished processing the tomato puree about 9 p.m., so after some discussion the Rats and I determined that we ought to make homemade donuts, featuring some real vanilla that one of them brought back from Mexico for me.  Naturally I had an old-fashioned donut batter press (made by the Popeil Bros., the predecessor of Ronco) obtained at a flea market for 75 cents, so we fired up the Fry Daddy and had a grand time.  Notice the modest size of old-fashioned donuts---much more reasonable than the tractor tire-sized treats in many bakeries.  Next experiement: red velvet donuts with cream cheese frosting---I promise I'll share the recipe!
            This afternoon I'll add some wine and garlic to the tomato puree, reduce it to the correct thickiness and add fresh minced basil, oregano and rosemary, salt and pepper.  Then we'll crank up the biggest steam kettle to can about 20 quarts of pizza sauce tonight.  Is my life great or what?

UPDATE AT 10:30 p.m.
            The pizza sauce turned out to  be very flavorful indeed (plenty of herbs, practicially a whole bulb of garlic in 16 quarts) but far sweeter than usual, although I didn't add any sugar.  So I suspect that's due to the type of tomatoes Br. Luke grew this year, which I have found to be deliciously sweet in a salad or on a smoked turkey sandwich, but I'm not sure how it will play out on a pizza.
            Secondly, I tried a recipe off the Internet for red velvet cake donuts, and it did not turn out at all.  I won't reveal what company website I found it on, but let me say that Queen Guenivere should be looking for a new baker.  The cream cheese frosting rocked, so if we can find a red velvet recipe to match, we'll be in business.  I may try baking the donuts instead of frying, since I have the special pans needed for that.  Somewhere . . .

1 Comment

Breadhead Bookself: Cookwise

8/15/2012

0 Comments

 
A quote from Shirley Corriher's Cookwise, my go-to book when I need to know anything about food science:
            Just milled flour, which has a yellowed look like old lace, makes gummy doughs
            and poor-quality bread.  As flour stands exposed to the air, however, oxygen
            combines with the yellow carotenoid pigments and converts them to a colorless
            form, thus naturally bleaching the flour.  Oxygen also reacts with the thiol groups
            in dough . . . and prevents their interfering with elasticity.  Thus oxygen improves
            baking qualities in several ways.   (p. 56)

            She goes on to say that it takes 8 to 12 weeks for the process of oxygenation to have the desired effects.  This revelation explains why the breads I've made in the past from freshly milled wheat flour never seem to rise very well.  So the flour I  milled a few weeks ago is now in Tupperware containers in the pantry, and every day or so I give them a shake to exposed more of the flour to oxygen.  We'll see how well things go in October when it's supposed to be ready to use!
            A little more about Cookwise (William Morrow, 1997).  This fascinating book, subtitled “The Hows & Whys of Successful Cooking”, also has a very clear section on how gluten is formed in kneading and explains the matter with charts and illustrations in great detail.  But bread is just the beginning.  You’ll also find out why cakes fail, how to make fluffy scrambled eggs, what makes smooth gravy possible, and what brining does for a roast chicken.  A James Beard Cookbook Award Winner that is every bit as entertaining as a novel. 
0 Comments

Camo Cake and Deer Poop

8/14/2012

0 Comments

 
Picture
My nephew Jordan got married this weekend in Bluffton IN (south of Fort Wayne), and as they say in the wedding planning biz, their "colors" were "denim" and "mossy oak camo".  I know that sounds terribly redneck, but I must say that the bride really rocked the dress.  In addition to the camo cake, they also served a chocolate cake with a creamy peanut butter frosting that was outstanding.  The bride's grandfather had the ceremony, so I was the wedding photographer for the reception, which actually was a lot of fun.

Picture
My sister Eileen performed her mother of the groom duties admirably, which she described (cheerfully and without rancor or irony) as "wear beige and shut up."  She also assisted with the reception by making some camo candies to accompany the cake.  Both the bride and groom work in a pretzel factory, so Eileen topped some pretzel rods with camo-colored almond bark/chocolate.  It was quite an impessive display overall, and my photos don't really do it justice.

Picture
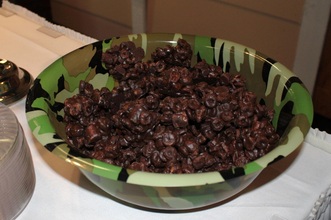
My contribution to the reception was a big bowl of deer poop (I suspect that is a sentence unique in the history of blogging about weddings).  It's a favorite snack of the Stage Rats and our summer theatre program, and it's easy to make.  The recipe follows.

Deer Poop 
2 Pkg. (24 oz.) Wilton's Dark Cocoa Candy Melts 
1/4 cup peanut butter
4 cups Cheerios (Dulce de Leche or Honey Nut)
1-1/2 cups of honey roasted peanuts
1-1/2 cups mini-marshmallows

In a large sauce pan, melt candy melts and peanut butter over low heat, stirring constantly until smooth.  Remove from heat.  Using a wide rubber spatula, gently fold in Cheerios and peanuts until well coated.  Allow mixture to cool slightly (5 to 10 minutes) before folding in marshmallows (they should remain whole rather than melting) until everything is evenly coated in chocolate.  Drop by tablespoons onto parchment or wax paper.  Allow to harden for two hours before storing in an airtight container.

0 Comments

Post Title.

8/9/2012

0 Comments

 
In my last post I wrote about bread knives, recommending a blade with a wavy edge instead of a serrated one with points.  However, in addtion to bread knives there is something called a sandwich knife that also has a wavy edge to the blade.  The blade is usually wider than most knives, so you can use it to spread condiments on a sandwich and then cut it neatly in half with the same knives---obviously they were developed in the food service industry for sandwich shops and delis. 
          The only problem with these knives is that the blade is often only 6" long---not very useful for slicing larger loaves.  But you can also find them as long as 8" or 9" on some restaurant supply websites, and they are usually piced under $30, sometimes half that.  I must add the disclaimer that I haven't used any of these knives, so I can't vouch for their quality.  But if you have the chance to visit a restaurant supply store (as a opposed to a high-end gourmet cooking boutique) you may find a knife worthy of your loaves.  So the hunt for your perfect bread knife continues!
0 Comments

Sweet Potato Bread

8/8/2012

0 Comments

 
We had mashed sweet potatoes for supper tonight, and although I don't much care for them, the leftovers can be used to make a delicious quick bread, which is what I did after night prayer.  You can also use self-rising flour, but omit the salt and baking powder as they are included in the flour mix.
Southern Sweet Potato Bread
1½ cups all-purpose flour
1 cup sugar
1 tsp. pumpkin pie spice
1¼ tsp. salt
2 ¼ tsp. baking powder
2 eggs
½ cup vegetable oil
1/3 cup sour cream
1 tsp. vanilla extract
1 cup mashed cooked sweet potato
1 cup chopped pecans

Sift flour, sugar, spice, and salt into a medium size mixing bowl.  In another bowl, beat eggs, then add oil, sour cream, vanilla and sweet potato and beat well.  Pour liquid mixture onto dry ingredients and stir until just blended—do not overmix.  Fold in nuts.  Pour batter into a well-greased loaf pan (9 x 5 x 3) and bake in a preheated 350 degree oven for 60 or until top is golden brown and a cake tester inserted into the center of the loaf comes out clean.  Cool on racks for at least an hour before slicing; best if sliced the next day.
0 Comments
<<Previous
Forward>>

    Author

    Fr. Dominic Garramone AKA 
    the Bread Monk

    Categories

    All
    Breadhead Bookshelf
    Breakfast Breads
    Buns Rolls And Biscuits
    Craftsy
    Donuts
    Equipment
    Ethnic Breads
    Events
    Gluten Free
    Herbal Breads
    Holidays
    Lake Thunderbird
    Memories Of Mama
    Multigrain Breads
    Pastries
    Pizza
    Places To Visit
    Quick Breads
    Reflections While The Bread Is Rising
    Savory Breads
    Sourdough
    Spirituality
    Stuff Besides Bread
    Sweet Breads
    The Classics
    Tools Of The Trade

    RSS Feed

    Archives

    June 2024
    December 2023
    September 2022
    April 2022
    March 2022
    February 2022
    January 2022
    October 2021
    May 2021
    April 2021
    March 2021
    February 2021
    August 2020
    July 2020
    May 2020
    February 2020
    October 2019
    June 2019
    September 2018
    July 2018
    May 2018
    April 2018
    March 2018
    February 2018
    January 2018
    December 2017
    November 2017
    August 2017
    July 2017
    June 2017
    May 2017
    April 2017
    March 2017
    February 2017
    January 2017
    December 2016
    November 2016
    October 2016
    September 2016
    August 2016
    June 2016
    May 2016
    April 2016
    February 2016
    December 2015
    November 2015
    October 2015
    September 2015
    August 2015
    July 2015
    June 2015
    May 2015
    April 2015
    March 2015
    December 2014
    November 2014
    October 2014
    September 2014
    August 2014
    July 2014
    June 2014
    May 2014
    April 2014
    March 2014
    February 2014
    January 2014
    December 2013
    November 2013
    October 2013
    September 2013
    August 2013
    July 2013
    June 2013
    May 2013
    April 2013
    February 2013
    January 2013
    December 2012
    November 2012
    October 2012
    September 2012
    August 2012
    July 2012
    June 2012
    May 2012
    April 2012
    March 2012
    February 2012
    January 2012
    December 2011
    November 2011
    October 2011
    September 2011

Web Hosting by FatCow